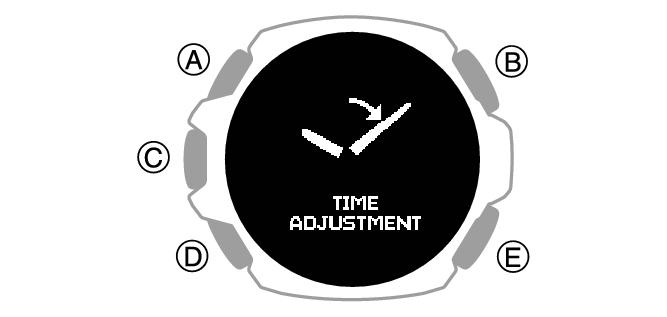
Time Adjustment
Your watch can connect to a phone or receive GPS signals to adjust its date and time settings.
Important!
Switch to Airplane Mode and use watch operations for time adjustment whenever you are inside an aircraft or any other area where phone use or GPS signal reception is prohibited or restricted.
Automatically Connecting with a Phone to Sync the Current Watch’s Time Setting
Auto Time Adjustment
Your watch can connect with your phone to adjust the watch’s time setting.
If you leave your watch with the current time screen displayed, it will perform the adjustment operation automatically as you go about your daily life, without any operation required by you.

Important!
The watch may not be able to perform auto time correction under the conditions described below.
While the watch is too far away from its paired phone
While communication is not possible due to radio interference, etc.
While the phone is updating its system
While the CASIO WATCHES phone app is not running on the phone
Note
If there is a World Time City specified with the CASIO WATCHES phone app, its time will also be corrected automatically.
Auto time correction is performed at the times described below.
After your phone’s time zone or summer time setting is changed
After 24 hours or more have passed since the last time adjustment using Bluetooth connection
After 24 hours or more have passed since the last home city change or time adjustment using watch operation
The watch remains connected with your phone even after time adjustment is complete.
If time adjustment fails for some reason, [FAILED] will appear.
Watch operation can be performed even while it is connected with your phone.
Connection with your phone is not possible while the watch’s Airplane Mode is enabled. To connect with your phone, disable the Airplane Mode.
Manually Connecting with a Phone to Sync the Watch’s Time Setting
You can use the procedure below to connect manually with a phone that is already paired with the watch.
-
Display the current time screen.
-
Hold down (A) for at least two seconds.
-
Use (A) and (D) to select [TIME ADJUSTMENT].
-
Press (C).
-
Use (A) and (D) to move the pointer to [BLUETOOTH].
-
Press (C).
-
Press any button and return to step 5 of this procedure.
-
Press (E) twice to complete the setting operation.
This enters the Control Mode.
This starts Bluetooth connection.
The acquired information appears on the watch display when time acquisition is successful.
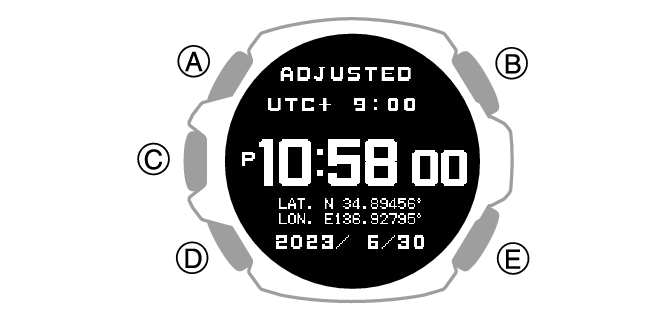
[FAILED] appears if acquisition fails.
Adjusting the Watch’s Current Time Setting Using GPS
The watch’s time and day settings can be configured in accordance with your current time zone by receiving a GPS signal.
Appropriate Signal Reception Location
GPS signal reception is possible outdoors where the sky is visible and not blocked by buildings, trees, or other objects.

Note
In areas where reception is poor, keep the watch LCD pointed upwards and do not move the watch.
When the watch receives GPS signals, avoid covering its LCD with the sleeve of your clothing.
GPS signal reception is not possible in the areas described below.
Where the sky is not visible
Indoors (Reception may be possible near a window.)
Near wireless communication equipment or other devices that generate magnetism.
You may experience GPS signal reception problems in the areas described below.
Where the view of the sky above is narrow
Near trees or buildings
Near a train station, airport, or other congested areas
Adjusting Time Settings by Performing a Manual GPS Signal Receive Operation
You can use a button operation to acquire GPS location information and adjust your time zone, time, and day settings in accordance with your current location.
Note
GPS signal reception requires large amounts of power. Perform it only when necessary.
-
Move to a location appropriate for signal reception and point the LCD of the watch straight up at the sky.
-
Display the current time screen.
-
Hold down (A) for at least two seconds.
-
Use (A) and (D) to select [TIME ADJUSTMENT].
-
Press (C).
-
Use (A) and (D) to move the pointer to [GPS].
-
Press (C).
-
Press any button and return to step 6 of this procedure.
-
Press (E) twice to complete the setting operation.
This enters the Control Mode.
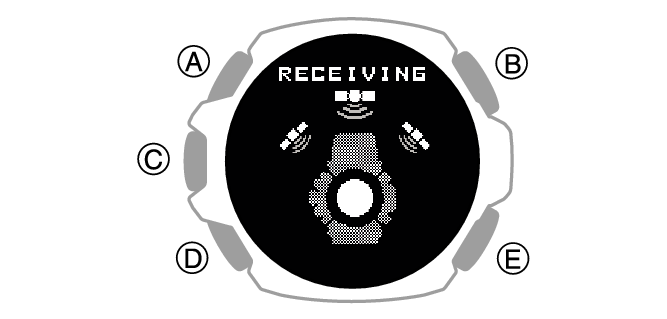
This starts location information acquisition.
The acquired information will appear on the watch display when location acquisition is successful.
[FAILED] will appear on the display if location information acquisition fails for some reason.
Note
Reception takes anywhere from about 30 seconds to about two minutes.
The receive operation can take as long as 15 minutes when leap second information is included.
You may experience location information acquisition problems in the vicinity of a city borderline.
The watch’s time and day is not be indicated correctly if the time zone setting is not right for your location. If this happens, move to a location near the center of the city you want to set as your Home City and acquire location information again.
Leap Second Reception
GPS signal reception each year on June 1 or later and on December 1 or later also receives leap second information.
Note
It can take as long as 15 minutes to complete the leap second information receive operation.
The leap second information receive operation is repeated until information receipt is complete.
Once the leap second information receive operation is complete, the watch will not make any attempt to receive it again until the following June 1 or December 1.
When connecting with a phone to adjust the watch date and time settings, leap seconds will also be received along with the time information. If this happens, leap seconds may not be received when receiving a GPS signal.
The first GPS signal receive operation after the watch’s current time and/or date setting has been changed manually will include receipt of leap second information.
Signal Reception Precautions
When the watch is unable to adjust its time in accordance with a GPS signal for some reason, average timekeeping accuracy is within ±15 seconds per month.
Note that an internal decoding process the watch performs after it receives a GPS signal may cause the time setting to be slightly off (by less than one second).
GPS signal reception is not possible under the conditions described below.
While ![]() or lower is displayed for the battery level
or lower is displayed for the battery level
While the watch is connected with a phone and data communication is in progress
While the watch’s Airplane Mode is enabled
While sleep measurement is in progress
If the receive operation is successful, the time and day settings will be adjusted automatically in accordance with the Home City (time zone) and summer time settings. Summer time will not be applied correctly in the cases described below.
When the summer time start date and time, end date and time, or other rules are changed by authorities
When location information is received, but it is not location information for your actual location (For example, when you are near a borderline of a city and the acquired location information is for a neighboring city, etc.)
Using GPS Outside Your Country
Some countries or geographic areas put legal restrictions on the use of GPS, on the collection and logging of location information, etc. Your watch has built-in GPS functionality, so before embarking on international travel to a country or area outside of the country where you purchased your watch, you should check with the embassy of the countries you plan to visit, your travel agency, or some other reliable source of information to find out if there are any prohibitions or restrictions on bringing in devices with GPS functionality, or on the logging of location information, etc.
Using Watch Operations to Adjust the Time Setting
When your watch cannot communicate with your phone or receive GPS signals for some reason, you can adjust date and time settings on the watch manually.
Setting a Home City
Use the procedure in this section to select a city to use as your Home City.
-
Display the current time screen.
-
Hold down (A) for at least two seconds.
-
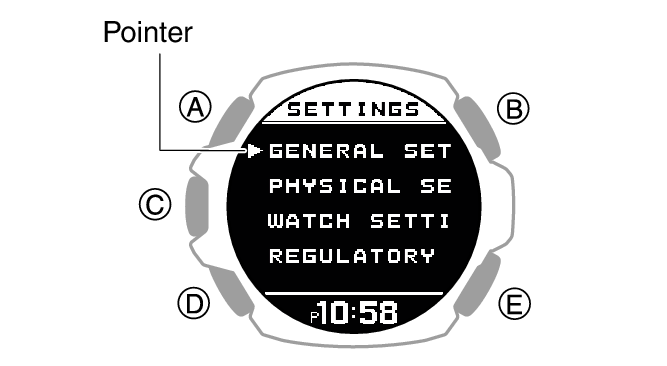
Use (A) and (D) to select [SETTING].
-
Press (C).
-
Use (A) and (D) to move the pointer to [WATCH SETTINGS].
-
Press (C).
-
Use (A) and (D) to move the pointer to [HOME TIME].
-
Press (C).
-
Use (A) and (D) to move the pointer to [HOME TIME CITY].
-
Press (C).
-
Use (A) and (D) to move the pointer to the city you want to use as your Home City.
-
Press (C) to complete the setting operation.
-
Hold down (E) for at least one second to return to the current time screen.
This enters the Control Mode.

This displays the setting menu screen.
After the setting operation is complete, a check mark appears for a few seconds, and then the home time setting screen re-appears.
Configuring the Summer Time Setting
If you are in an area that observes summer time, you can also enable or disable summer time.
Note
The initial factory default summer time setting for all cities is [AUTO]. In many cases, [AUTO] lets you use the watch without switching manually between summer time and standard time.
In the cases described below, receiving location information by GPS will cause [AUTO] to be automatically selected for the summer time setting.
When the time zone of the current receive operation is different from the watch’s time zone setting prior to the receive operation.
When the time zone is unchanged, but the acquired location information is for a geographic area with different summer time rules (start date, end date)
-
Display the current time screen.
-
Hold down (A) for at least two seconds.
-
Use (A) and (D) to select [SETTING].
-
Press (C).
-
Use (A) and (D) to move the pointer to [WATCH SETTINGS].
-
Press (C).
-
Use (A) and (D) to move the pointer to [HOME TIME].
-
Press (C).
-
Use (A) and (D) to move the pointer to [DST].
-
Press (C).
-
Use (A) and (D) to select a summer time setting.
-
Press (C) to complete the setting operation.
-
Hold down (E) for at least one second to return to the current time screen.
This enters the Control Mode.
This displays the setting menu screen.
|
[AUTO] |
Auto switching between standard time and summer time |
|
[OFF] |
Always standard time |
|
[ON] |
Always summer time |
After the setting operation is complete, a check mark appears for a few seconds, and then the home time setting screen re-appears.
To adjust the date manually
-
Display the current time screen.
-
Hold down (A) for at least two seconds.
-
Use (A) and (D) to select [SETTING].
-
Press (C).
-
Use (A) and (D) to move the pointer to [WATCH SETTINGS].
-
Press (C).
-
Use (A) and (D) to move the pointer to [DATE & TIME].
-
Press (C).
-
Use (A) and (D) to move the pointer to [DATE SETTING].
-
Press (C).
-
Use (A) and (D) to change the year setting.
-
Press (C).
-
Use (A) and (D) to change the month setting.
-
Press (C).
-
Use (A) and (D) to change the day setting.
-
Press (C) to complete the setting operation.
-
Hold down (E) for at least one second to return to the current time screen.
This enters the Control Mode.
This displays the setting menu screen.
This causes a cursor to appear under the year setting.
This moves the cursor to the month setting.
This moves the cursor to the day setting.
After the setting operation is complete, a check mark appears for a few seconds, and then the current time setting screen re-appears.
Note
Pressing (E) during the above procedure will go back one screen.
To correct the time manually
-
Display the current time screen.
-
Hold down (A) for at least two seconds.
-
Use (A) and (D) to select [SETTING].
-
Press (C).
-
Use (A) and (D) to move the pointer to [WATCH SETTINGS].
-
Press (C).
-
Use (A) and (D) to move the pointer to [DATE & TIME].
-
Press (C).
-
Use (A) and (D) to move the pointer to [TIME SETTING].
-
Press (C).
-
Use (A) and (D) to change the current time hour setting.
-
Press (C).
-
Use (A) and (D) to change the current time minute setting.
-
Press (C) to complete the setting operation.
-
Hold down (E) for at least one second to return to the current time screen.
This enters the Control Mode.
This displays the setting menu screen.
This causes a cursor to appear under the hour setting.
This moves the cursor to the minute setting.
After the setting operation is complete, a check mark appears for a few seconds, and then the current time setting screen re-appears.
Switching between 12-hour and 24-hour Timekeeping
You can specify either 12-hour format or 24-hour format for the time display.
-
Display the current time screen.
-
Hold down (A) for at least two seconds.
-
Use (A) and (D) to select [SETTING].
-
Press (C).
-
Use (A) and (D) to move the pointer to [WATCH SETTINGS].
-
Press (C).
-
Use (A) and (D) to move the pointer to [DATE & TIME].
-
Press (C).
-
Use (A) and (D) to move the pointer to [TIME FORMAT].
-
Press (C).
-
Use (A) and (D) to select [12H] (12-hour timekeeping) or [24H] (24-hour timekeeping).
-
Press (C) to complete the setting operation.
-
Hold down (E) for at least one second to return to the current time screen.
This enters the Control Mode.
This displays the setting menu screen.
After the setting operation is complete, a check mark appears for a few seconds, and then the current time setting screen re-appears.
While 12-hour timekeeping is selected, [P] will be displayed for p.m. times.