Preparation Before Playing
Getting the power supply ready (AC adaptor or batteries)
This Digital Keyboard can be powered by an AC adaptor or batteries. For stable performance, we recommend using an AC adaptor.
Using the AC adaptor
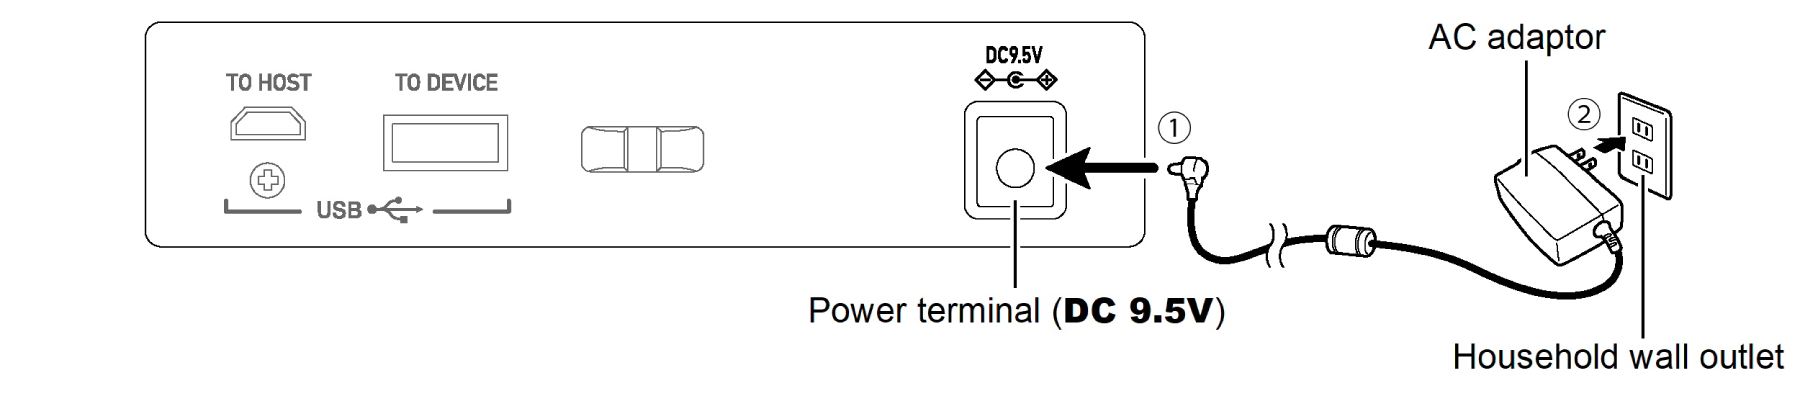
Use the AC adaptor (JEITA standard, with unified polarity plug) supplied with the Digital Keyboard. Use of other AC adaptors may cause smoke or a malfunction.
AC adaptor model: AD-E95100LE/LG/LJ/LU/LW (JEITA standard plug)
Connect the AC adaptor following the numbers 1 to 2 in the figure below in order.
Using batteries
Rechargeable batteries
When using rechargeable batteries, note the following:
-
Use AA eneloop rechargeable batteries manufactured by the Panasonic Group. Do not use any other kind of rechargeable batteries.
-
Be sure to use a dedicated charger to charge rechargeable batteries.
-
Rechargeable batteries cannot be recharged while they are inside the product that they are powering.
-
Leaving depleted rechargeable batteries in the Digital Keyboard may cause them to deteriorate. When the low battery indication appears, remove the batteries immediately.
-
When using rechargeable batteries and a dedicated charger, read the instruction manuals and notes that come with each product, and adhere to the conditions of use.
Inserting the batteries
-
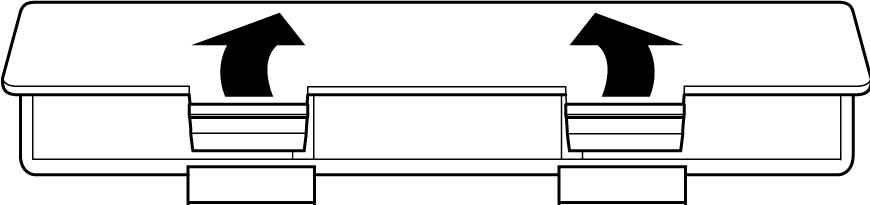
Open the battery case lid on the back of the Digital Keyboard.
-
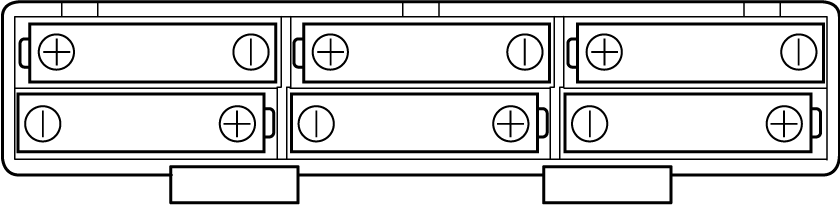
Place six commercially available AA batteries in the battery case.
-
Insert the batteries in the correct +/– orientation.
-
-
Insert the hooks into the holes in the battery case and close the lid.

-
Refer to “Setting the Battery Type” to set the battery type.
Low battery indication
When the Digital Keyboard is used only with batteries without an AC adaptor connected, the LEDs on the PLAY PART BALANCE buttons blink if the batteries are running low.
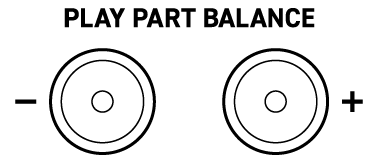
If the LEDs blink, replace the batteries with new ones. If you are using rechargeable batteries, recharge them before reinserting them into the Digital Keyboard. The LEDs show the status of the batteries, as shown in the table below.
|
LED display |
Battery status |
|
Lights up |
There is enough battery power remaining. |
|
Blinks slowly |
The batteries are running low. Battery replacement is recommended. |
|
Blinks |
It is time to replace the batteries. Replace the batteries immediately, or remove the depleted batteries and then connect the AC adaptor. |
-
The LEDs that light up and blink are the LEDs on one or both of the – and + buttons, depending on the setting. For details, see “Adjusting the Volume Balance Between the Song and Keyboard Performance”.
Setting up the music stand (accessory)
Insert the music stand into the holes on the back of the Digital Keyboard.

Plugging in the Wireless MIDI & audio adaptor (accessory)
Insert the Wireless MIDI & audio adaptor into the USB Type A port on the back of the Digital Keyboard, in the direction shown in the figure below.
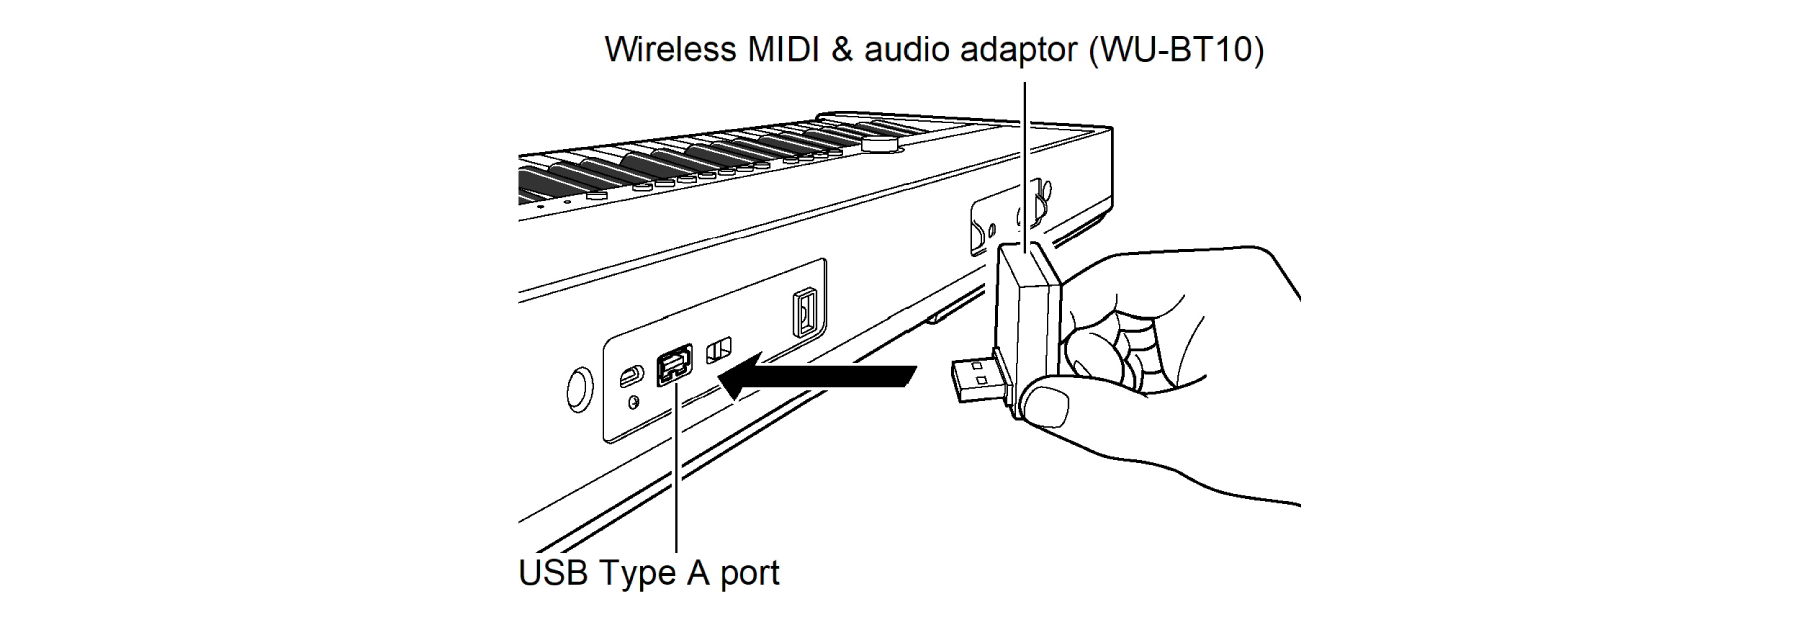
Connecting to Bluetooth audio-enabled devices
By making a Bluetooth audio connection between this Digital Keyboard and a smart device, you can play back sound from your smart device through this Digital Keyboard.
For details, see “Connecting via Bluetooth Audio”.
Connecting to Bluetooth Low Energy MIDI-enabled devices
When you connect the Digital Keyboard to your smart device via Bluetooth Low Energy MIDI, you can use a dedicated app to perform various operations.
-
This is not guaranteed to work when using apps other than CASIO’s dedicated app.
For more information, see “Making a Bluetooth Low Energy MIDI Connection”.
Using the Dedicated Feel Sync app
Connect your smart device to the Digital Keyboard and use CASIO’s dedicated Feel Sync app.
For details, see “Using the Feel Sync Function While Playing a Song on the Dedicated App”.
Using the dedicated CASIO MUSIC SPACE app
Connect your smart device to the Digital Keyboard and use CASIO’s dedicated CASIO MUSIC SPACE app.
For details, refer to “Using the Dedicated CASIO MUSIC SPACE App”.
Turning the power on or off
-
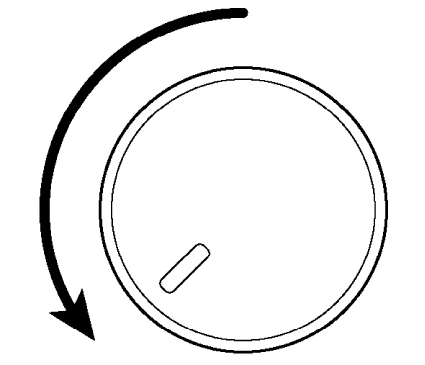
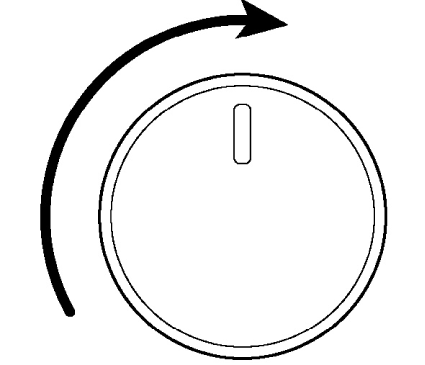
Before turning on the power, turn the VOLUME knob to the position shown below.
-
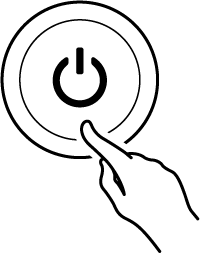
Press the P(Power) button.
-
Within a matter of seconds, several LEDs will light up and the Digital Keyboard will be ready to play.
-
-
Once the power is turned on, use the VOLUME knob to adjust the volume.
-
To turn off the power, press and hold the P(Power) button until all LEDs turn off.
Auto Power Off function
By default, the Digital Keyboard automatically turns off the power after about 20 minutes of inactivity, to prevent unnecessary power consumption. This is called the Auto Power Off function. If necessary, this function can be disabled so that the power does not automatically turn off. For details, refer to “Turning the Auto Power Off function on/off”.
Adjusting the volume level
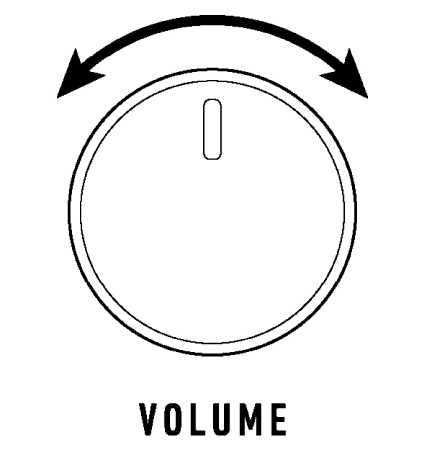
The volume of the entire Digital Keyboard is controlled by the VOLUME knob.
-
For the main part and the layered part, see “Layering Two Tones”.
Connecting headphones (sold separately)
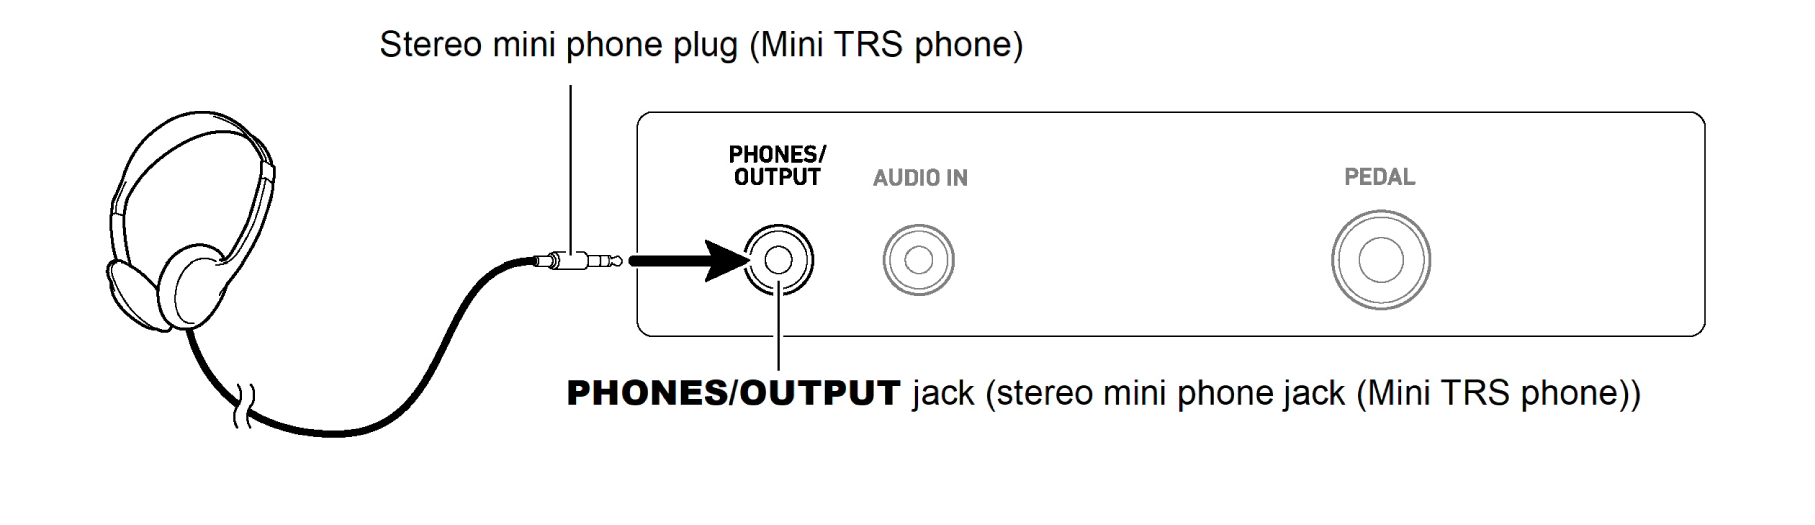
When headphones are used, no sound is emitted from the built-in speakers, so you can enjoy playing at night without worrying about your surroundings.
-
Turn down the volume on the Digital Keyboard before connecting headphones.
Connecting a pedal (sold separately)
When using a pedal, connect it to the PEDAL jack on the rear panel.
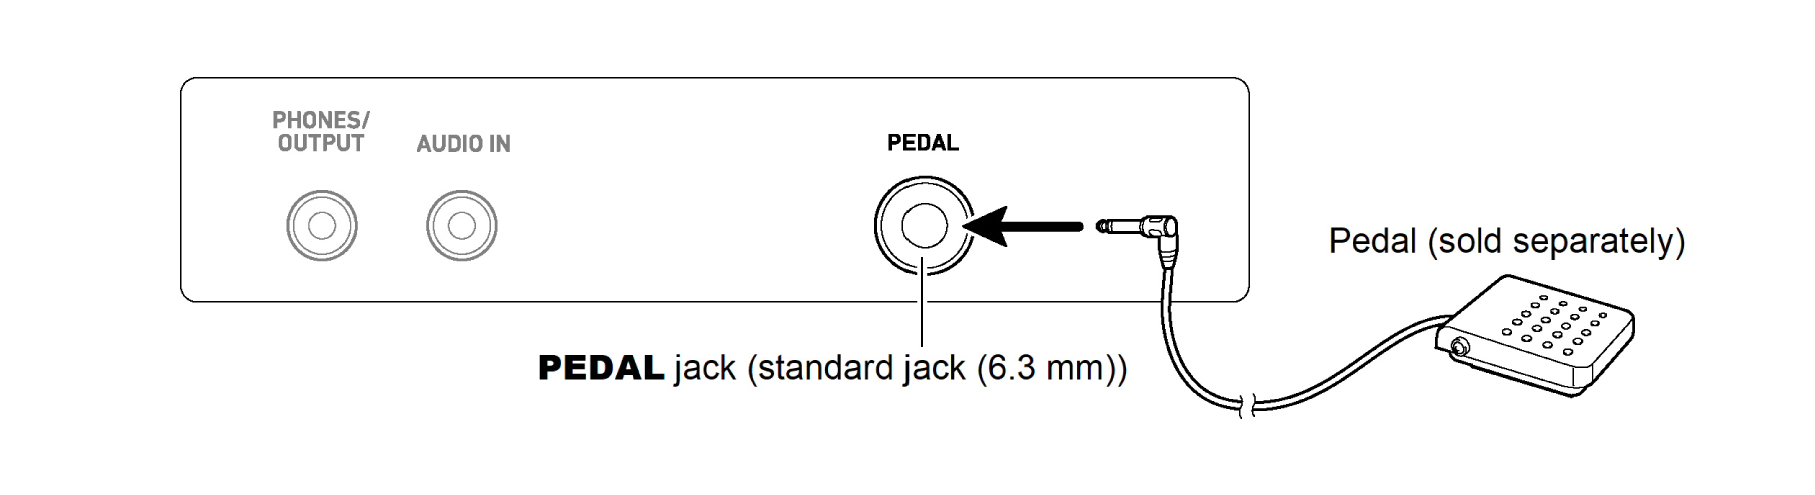
This pedal works as a damper pedal when using the default settings. If you want to change this setting (to soft, sostenuto, etc.), see “Switching between pedal functions”.
Attaching a strap (commercially available)
-
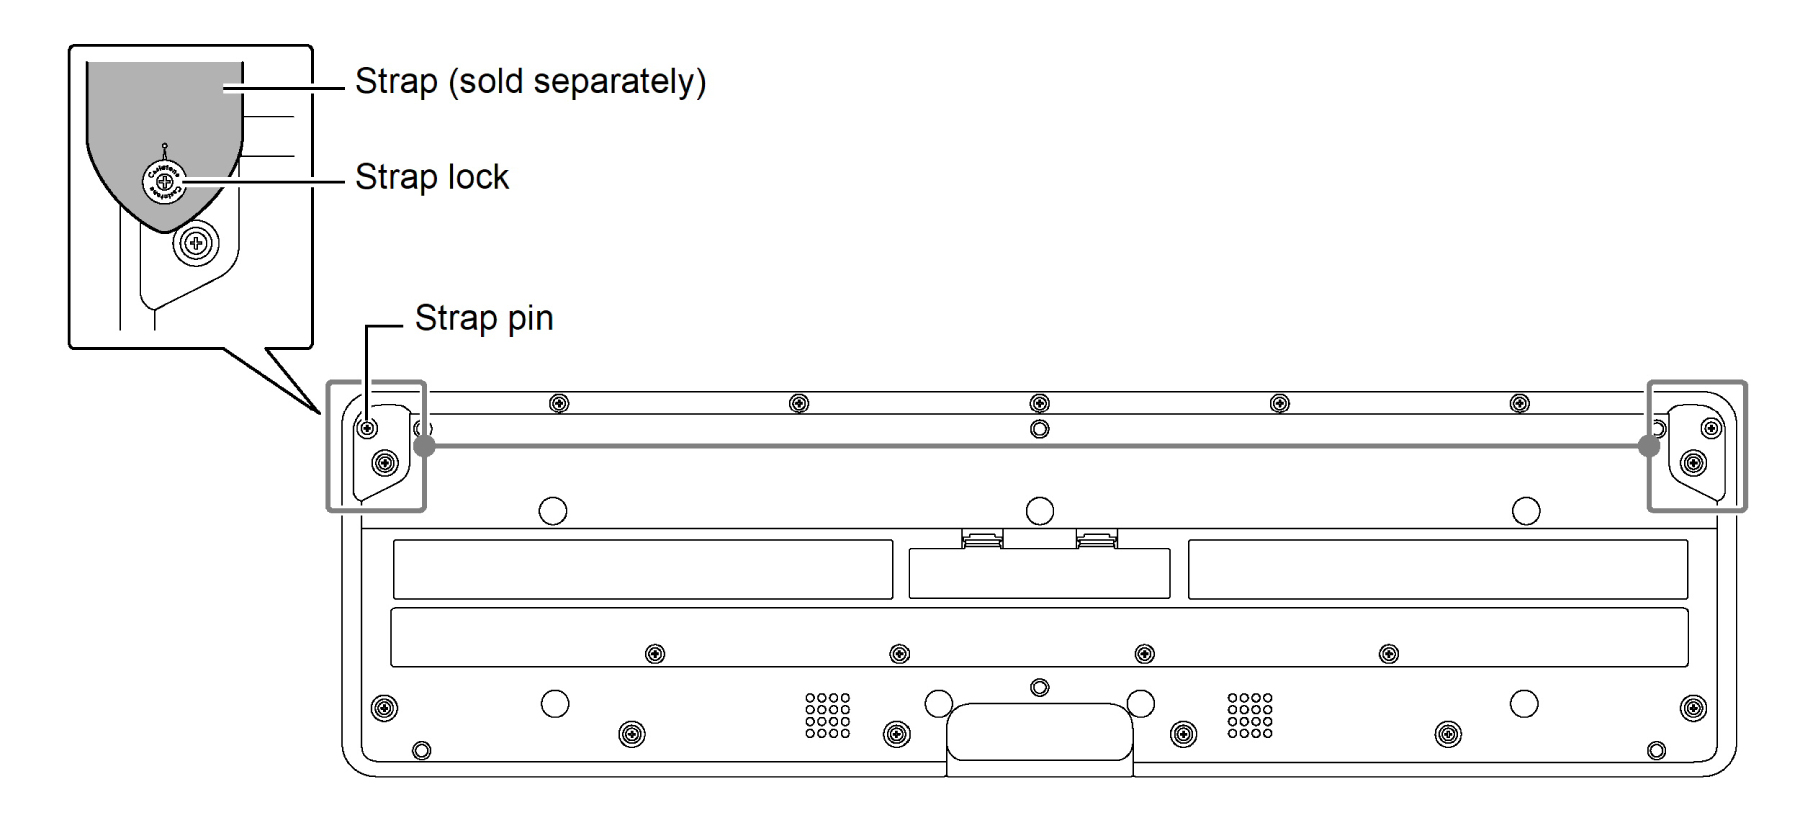
Attach a strap (commercially available) to the strap pins on the left and right sides of the bottom of the Digital Keyboard.
-
Fit the strap locks onto the strap pins.