Basic App Operations
Starting Up an Application
-
Press the h key to display the HOME screen.
-
Use the cursor keys to move the highlighting to the icon of the app you want to start up, and then press O. Alternatively, you can press a number or letter key to select an app.
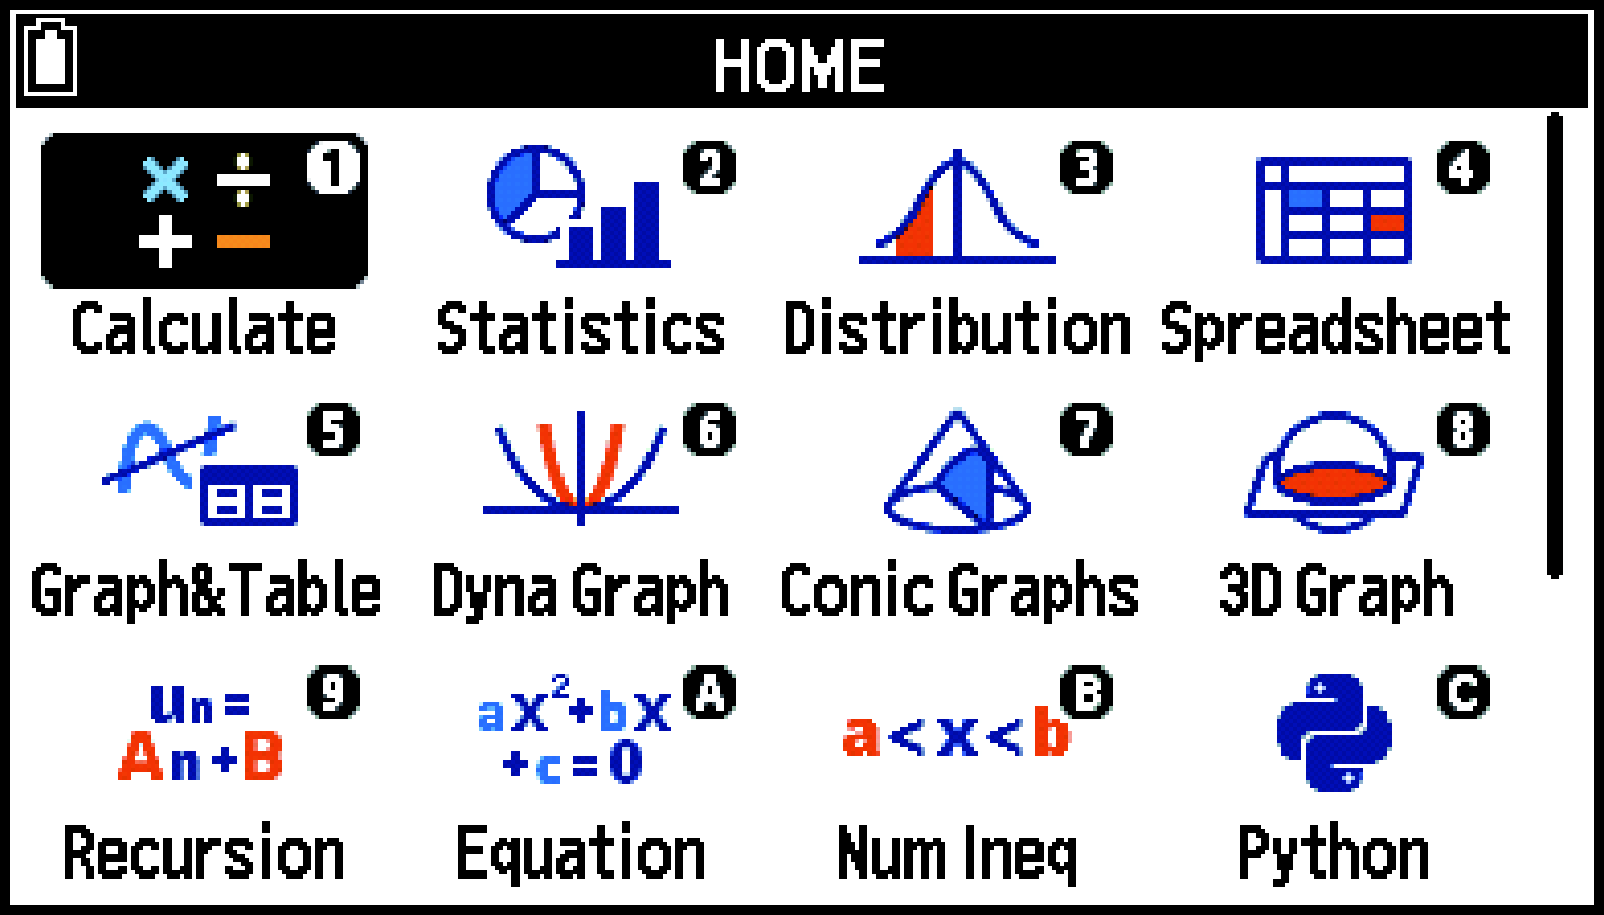
If 1 is shown in the upper right corner of the icon you want to select, press 1. If A is shown, press XA.
App Screen Configuration

Status bar
App window
Tab
Status bar
The status bar at the top of the screen shows the current battery level, current settings, various statuses, and help messages.
App window
This is the display area of the app. While the window displays a graph, you can hide the tabs to expand the display area (see Using Tabs).
Tab
Some applications of your calculator have multiple tabs. Each tab is assigned a role or function. The currently active tab is white, while inactive tabs are black. Some apps do not have tabs.
Using Tabs
Some apps have tabs that are organized according to functions or properties.
There are two types of apps with tabs, and the app type depends on the app organization.
One-way type:
This type of app has a starting tab and an ending tab. App operations proceed sequentially from the start (left-most) tab to the end (right-most) tab. Each press of > moves to the next tab to the right.
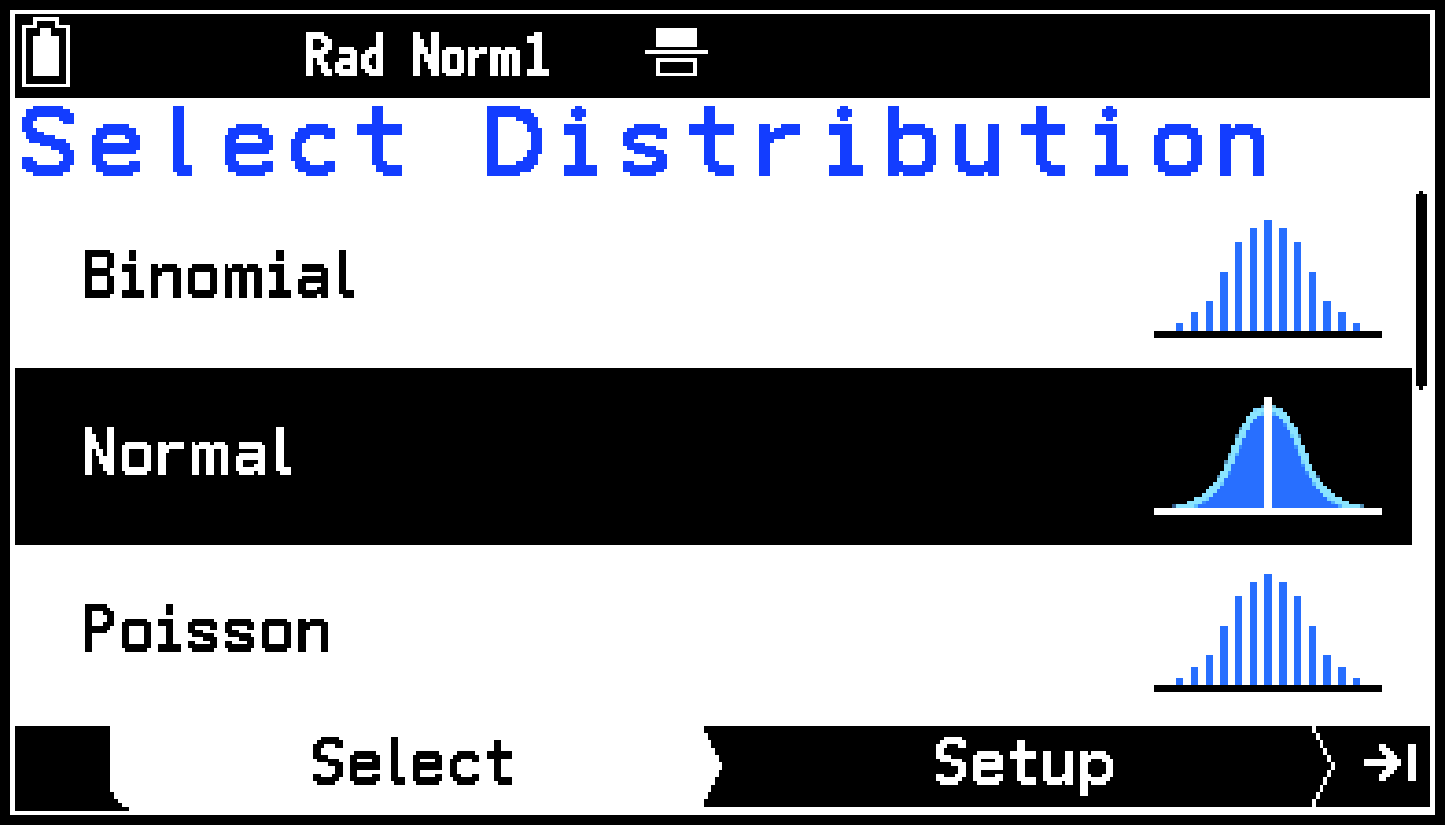
Distribution App
Pressing < moves in reverse sequence (to the left) until the start (left-most) tab is reached.
Cyclical type:
With this app type, operations proceed cyclically among tabs. Pressing > while any tab is displayed moves to the next tab to the right.
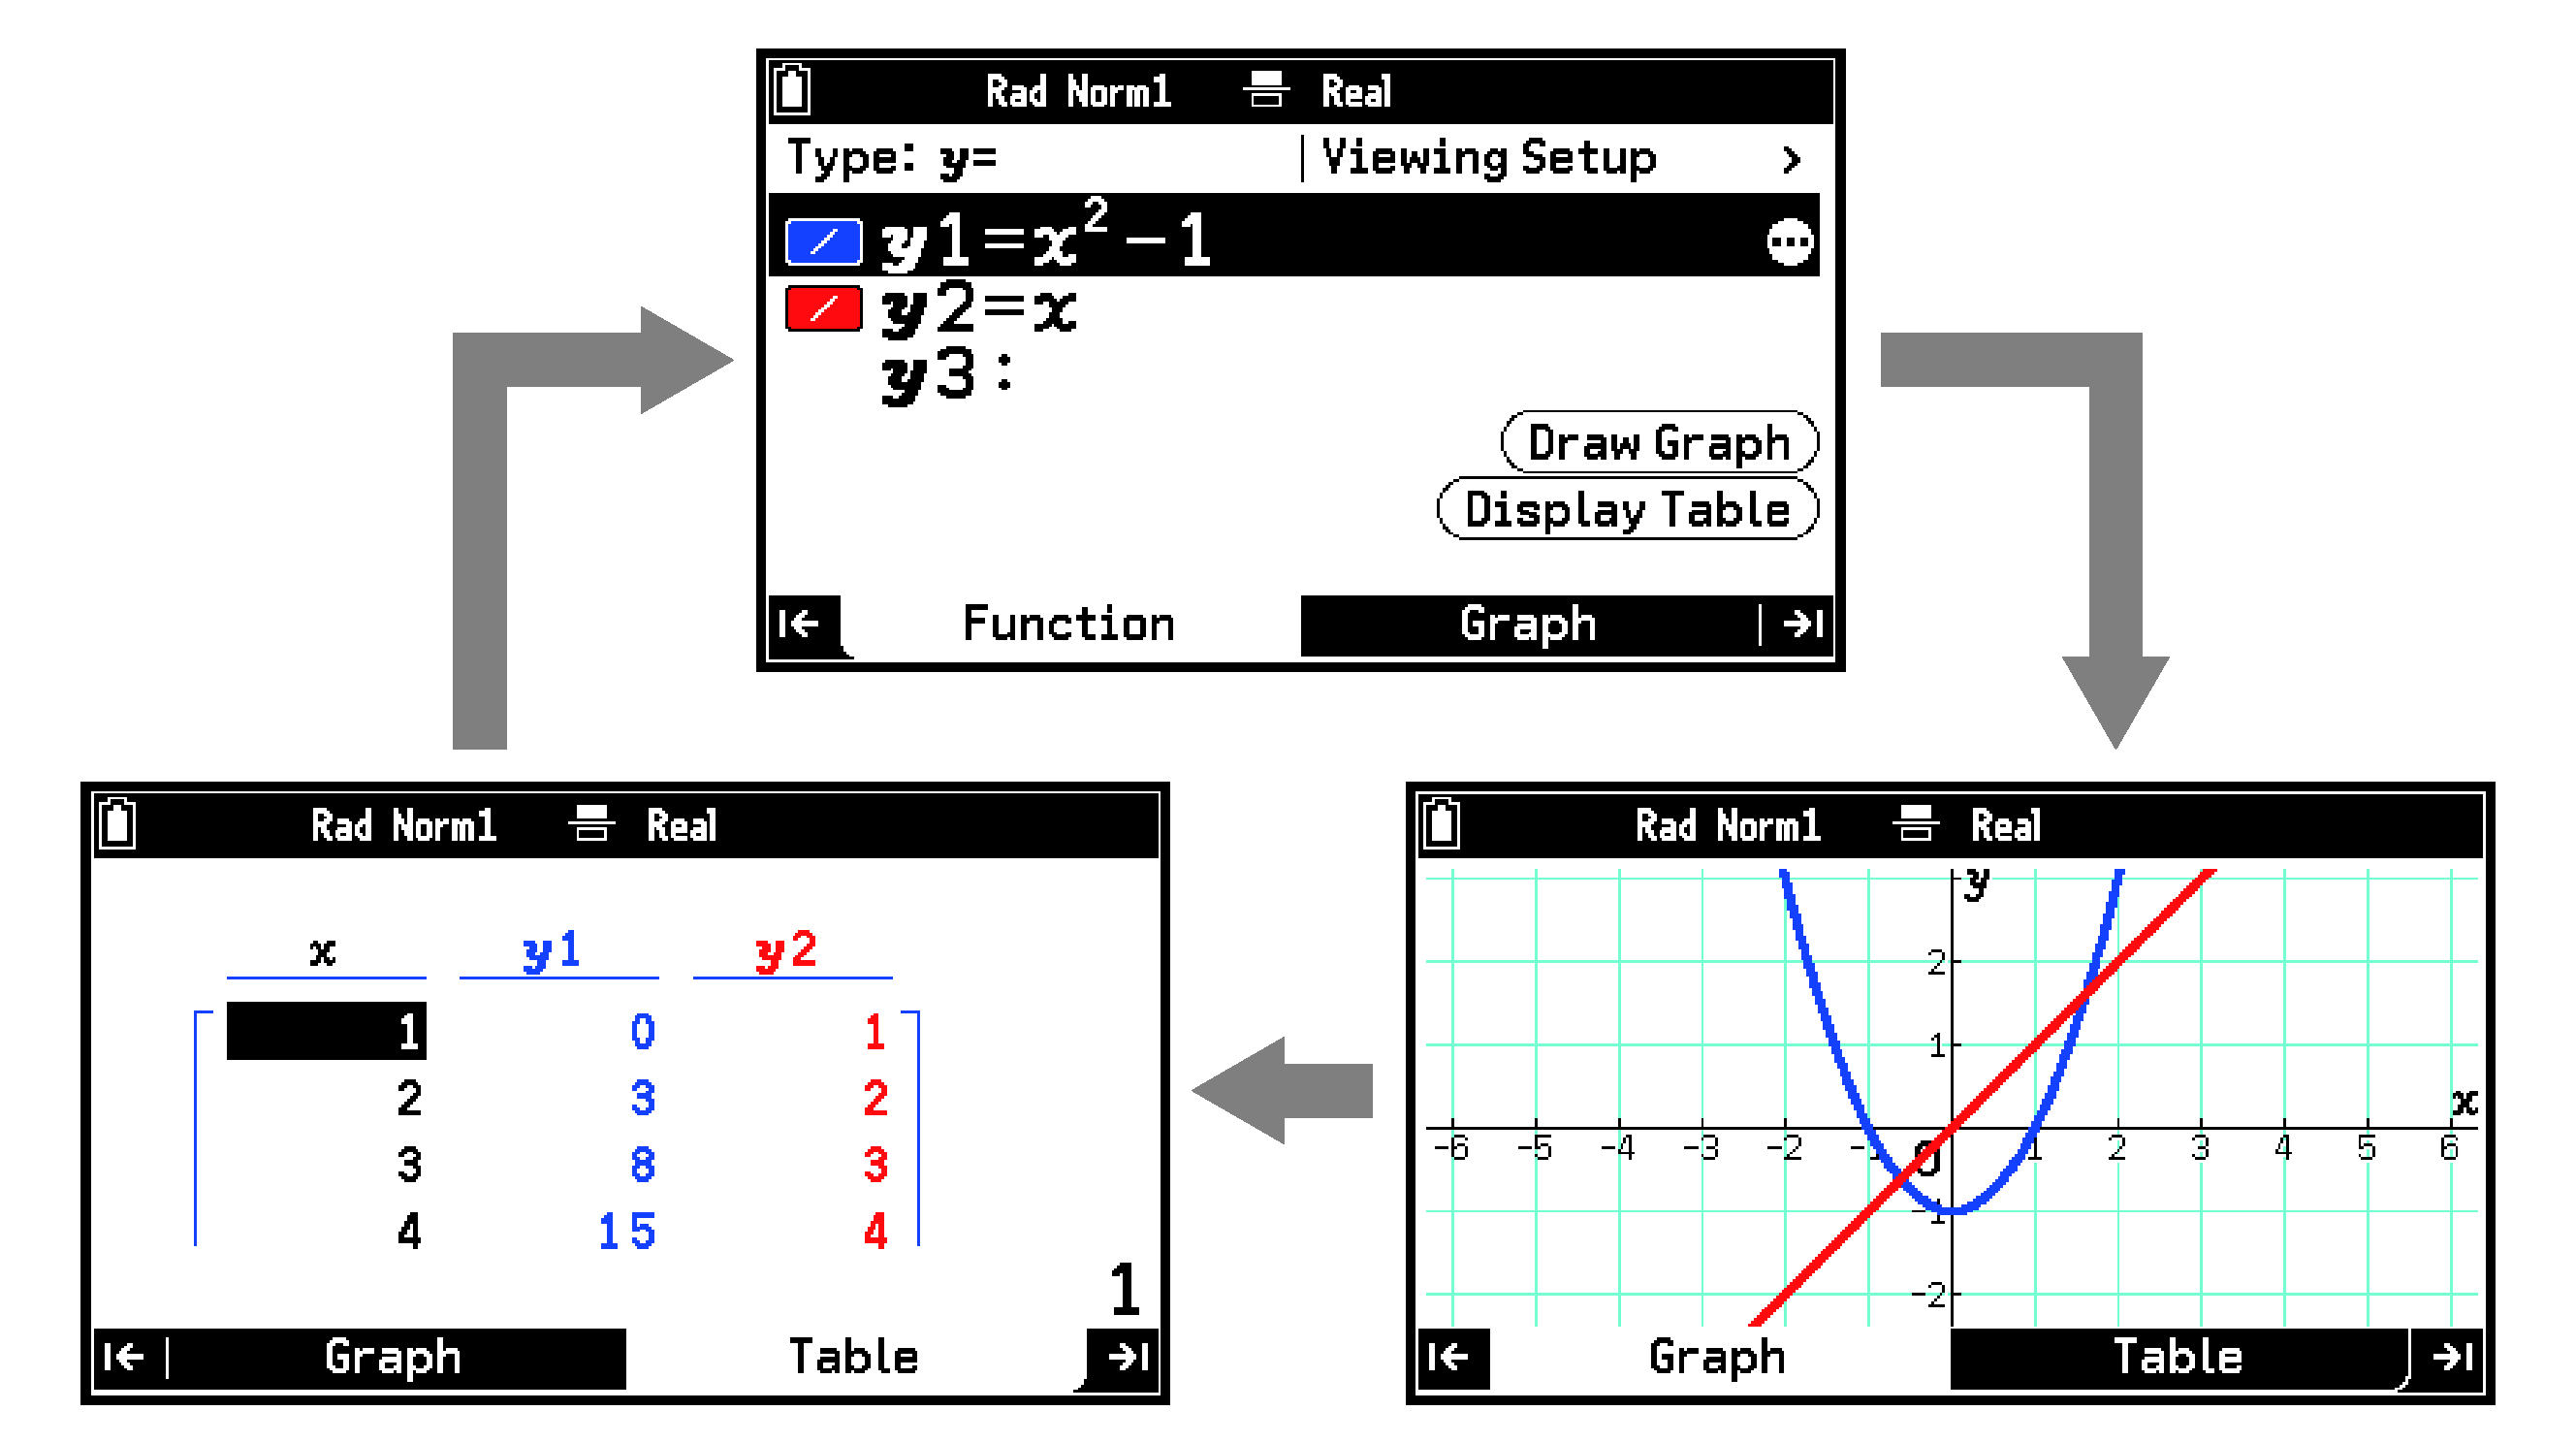
Graph&Table App
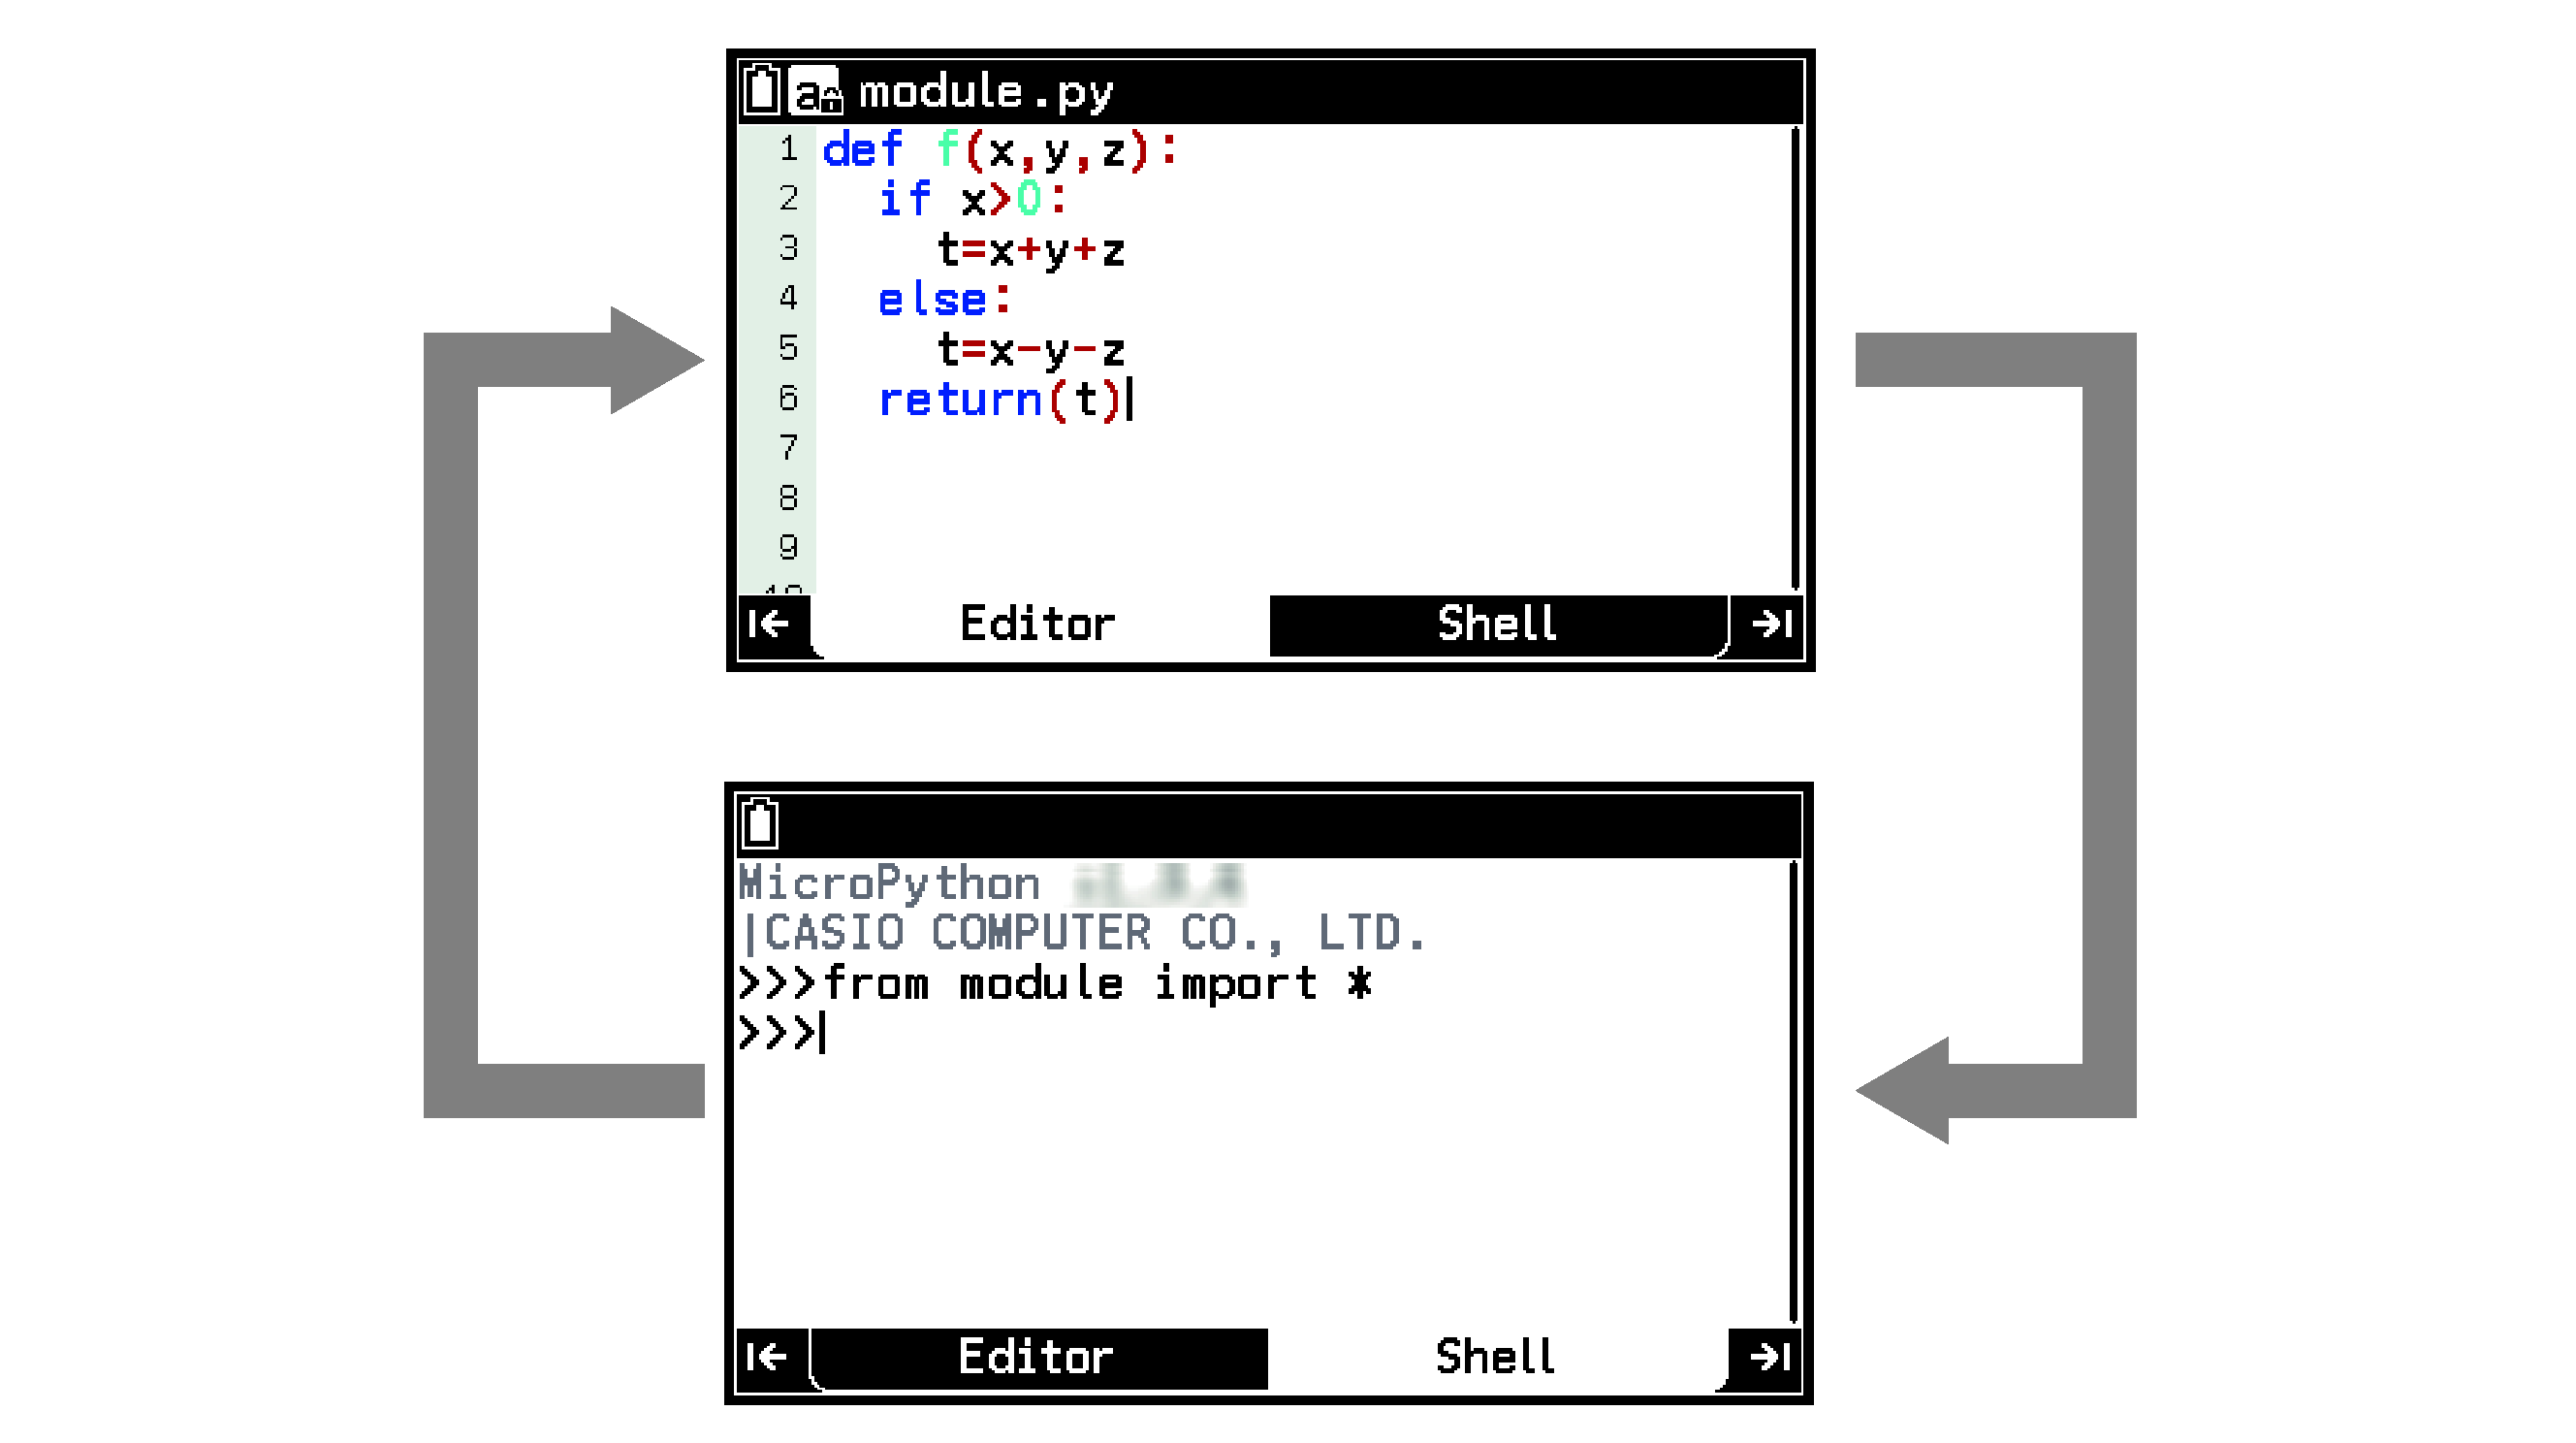
Python App
Press < to move to the next tab to the left.
![]() and
and ![]() on either end of the tabs means there is a tab in the direction indicated by the arrow(s).
on either end of the tabs means there is a tab in the direction indicated by the arrow(s).
While the window displays a graph, you can hide the tabs by pressing D. This expands the display area.
In some cases, tabs may be hidden automatically. If you are able to show hidden tabs, ![]() will be shown in the status bar. In this case, press U to show the tabs.
will be shown in the status bar. In this case, press U to show the tabs.
App Alpha Character and Numeric Input
Natural Input and Linear Input
Your calculator lets you enter expressions using either of two input methods: natural input or linear input. Natural input lets you input expressions in textbook format. With linear input, you can input expressions in linear format. There are differences between natural input and linear input when entering fractions, square roots (), some functions, vectors, and matrices. The table below shows examples of natural and linear input.
|
Expression Input method |
Fractions, |
Functions (Integration example) |
Matrix |
|
Natural input |
 |
 |
 |
|
Linear input |
 |
 |
 |
To incorporate a previously entered numeric value as an argument into a function (natural input only)
Example: To enter and change it to
1+e7d6llllsI(INS)

j

Pressing sI(INS) makes , which was input in the above example, the argument of the function () entered with the next key operation.
To switch between insert mode and overwrite mode (linear input only)
In overwrite mode, the character at the current cursor position is replaced by the character you enter. Each press of sI(INS) toggles between the insert and overwrite modes. The cursor shape is “![]() ” in insert mode and “
” in insert mode and “![]() ” in overwrite mode.
” in overwrite mode.
Alphabet Input
To enter a single alpha character, press P (which displays ![]() in the status bar), followed by a key marked with an orange letter (fx-CG100) / a red letter (fx-1AU GRAPH). In addition to the alpha characters, you can also enter spaces (
in the status bar), followed by a key marked with an orange letter (fx-CG100) / a red letter (fx-1AU GRAPH). In addition to the alpha characters, you can also enter spaces (![]() ) and quotation marks (").*
) and quotation marks (").*
Other symbols can be entered using C > [All] > [Symbol].
Alpha Lock
You can alpha lock keys to allow continuous input of alpha characters, so you don’t need to press P for each one.
Pressing sP(Q) alpha locks the keys, which is indicated by ![]() in the status bar. To unlock alpha lock, press P.
in the status bar. To unlock alpha lock, press P.
Note
When using the Python app’s Editor, keys are automatically alpha-locked to lowercase, which is indicated by ![]() in the status bar.
in the status bar.
Copying, Cutting, and Pasting Expressions
You can select a range of expressions or strings that have already been entered and copy or cut them to the clipboard. You can then paste the clipboard contents into the same app or another app.
To copy or cut screen data
-
Move the input cursor (
 ) to the start of the range of data you want to copy or cut.
 -
Press s0($).
-
Move the cursor to the end of the range of data you want to copy or cut.
-
Select [Copy] or [Cut] in the menu that appeared after you pressed O.
This displays ![]() in the status bar until you press O in step 4.
in the status bar until you press O in step 4.
You can specify the end point first if you want.
To paste data
-
Move the input cursor (
) to the location where you want to paste the data. -
Press s.(%).
Frequently Used App Menus
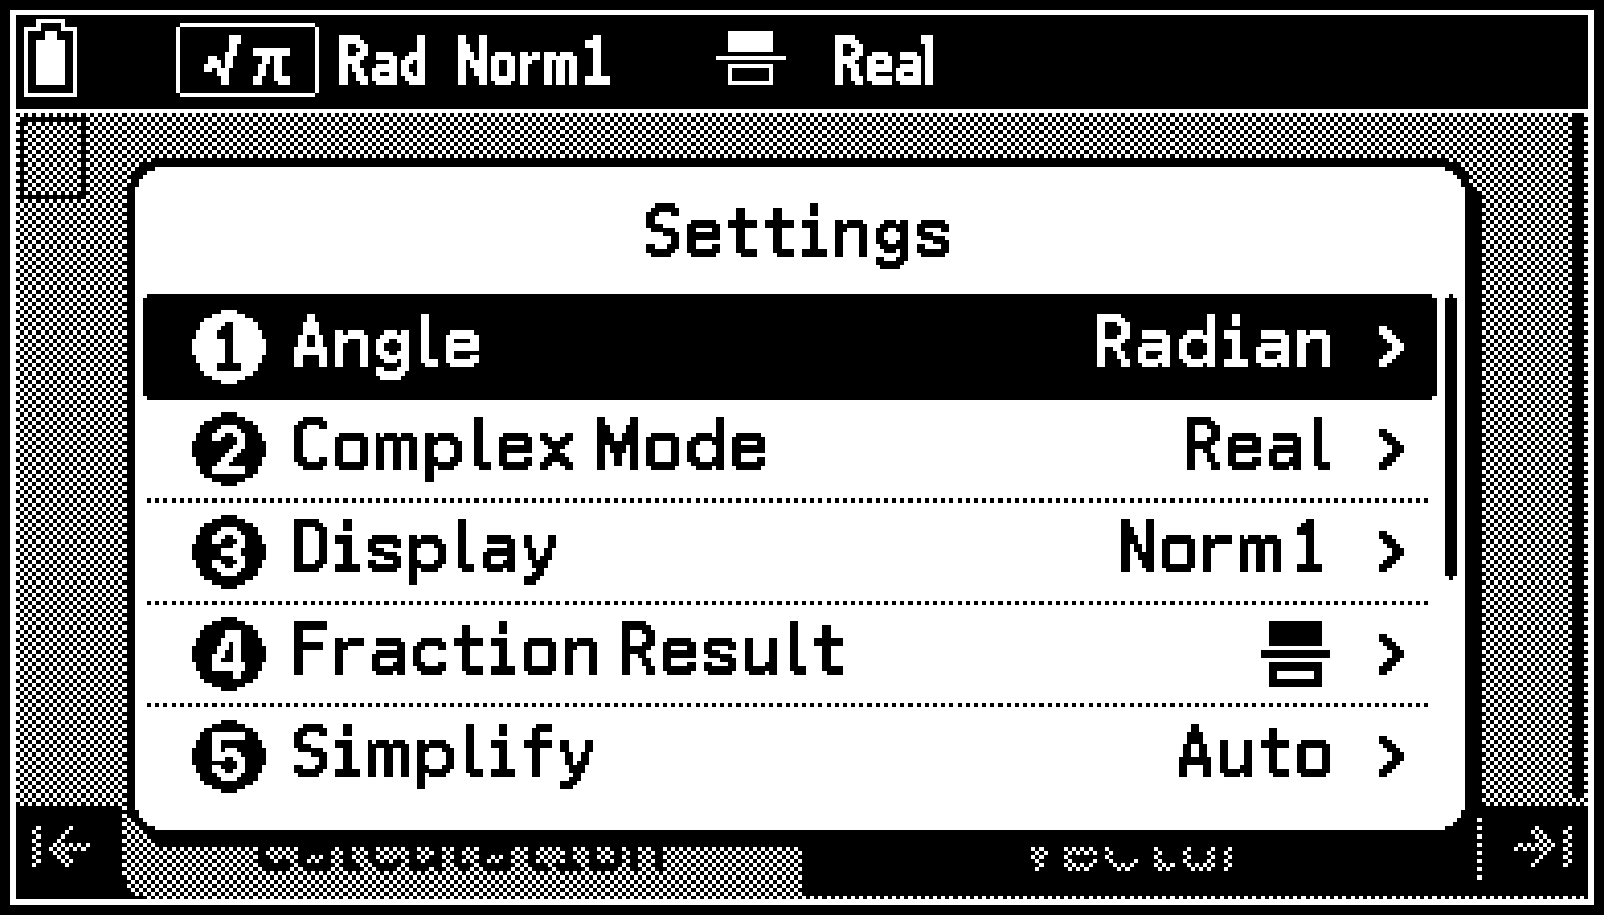
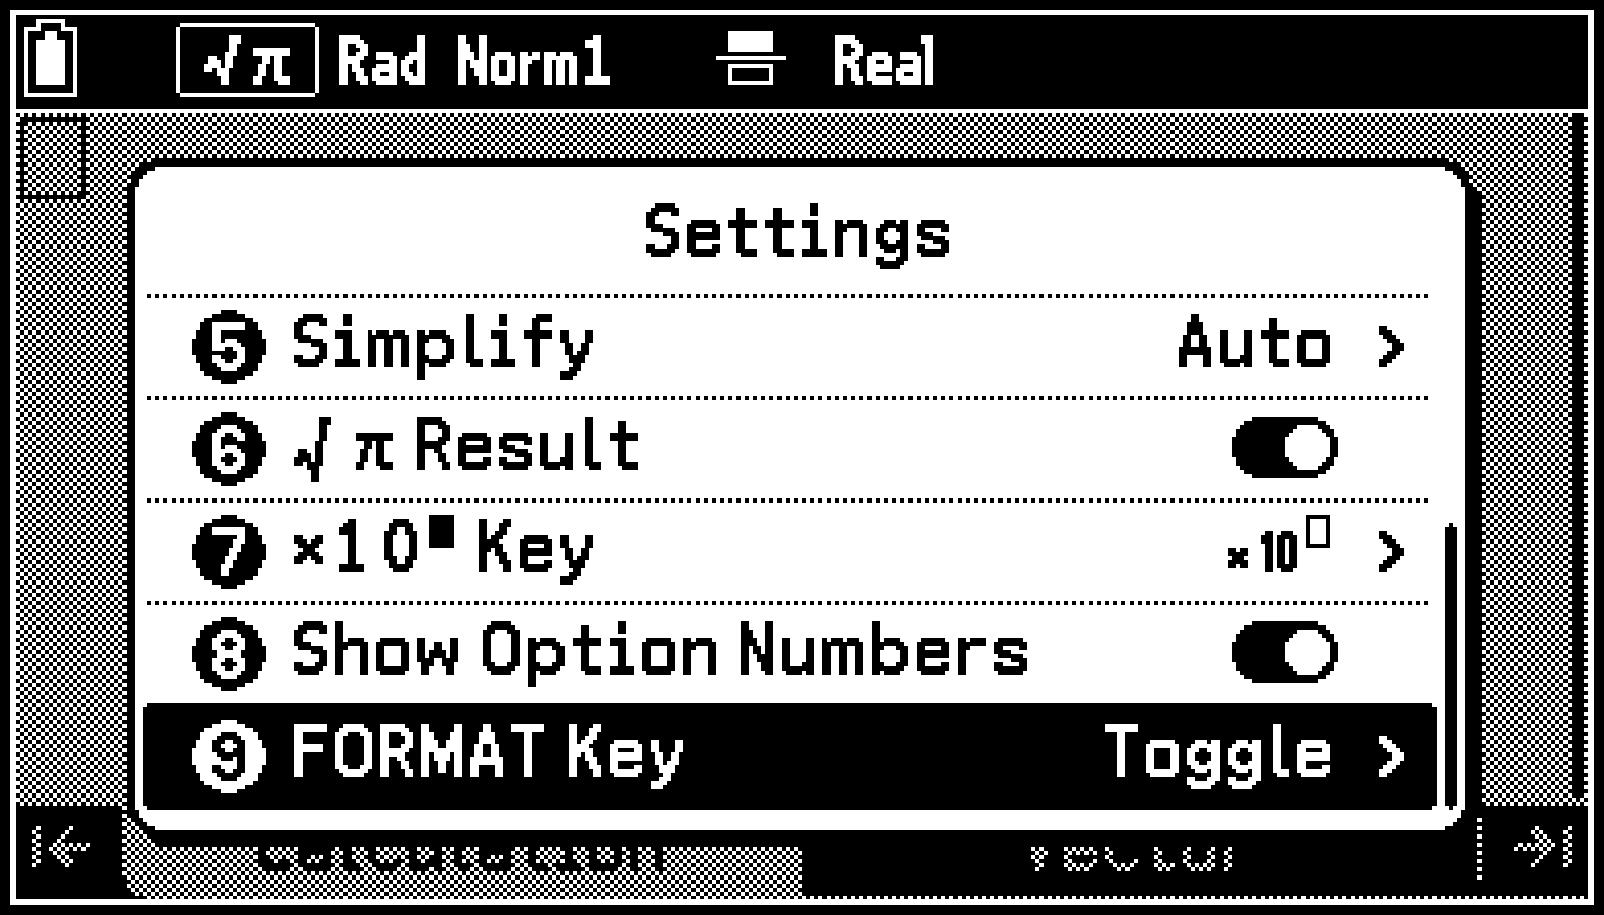
S Settings Menu (Changing App Settings)
The Settings menu displays setting items for the app you are currently using. It includes items common to multiple apps and items specific to a particular app.
To change app settings
-
Press h, select an app, and then press O.
-
Press S to display the Settings menu and then change the app’s settings.
If there is a switch (Off: ![]() , On:
, On: ![]() ) to the right of a menu item, press O to toggle between Off and On.
) to the right of a menu item, press O to toggle between Off and On.
For details about setting items and options, see Settings Menu Details.
V Variable Menu (Inputting a Variable into a Calculation or Expression)
Use the Variable menu to input a variable into a calculation or expression.
|
To recall this variable: |
Select this menu item: |
Details: |
|---|---|---|
|
Alpha variable |
V > [Alpha] |
|
|
Function variable |
V > [Function] |
|
|
Vector variable |
V > [Vector] |
|
|
Matrix variable |
V > [Matrix] |
|
|
List variable |
V > [List] |
Note
The menu item for each variable also shows the line form of the contents currently stored in the variable.
C Catalog Menu (Inputting Functions and Commands)
The Catalog menu is a comprehensive list of all functions, commands, app variables,* and symbols.
Variables that automatically store specific input or output values.
For details about the items included on the Catalog menu, see Catalog Menu Details.
Note
Pressing C while using the Python app or Base-N app displays the Catalog menu for the app you are using. For details, see the chapters explaining each app.
T Tools Menu (Displaying Operation Options)
Press T to display the Tools menu. The items that appear on the Tools menu depend on the app or tab you are currently using.
When ![]() is displayed on the right end of a highlighted menu item, the Tools menu that appears when you press T will contain operation options enabled for the highlighted line.
is displayed on the right end of a highlighted menu item, the Tools menu that appears when you press T will contain operation options enabled for the highlighted line.
F Format Menu (Changing the Display Format)
The Format menu that appears when you press sF* lets you change the format of the calculation result display and cell details. For details about the items included on the Format menu, see Changing the Display Format of Calculation Results (Format Menu).
When “![]() Decimal” is selected for S > [FORMAT Key] (initial default).
Decimal” is selected for S > [FORMAT Key] (initial default).
Menu and Dialog Operations (Using Option Numbers)
Pressing certain keys (C, T, etc.) or executing some operation in an app causes a menu or dialog to appear.

Menu Example
Dialog Example
There are two ways to select an item on a menu or dialog.
Method 1: Use d and u to move the highlighting to the item you want to use and then press O.
Method 2: Press the number or letter key* that corresponds to the number or letter to the left of the item you want to select.
The number or letter to the left of an item is its “Option Number”.
To enter a letter from A through L, press XA through )L (without pressing P).
To enter a letter from M through Z, press P + 7M to P + 0Z. Be sure to press P first in this case.
Note
You can use Option Numbers to select a menu or dialog operation by pressing its corresponding number or letter key even if its menu or dialog is not currently displayed. To understand how this works, try performing the example operation below.
Option Numbers are displayed when S > [Show Option Numbers] is turned on and not displayed when it is turned off. The default setting is On. Note that menu and dialog operations you execute by pressing number and letter keys remain in effect even when S > [Show Option Numbers] is turned off.
Example of Menu Operations Using Option Numbers
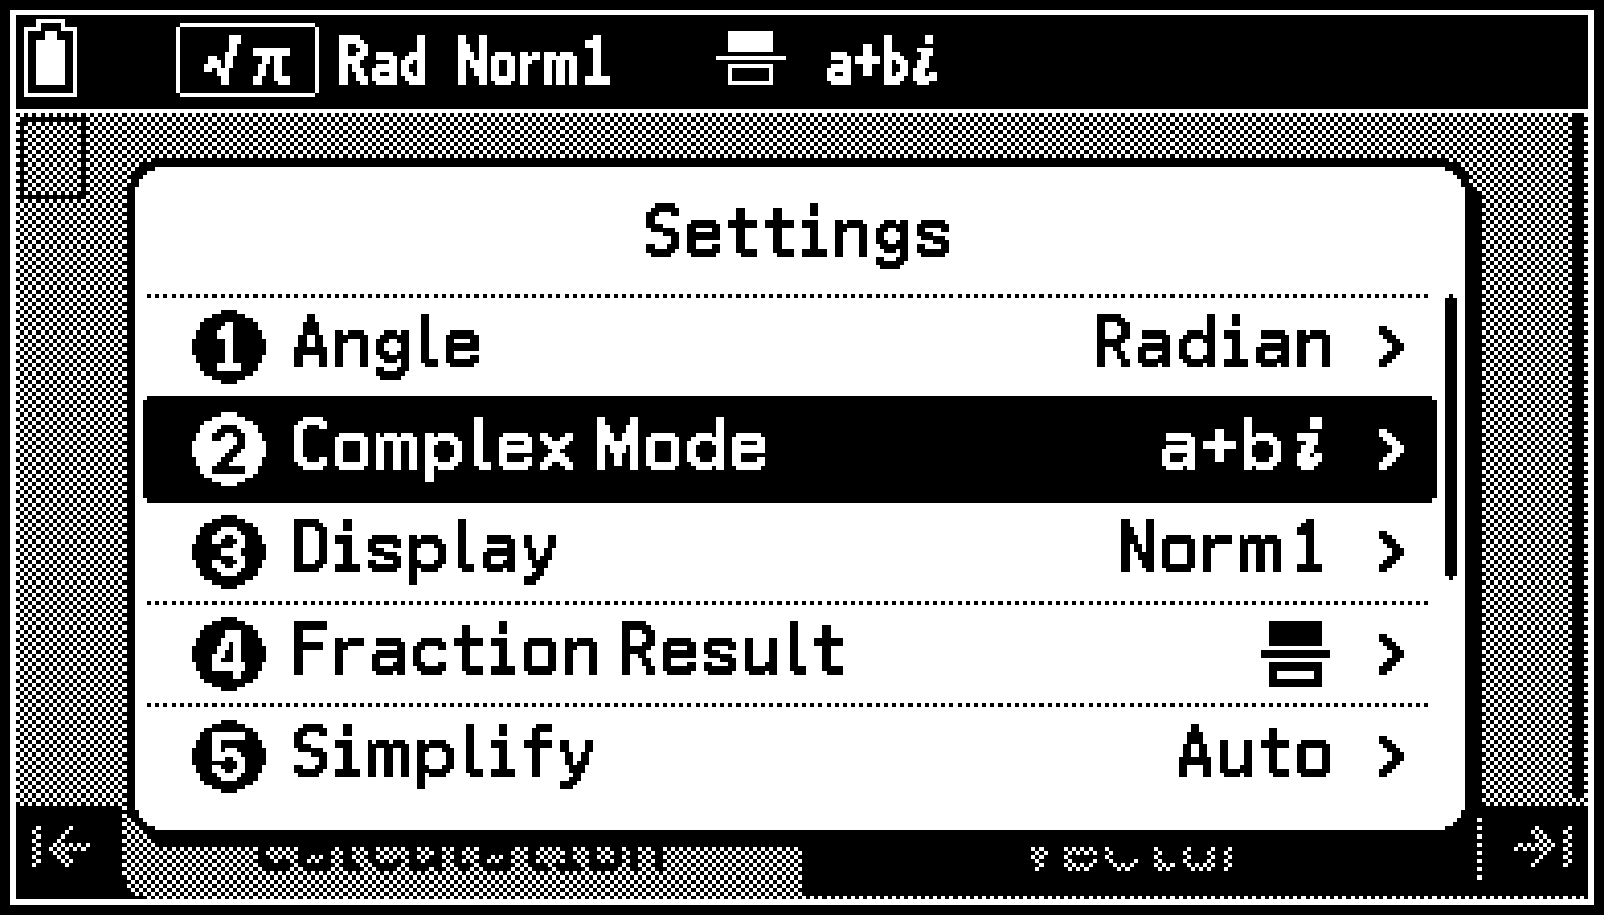
The operations in this example are performed with the Calculate app running and the Settings menu displayed. The following operations will be performed using Option Numbers.
Selecting [a+b] for the [Complex Mode] setting
Turning [Show Option Numbers] off and then back on
-
h > Calculate
-
Press S.
-
Press u.
-
Press 2 to select [Complex Mode].
-
Press 2 to select [a+b].
-
Press 8 to select [Show Option Numbers].
-
Press 8 again (or O).
This displays the Settings menu.
Note that ![]() is shown to the left of [Complex Mode].
is shown to the left of [Complex Mode].
This jumps to the last line of the menu.
Note that ![]() is shown to the left of [Show Option Numbers].
is shown to the left of [Show Option Numbers].
This displays a list of available Complex Mode settings.
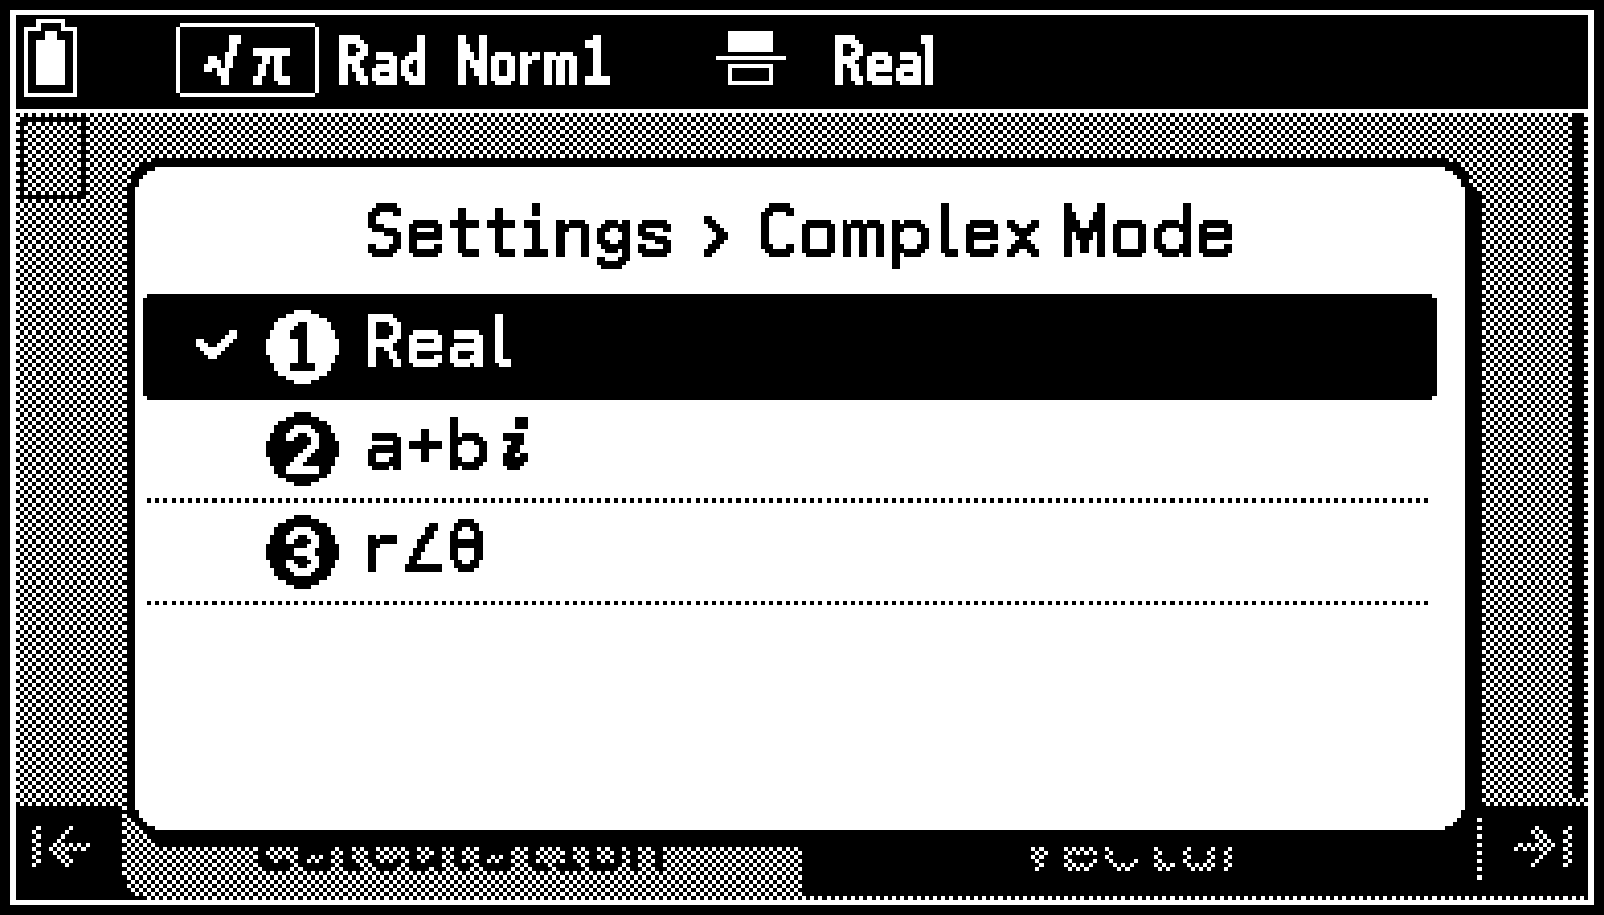
This changes the Complex Mode setting to a+b and returns to the Settings menu.
This turns off the [Show Option Numbers] setting (![]() ), which causes the Option Numbers to the left of the menu items to disappear.
), which causes the Option Numbers to the left of the menu items to disappear.
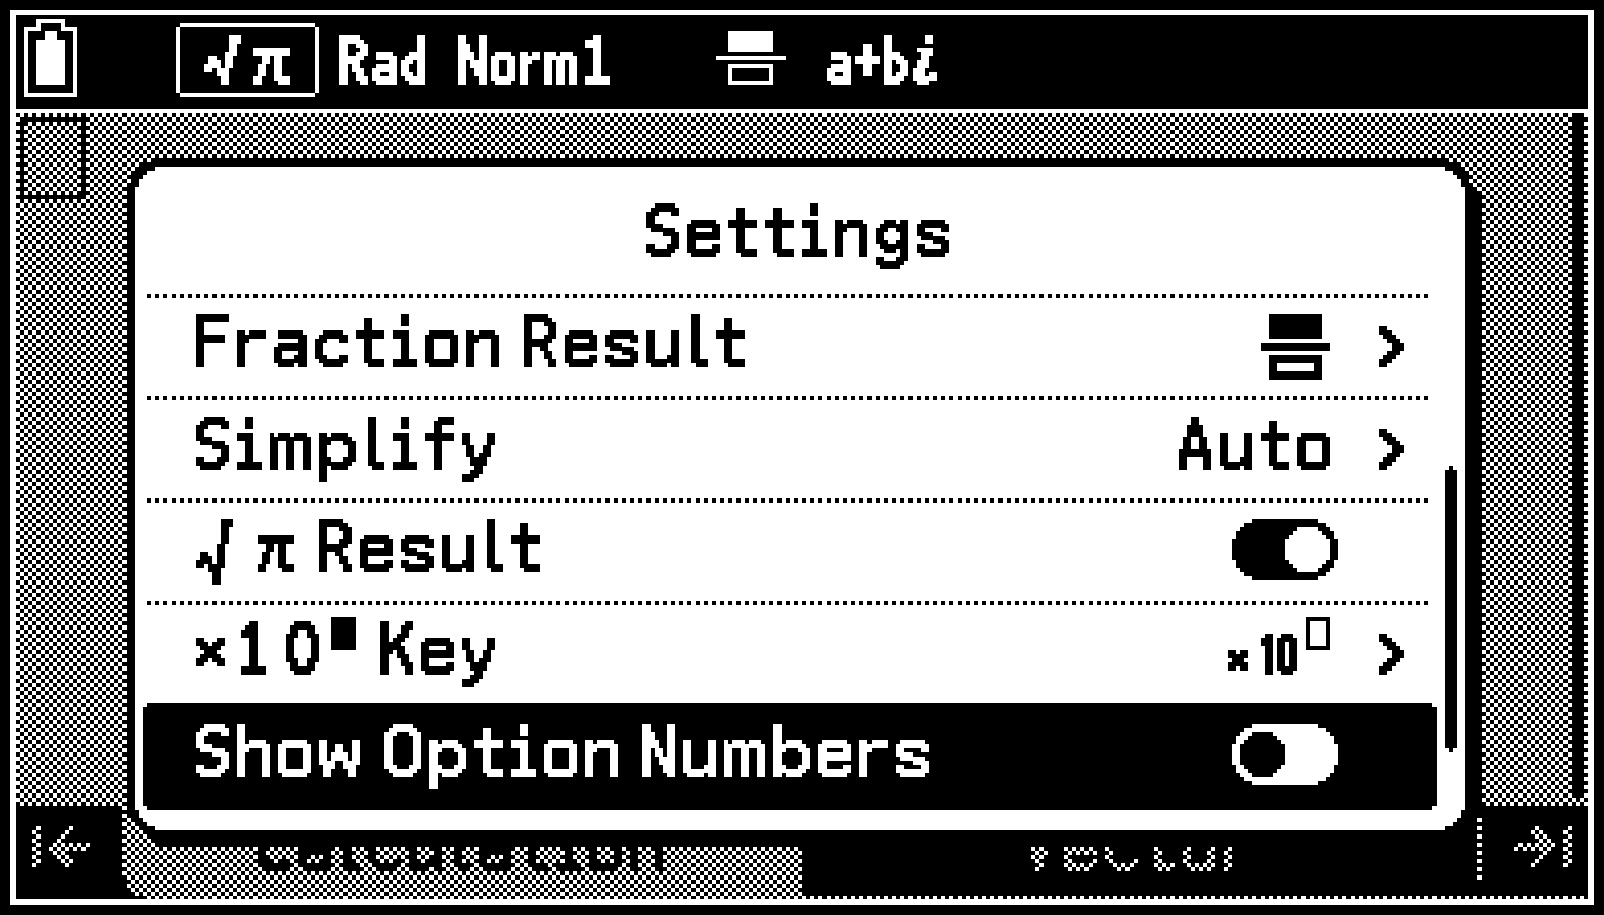
This turns on the [Show Option Numbers] setting (![]() ), which causes the Option Numbers to reappear.
), which causes the Option Numbers to reappear.
Cases when Option Number Operations Are Disabled
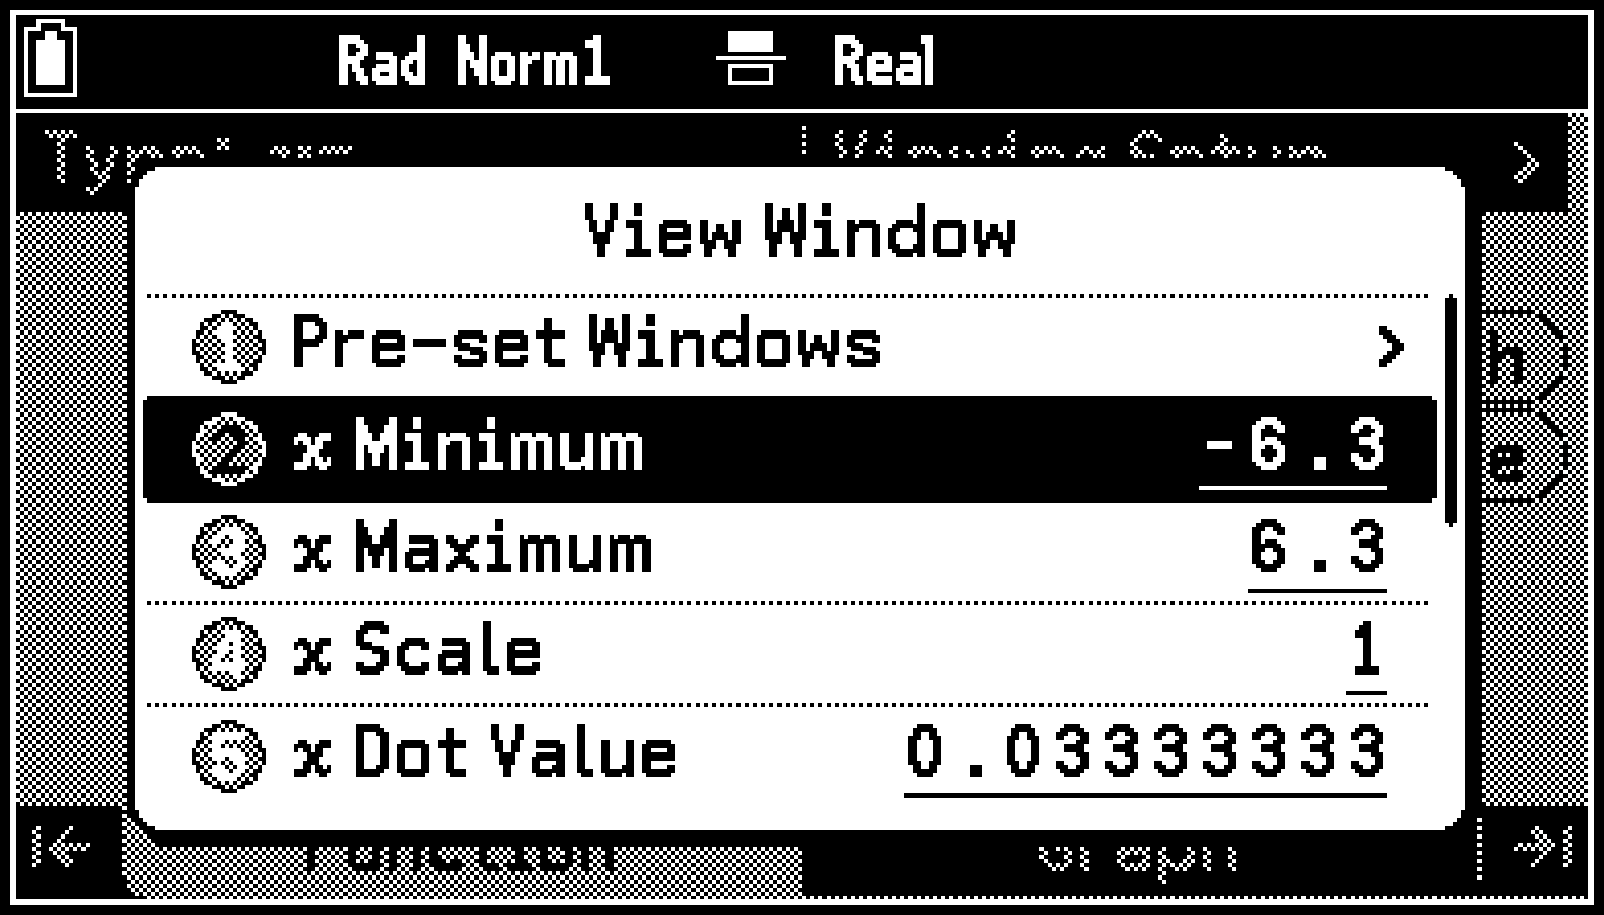
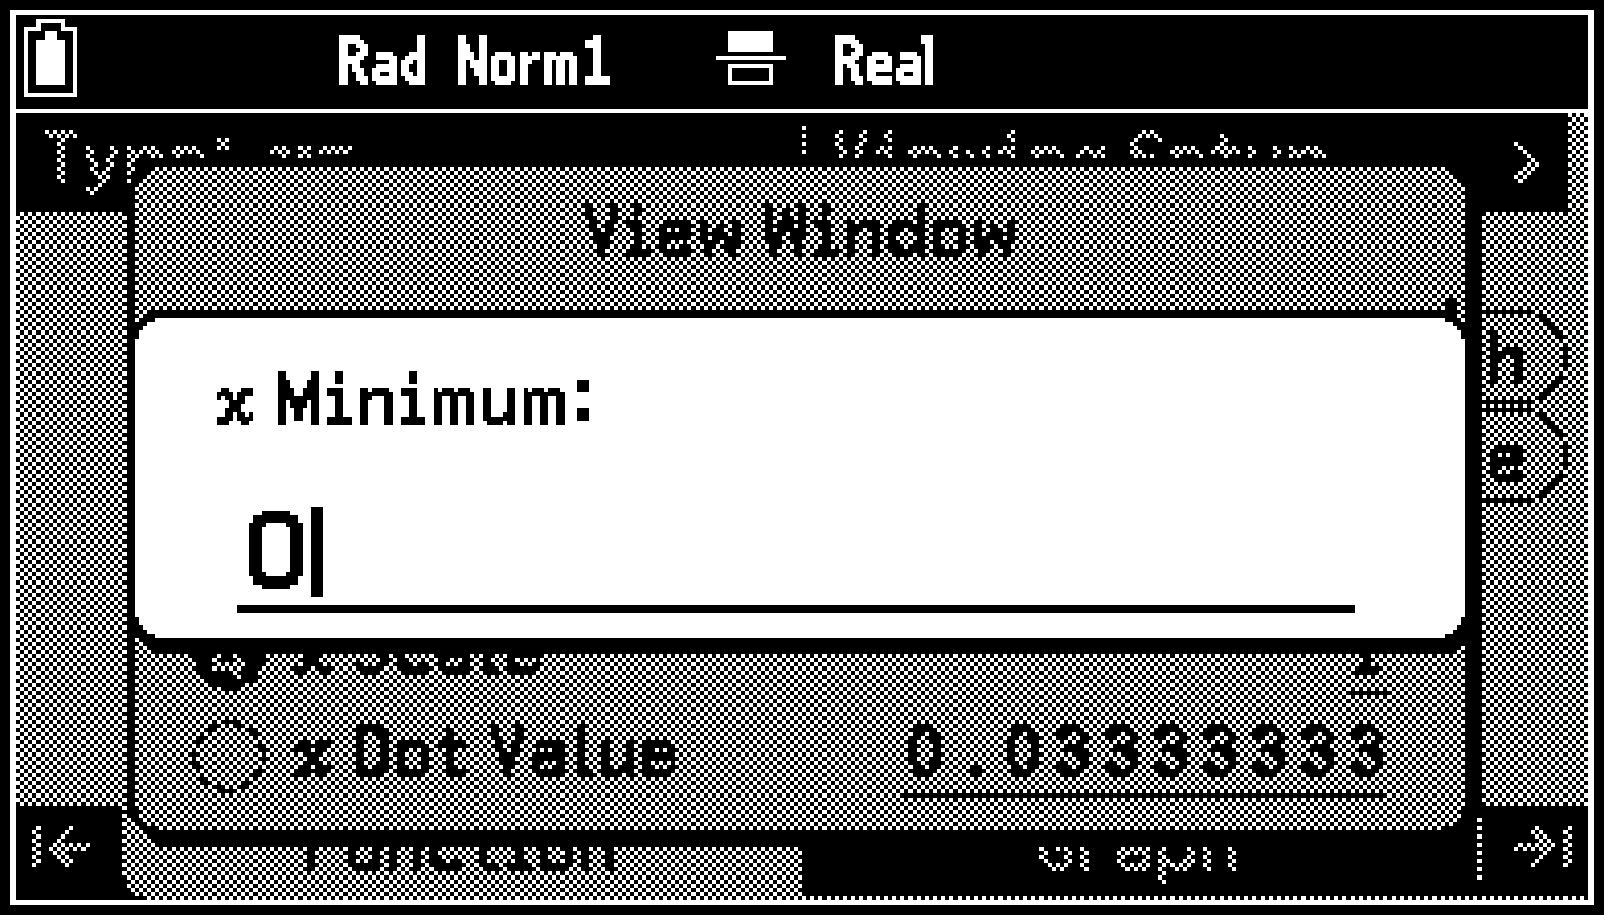
Option Number operations are disabled while a setting item that requires direct numeric input is highlighted because pressing a number or letter key displays an input dialog. Option Numbers are dimmed when they are disabled.
Using the Screen Capture Function
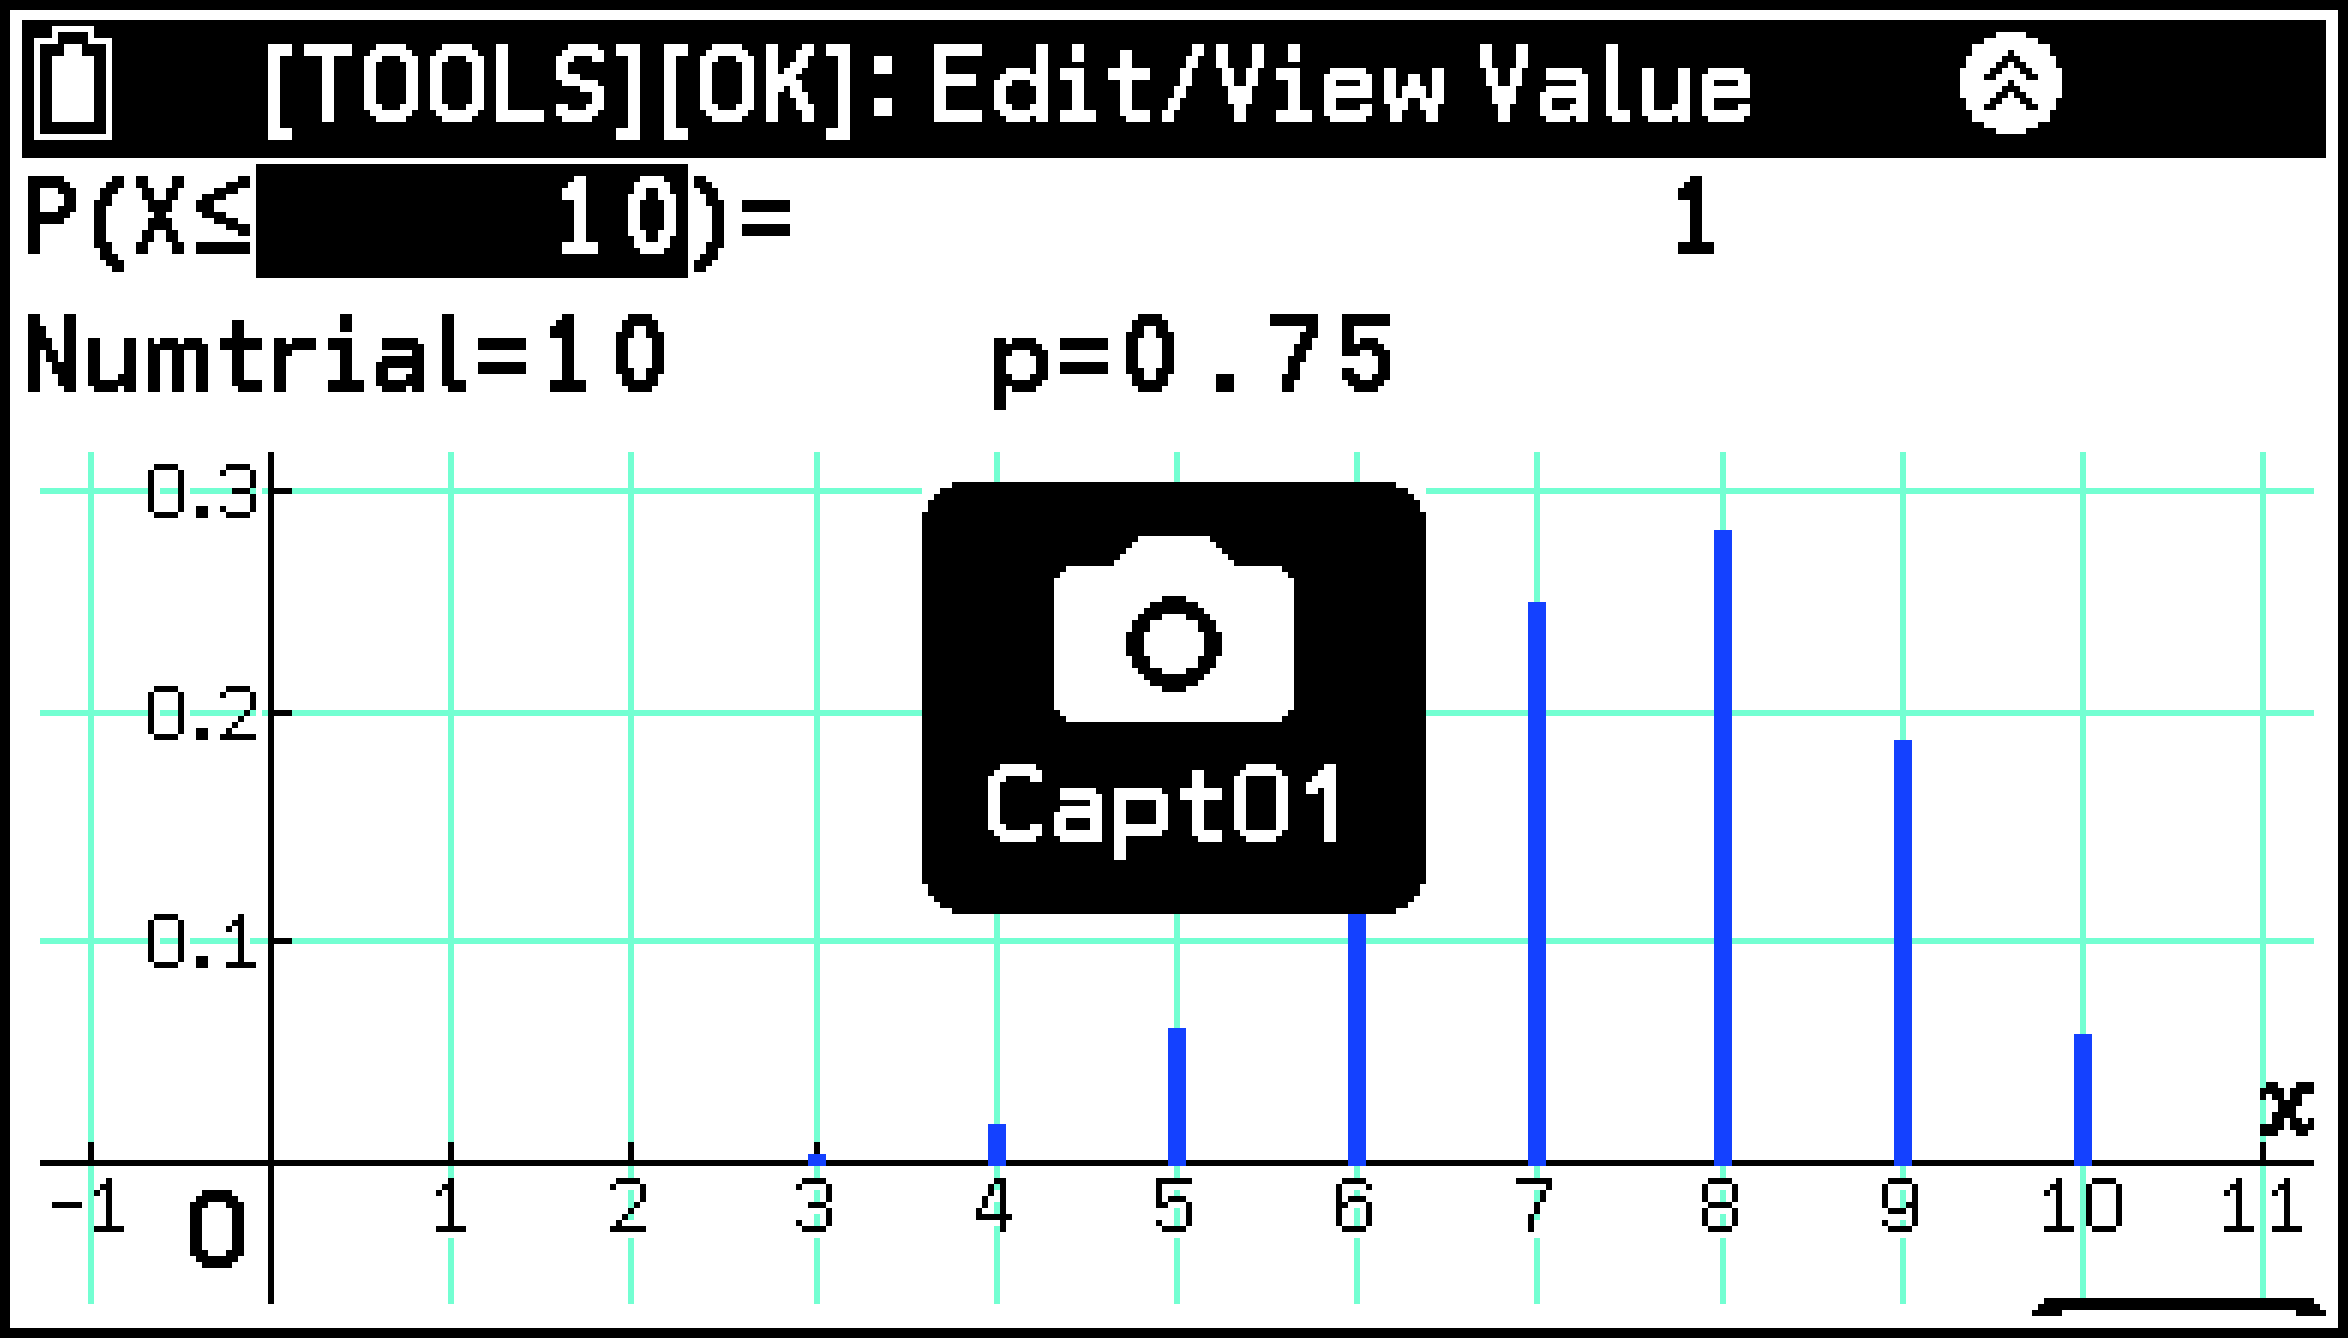
To capture what is displayed on the screen, press sk(&). “Capt01” (where “01” is a number from 01 to 20) will appear in the center of the screen when the capture is successful.
The captured image file is saved in the Storage Memory “Capt” folder.
Captured Image Storage Format
Captured images can be saved as either .g4p (default) or .bmp images. For details, see Specifying the Image Capture Format (Capture Format).
Viewing Captured Images
You can view the captured images in the “Capt” folder by displaying the Memory app’s Storage Memory tab. For details, see Using the Storage Memory Tab.
Using Captured Images
An image saved in .g4p format can be used as a graph window background (Background (Graph)). Images saved in bmp format can be used by transferring them to a PC (Connecting the Calculator to a Computer).
Conditions When Capture Cannot be Performed
Pressing sk(&) when any of the conditions below exists causes ![]() to appear in the center of the screen, indicating that capture cannot be performed.
to appear in the center of the screen, indicating that capture cannot be performed.
When there is insufficient Storage Memory available.
When you attempt to save a bmp image while all of the available bmp file names (Capt01.bmp to Capt20.bmp) are in use.
When you attempt to save a g4p image while all of the available g4p file names (Capt01.g4p to Capt20.g4p) are in use.
When there is insufficient battery power.
When you are in an Exam Mode.
Before Assuming Malfunction
If a problem continues to occur, try performing the steps below starting from ①.
-
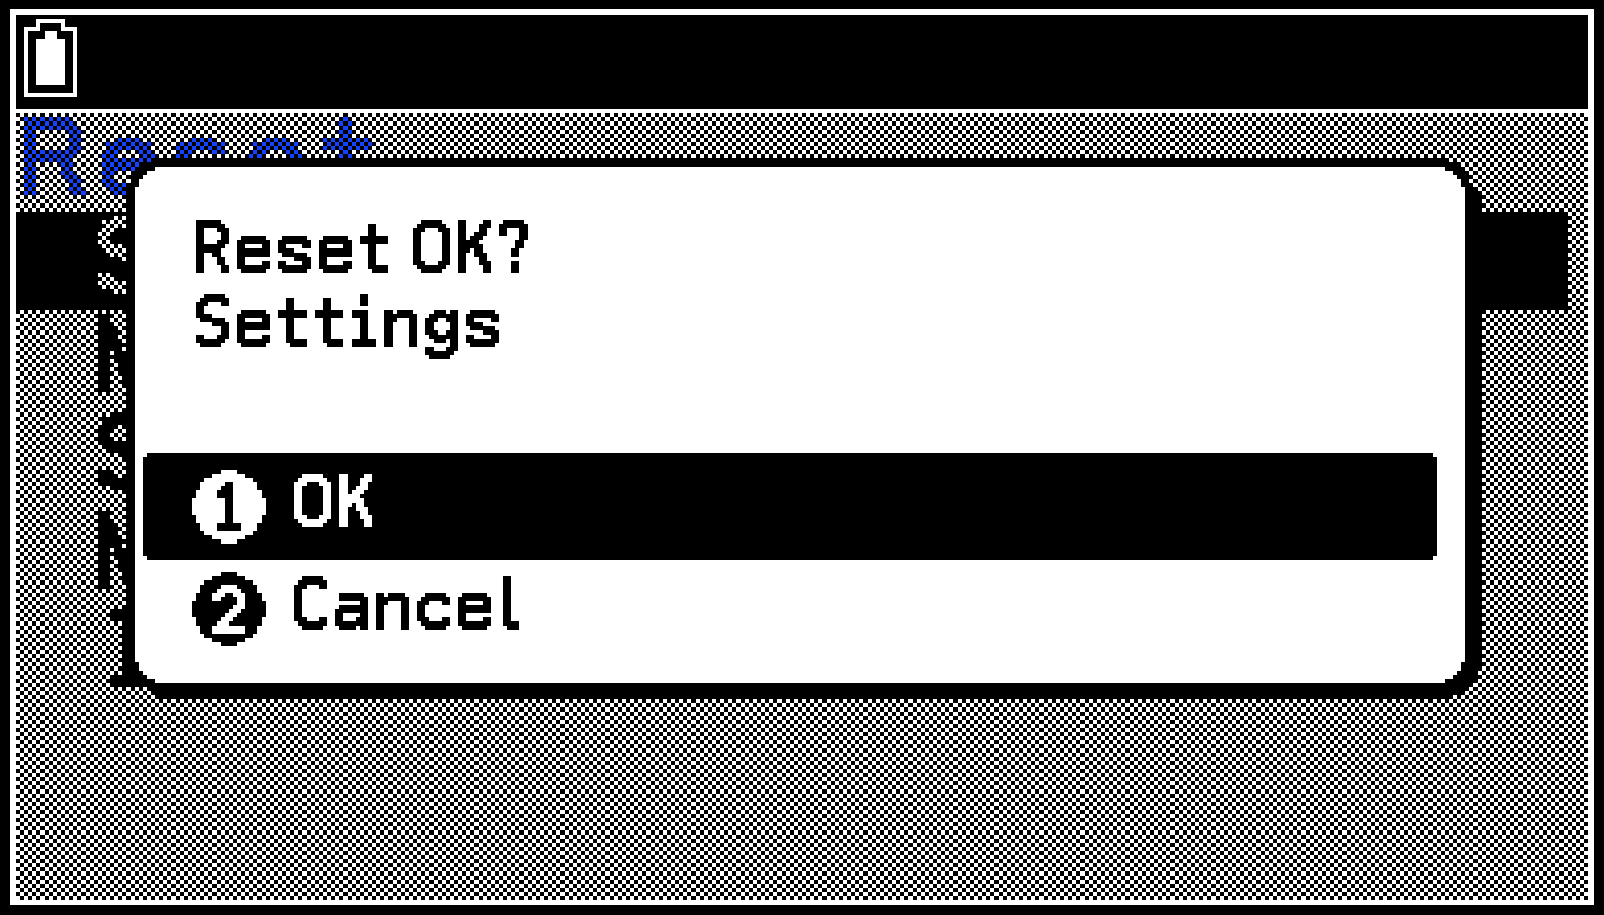
Reset your calculator’s settings.
-
h > System
-
Select [Reset] > [Settings].
-
On the dialog that appears, select [OK].
-
Press the RESTART button to restart your calculator.
-
Reset calculator memory.
-
h > System
-
Execute [Reset] > [Main Memory].
-
If the operation does not improve, execute [Reset] > [Initialize All].
If this does not resolve the problem, try step ②.
Important!
When you press the RESTART button to restart the calculator, data already stored in the memory of the calculator is normally retained. However, data that is being edited or data that is being entered but not yet finalized at the time RESTART is pressed is not retained.

RESTART button
After you press the RESTART button, configure all of the following settings that appear sequentially on the screen: Language, Country (fx-CG100 only), Display Settings, Power Properties, Battery Settings.
For information about each setting, see System App.
If this does not resolve the problem, try step ③.
Before performing the operation below, make sure to copy any important data stored in the calculator. Step (2) deletes all the data in your calculator’s Main Memory. Step (3) returns all calculator settings to their initial defaults and erases all data in Main Memory and Storage Memory.
For information about the reset operation, see Resetting the Calculator (Reset).
Low Battery Warning
If the Low Battery Warning below appears, immediately turn off your calculator and replace its batteries.
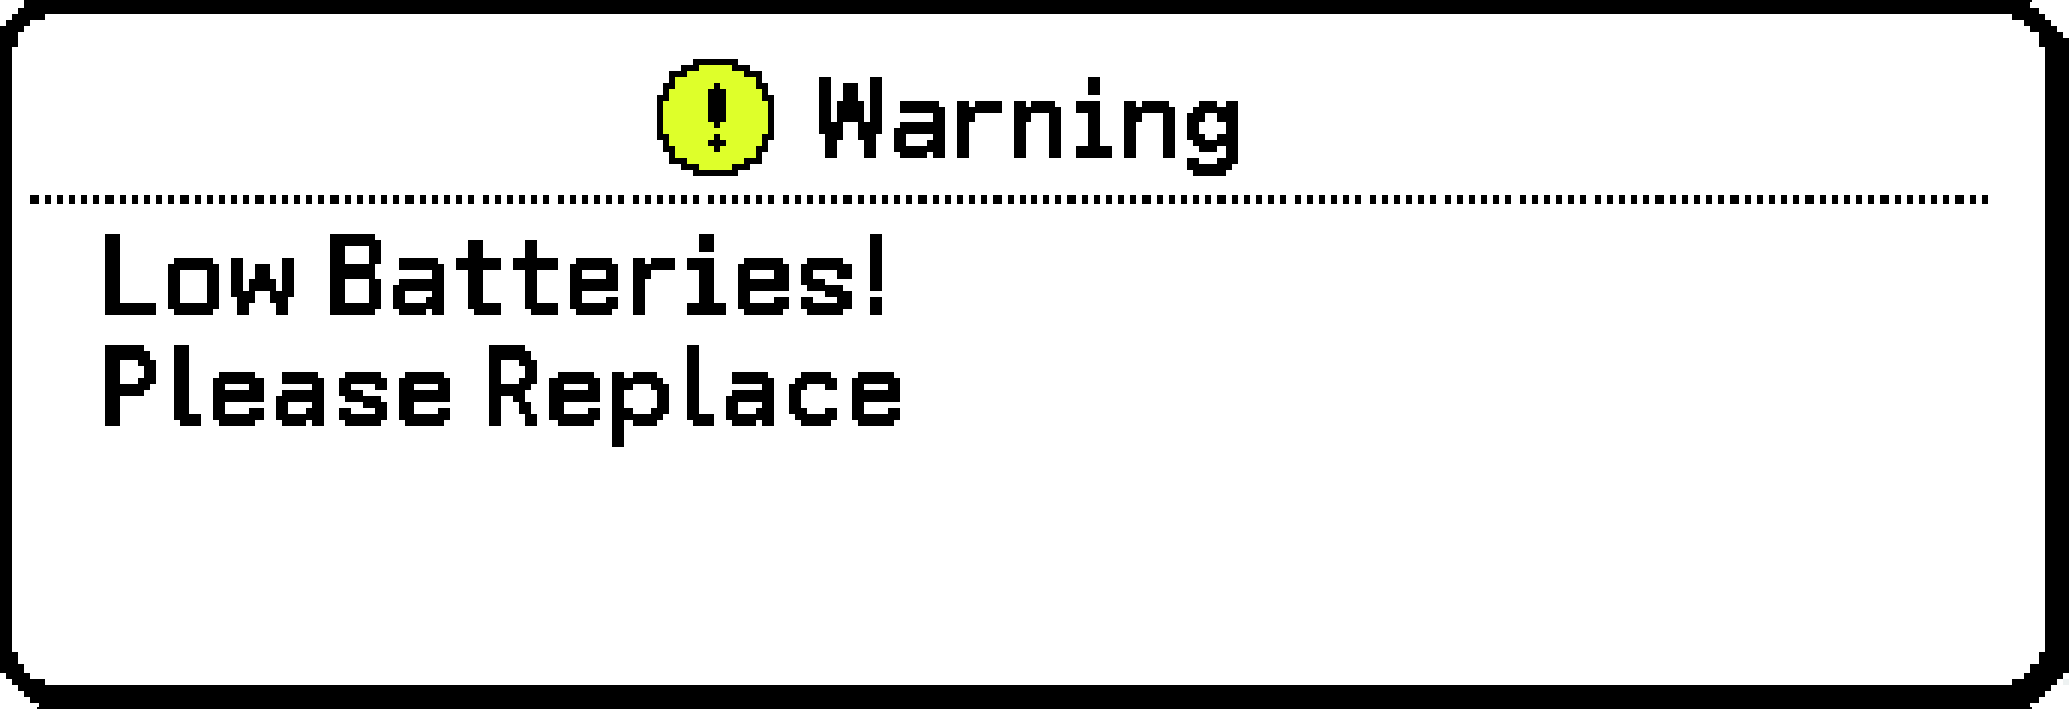
Important!
If you continue to use your calculator without replacing the batteries after the low battery warning appears, it will automatically turn off to protect memory contents, and you will not be able to turn it on again.
Leaving the unit without replacing the batteries after the low battery warning appears may cause the memory contents to be cleared.
After the low battery warning appears, you will not be able to transfer data to a computer until you replace the batteries.