System App
Use the System app to reset the calculator or to change settings that affect the overall calculator operation.
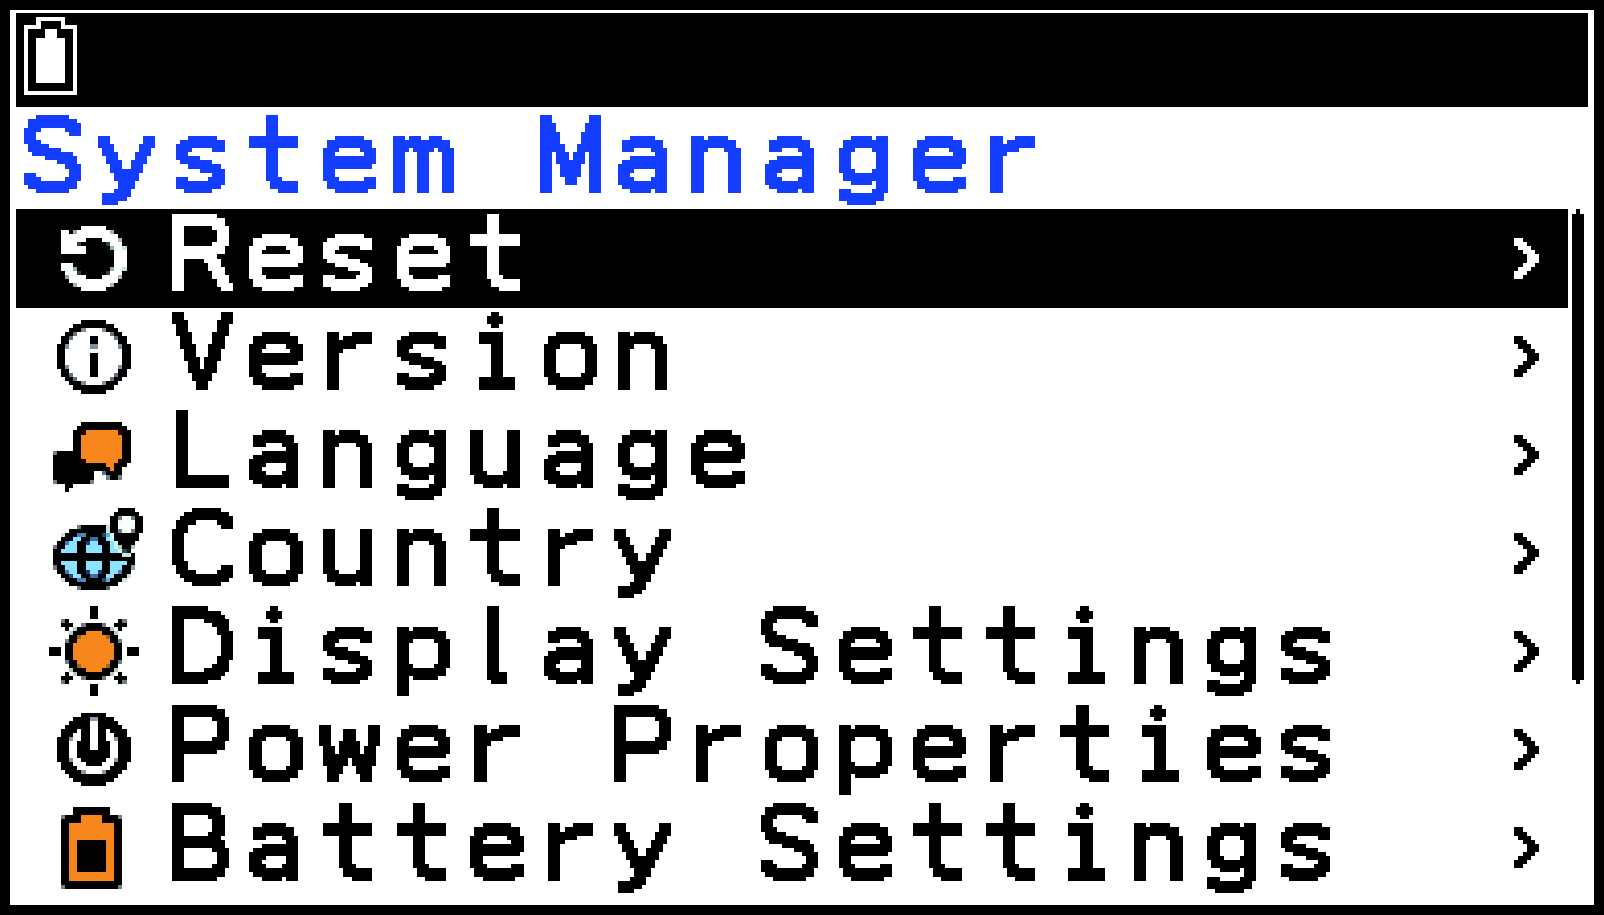
System Manager Menu
After you select h > System to launch the app, the System Manager menu appears first. All of the operations described in this section start from this menu.
System Manager Menu Items
Resetting the Calculator (Reset)
-
From the System Manager menu, select [Reset].
-
Select the menu item for the type of reset operation you want to perform.
-
To reset, select [OK]. To cancel the operation, select [Cancel].
|
To reset/delete this: |
Select this menu item: |
|---|---|
|
Main Memory SETUP contents System app settings listed below: CSV Format |
[Settings] |
|
All the Main Memory data Main Memory SETUP contents |
[Main Memory] |
|
All the Storage Memory data |
[Storage Memory] |
|
All the Main Memory and Storage Memory data Main Memory SETUP contents |
[Main&Storage] |
|
All the Main Memory and Storage Memory data Main Memory SETUP contents System app settings listed below: Display Settings, Auto Power Off, Battery Settings, CSV Format, Capture Format |
[Initialize All] |
Selecting a menu item causes a confirmation message to appear for the type of reset you selected.
Important!
After selecting [Initialize All], you need to perform several initial setup operations, just as you would immediately after turning on the calculator for the first time. The setup screens appear automatically in the following sequence. Configure the settings on each screen.
Viewing Version Information (Version)
You can view the OS version of the calculator on the Version information screen that appears when you select [Version] from the System Manager menu.
Note
While the Version information screen is displayed, pressing T will display the menu item [OS Update].
Selecting a Display Language (Language)
-
From the System Manager menu, select [Language].
-
Press O.
-
From the menu that appears, select the display language you want.
This displays the currently selected language.
Changing the Country Setting (Country) (fx-CG100 only)
The four available options for the Country setting are shown below. The default setting is “International”.
International
Portugal
United Kingdom
United States
The Country setting affects this calculator as described below.
The arrangement of the HOME screen app icons
The Catalog menu configuration and content
Display sequence in which categories appear on the menu
Items included in each category and the sequence in which they appear (except for the All category)
Exam Modes that can be selected with the Exam Mode app and the sequence in which they appear on the menu.
Note
Change the Country setting as required to use this calculator in specific countries. Otherwise, use the default setting (International).
Use the operation below to change the Country setting.
-
From the System Manager menu, select [Country].
-
Press O.
-
Highlight the option you want and then press O.
This displays the currently selected Country setting.
This displays a menu of Country setting options.
Adjusting Display Brightness (Display Settings)
-
From the System Manager menu, select [Display Settings].
-
Use l and r to adjust display brightness.
Configuring Auto Power Off and Backlight Duration Settings (Power Properties)
-
From the System Manager menu, select [Power Properties].
-
Perform one of the operations below to configure the setting you want.
-
Highlight [Auto Power Off] and then press O.
-
From the menu that appears, select [10 Min.] to specify approximately 10 minutes or [60 Min.] to specify approximately 60 minutes.
-
Highlight [Backlight] and then press O.
-
From the menu that appears, select [30 Sec.], [1 Min.], or [3 Min.].
|
To configure this setting: |
Perform this operation: |
|---|---|
|
Auto Power Off duration |
|
|
Backlight illumination duration |
|
Specifying the Battery Type (Battery Settings)
Important!
After replacing the batteries, be sure to perform the operation below to select the battery type of the new batteries.
-
From the System Manager menu, select [Battery Settings].
-
Press O.
-
From the menu that appears, select [Alkaline batteries] or [Ni-MH].
-
To register the selected battery type, select [OK]. To cancel the operation, select [Cancel].
This displays the currently selected battery type.

Read the warning message that appears on the display.
Specifying the CSV File Import and Export Format (CSV Format)
When importing a CSV file that has been transferred from a computer to the calculator, specify the delimiter symbol and decimal point in accordance with the settings you specified on the application when outputting the CSV file. The comma ( , ) or semi-colon ( ; ) can be specified for the delimiter, while the period ( . ) or comma ( , ) can be specified as the decimal point.
-
From the System Manager menu, select [CSV Format].
-
Use u and d to move the highlighting to [Separator], and then press O.
-
From the menu that appears, select [Comma] or [Semi-Colon], and then press O.
-
Use u and d to move the highlighting to [Decimal Separator], and then press O.
-
From the menu that appears, select [Period] or [Comma], and then press O.
If you chose [Comma] in step 2 above, you cannot choose [Comma] here.
Specifying the Image Capture Format (Capture Format)
Use the procedure below to specify the format of an image that was saved using screen capture.
-
From the System Manager menu, select [Capture Format].
-
Press O.
-
From the menu that appears, select [Memory] (to save in .g4p format) or [Bitmap] (to save in .bmp format).
This displays the currently selected image format.
Registering a User Name (User Name)
You can register a user name and organization name on your calculator. The registered user name and organization name are displayed on the screen when you turn off the calculator.
-
From the System Manager menu, select [User Name].
-
Highlight the line below “User Name.”
-
Input up to 19 characters for the user name and then press O.
-
Highlight the line below “Organization.”
-
Input up to 19 characters for the organization name and then press O.
Note
Select T > [Delete All] to delete all input on this screen.
“ID” at the bottom of the screen where you register your user name and organization name indicates the ID number of the device.