Memory App
Your calculator has two data storage areas named Main Memory and Storage Memory. You can use the Memory app to manage these two memory areas.
Main Memory:
This area is used for storage of input data, variables, and configuration data for apps such as Statistics and Graph&Table.
Storage Memory:
This area is used to store relatively large-volume data such as image files and py files. This area can also be used to create backup files of Main Memory data.
When you select h > Memory to start up the Memory app, the Main Memory tab contents appear first. You can use < and > to navigate between the Main Memory tab and the Storage Memory tab.
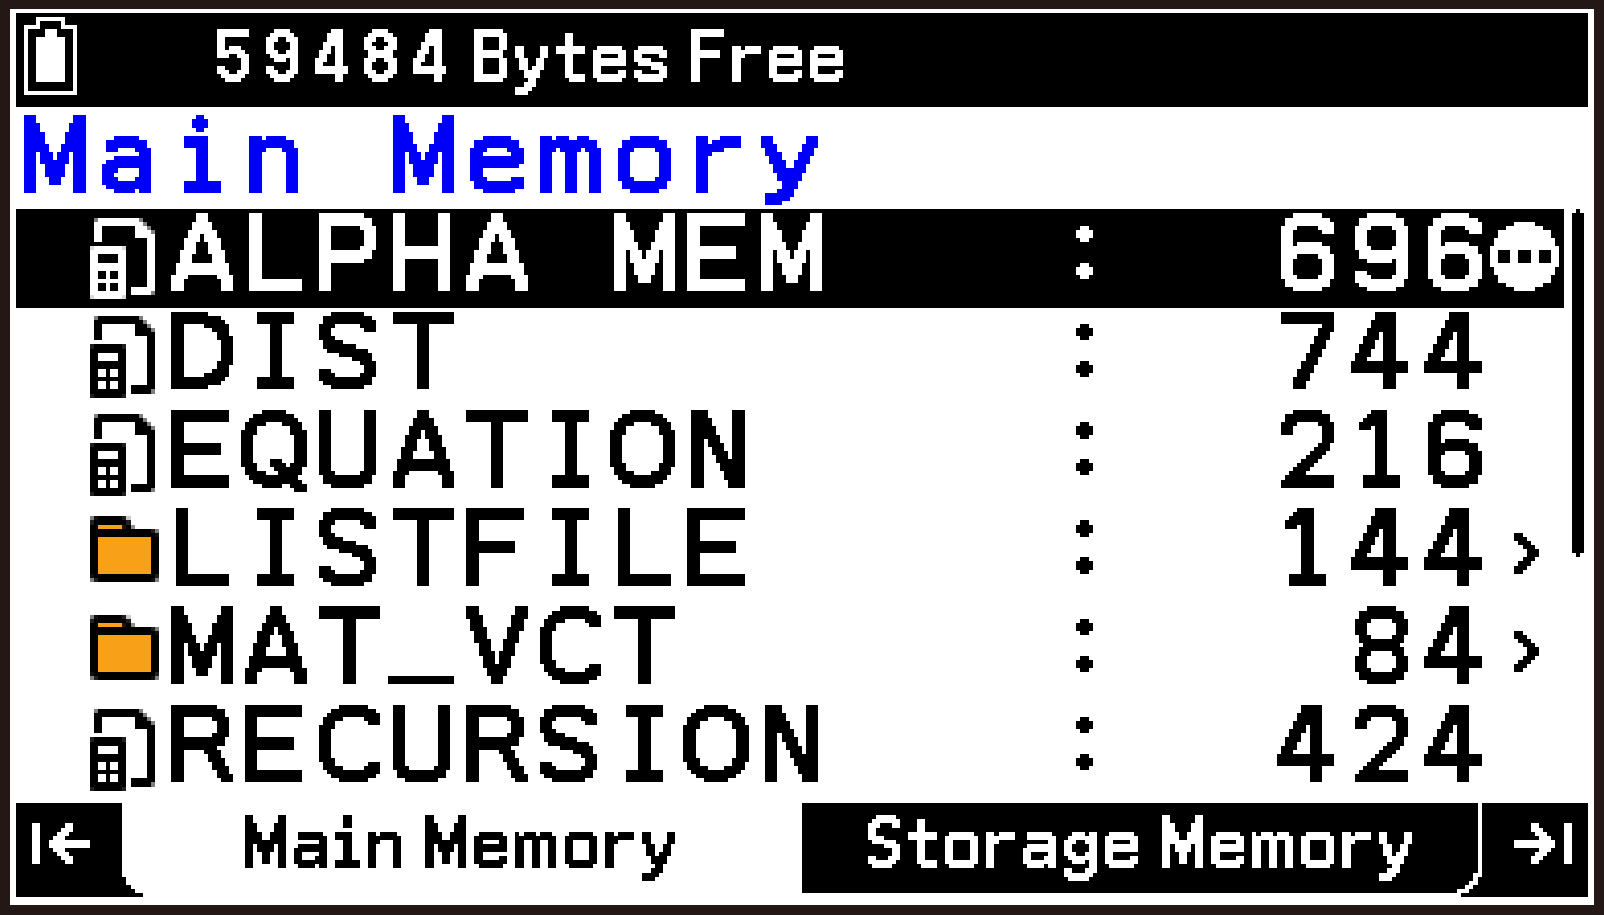

Using the Main Memory Tab
Data Displayed on the Main Memory Tab
The Main Memory tab shows calculator data using the names shown below.
|
Data Name |
Contents |
|---|---|
|
|
Alpha variables |
|
|
Conic Graphs app data |
|
|
Distribution app data |
|
|
Dyna Graph app data |
|
|
Equation app data |
|
|
Financial app data |
|
|
List variable group |
|
|
List variables ( = 1 to 26 and ANS) |
|
|
List files ( = 1 to 6) |
|
|
Matrix and vector variable group |
|
|
Matrix variables ( = A to Z and ANS) |
|
|
Vector variables ( = A to Z and ANS) |
|
|
Num Ineq app data |
|
|
Recursion app data |
|
|
Settings data and other setup data |
|
|
Statistics app data |
|
|
Operating system and shared app data (clipboard, calculation history, etc.) |
|
|
Spreadsheet app group |
|
|
Spreadsheet app setting data |
|
|
Spreadsheet app data (“SHEET” is the initial default spreadsheet file name.) |
|
|
Spreadsheet app data |
|
|
Graph&Table app table data |
|
|
Function variables |
|
|
3D Graph app group |
|
|
3D Graph app data |
|
|
Database app group |
|
|
Database app periodic table data |
|
|
Database app fundamental physical constants data |
|
|
Geometry app group |
|
|
Geometry app current data |
|
|
Geometry app data |
|
|
Prob Sim app group |
|
|
Prob Sim app data |
Main Memory Tab Operations
To create a backup file of all data
Use the procedure below to store a backup file of all Main Memory data in Storage Memory. The name of the file is always “BACKUP.g4m” and cannot be changed. If you want to create a save destination folder, go to the Storage Memory tab and create the folder in advance.
-
Select T > [Backup] > [Save Backup Data].
-
Use the operation below to select the save destination folder.
-
Highlight the folder you want to select and then press O. This will take you into the selected folder.
-
Highlight the folder’s name and then press O again.
This displays a dialog you can use to select a folder to save the data.
|
To select this folder: |
Perform this operation: |
|---|---|
|
Root directory |
Highlight ROOT and then press O. |
|
Other folders |
|
To restore all data from a backup file
You can use the procedure below to restore all data in Main Memory from a backup file stored in Storage Memory.
-
Select T > [Backup] > [Load Backup Data].
-
Use the operation below to select the folder where the backup file is stored.
-
Highlight the folder you want to select and then press O. This will take you into the selected folder.
-
Highlight the folder’s name and then press O again.*
-
Select [OK] to overwrite all existing data in Main Memory with the contents of the backup file, or [Cancel] to cancel the operation.
This displays a dialog for selecting the folder where the backup file is stored.
|
To select this folder: |
Perform this operation: |
|---|---|
|
Root directory |
Highlight ROOT and then press O.* |
|
Other folders |
|
This displays a confirmation message asking if you want to overwrite existing data.
If the selected folder does not contain a backup file, the message “No Data” will appear.
To save specific data or groups as a single file in Storage Memory
-
Highlight the data or group you wish to save to a file.
-
Select T > [Save As].
-
Use the operation below to select the save destination folder.
-
Highlight the folder you want to select and then press O. This will take you into the selected folder.
-
Highlight the folder’s name and then press O again.
-
Use the dialog that appears to input up to eight characters for the file name and then press O.
This displays a dialog you can use to select a folder to save the data.
|
To select this folder: |
Perform this operation: |
|---|---|
|
Root directory |
Highlight ROOT and then press O. |
|
Other folders |
|
The file name extension of the saved file is .g4m.
Saved files can be loaded into Main Memory using the operations on the Storage Memory tab. See To load a g4m file into Main Memory.
To delete specific data or groups
-
Highlight the data or group you want to delete.
-
Select T > [Delete].
-
To delete, select [OK]. To cancel the operation, select [Cancel].
This causes a delete confirmation message to appear.
Using the Storage Memory Tab
Files Displayed on the Storage Memory Tab
Files created with the calculator and files transferred from a computer to the calculator are displayed on the Storage Memory tab.
|
File Extension |
Description |
|---|---|
|
|
File that contains Main Memory data. |
|
|
File that contains a screen image captured with the calculator.*2 |
|
|
Bitmap format image file. |
|
|
File that contains a screen image captured with an earlier Color Graph scientific calculator. |
|
|
Python script file (py file) |
|
|
CSV files |
|
|
These files are not supported by this calculator, but you can use this calculator to delete them. |
Files of these formats can be used as background images of graph windows.
The Geometry app data with background image is also saved as a g4p file. For more information, see Displaying a Geometry App Screen Background Image.
Note
Folders are indicated by the icon ![]() on the Storage Memory tab.
on the Storage Memory tab.
If the name of a file transferred to Storage Memory from your computer has a file name that is more than eight characters long, its name will be abbreviated to eight characters when displayed on the Storage Memory tab (Example: AAAABBBBCC.py > AAAABB~1.py). Also, if a file name extension has more than three characters, everything after the third character of the file name extension will be trimmed off.
Up to 200 files per folder can be displayed on the Storage Memory tab. If a folder has more than 200 files and you need to display them all, divide them among multiple folders so the total number of files in a single folder is not greater than 200.
Though you can create folders on your computer nested to more than three levels in Storage Memory, this calculator will display only up to the third level.
The following are single-byte characters that can be used in file names and folder names.
A-Z, a-z, 0-9, !, #, $, %, ,(comma), (, ), +, –, ., ;, =, @, [, ], ^, _, `, space
Note that file names and extensions are not case-sensitive.
Storage Memory Tab Operations
To load a g4m file into Main Memory
You can use the operation below to load g4m files* into Main Memory.
Backup files created with Main Memory tab operations or individually saved files with Main Memory tab operations.
Important!
If duplicates of the data items below are found in step 2 of the procedure below, a confirmation message will appear asking if you want to overwrite the existing data.
DYNA MEM, LIST , LISTFILE , MAT , VCT , Spreadsheet app data, data in the DBASE group, data in the GEOM group
The data items below are always overwritten without displaying a confirmation message.
ALPHA MEM, CONICS, DIST, EQUATION, FINANCE, NUMINEQ (fx-CG100 only), RECURSION, SETUP, STAT, SYSTEM, S-SHEET (_SETTING), TABLE, Y=DATA, 3DGRAPH, PROBSIM
For details about data contents, see Data Displayed on the Main Memory Tab.
-
Highlight the g4m file you want to load into Main Memory.
-
Select T > [Load].
This starts the load operation. During loading, a confirmation message like the one on the right may appear. For more information, see “Important!” above. To overwrite, select [OK]. To cancel the operation, select [Cancel].
The message Complete! appears on the display when the load operation is complete.

Note
In the cases described below, the load operation does not start when you select T > [Load] in step 2.
When battery power is low (Low Battery error)
When there is not enough free space in Main Memory (Memory Full error)
When there are too many data items in Main Memory (Too Much Data error)
When a file that is not a g4m file is selected (Invalid Type error)
To create a folder
-
Display the location (in the root directory or folder) where you want to create a folder.
-
Select T > [Folder] > [Make Folder].
-
Use the dialog that appears to input up to eight characters for the folder name and then press O.
You can nest folders up to three levels.
To rename a folder
-
Highlight the folder you want to rename.
-
Select T > [Folder] > [Rename Folder].
-
Use the dialog that appears to input up to eight characters for the folder name and then press O.
To view detailed information about a file
-
Highlight the file whose details you want to view.
-
Select T > [Detail].
This displays the detailed information screen.
With a g4p or g3p file, you can preview images by pressing r.
Pressing u or d while a detailed information screen (or image preview screen) is displayed will scroll either up or down to the detailed information screen (or image preview screen) of the next file in the sequence that the files are listed on the Storage Memory tab.
To delete a file or folder
-
Highlight the file or folder you want to delete.
-
Select T > [Delete].
-
To delete, select [OK]. To cancel the operation, select [Cancel].
This causes a delete confirmation message to appear.