Creating a Number Table
You can use the Table app to create a number table based on the defining equations registered for functions f(x) and g(x).
General Procedure for Creating a Number Table
Example : To generate a number table for the functions f(x) = x2 + 12 and g(x) = x2 − 12 for the range -1 ≤ x ≤ 1, incremented in steps of 0.5
1. Press  , select the Table app icon, and then press
  .
.
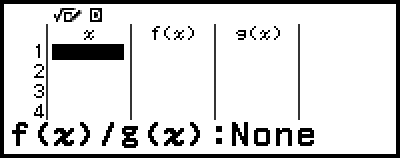
This displays the number table screen.
If a defining equation is not registered for either or both of f(x) and g(x) and the data at the cursor selection position is empty, a message will appear at the bottom of the screen indicating that the defining equation is not registered.
2. Configure settings to generate a number table from two functions.
(1) Press  , and then select [Table Type] > [f(x)/g(x)].
(2) Press  .
.
For information about settings, see "Maximum Number of Rows in a Number Table According to Table Type".
3. Register a defining equation for f(x).
- – [Define f(x)/g(x)] > [Define f(x)]


 1
1 2
2

- (Screen immediately before you pressed )
4. Register a defining equation for g(x).
- – [Define f(x)/g(x)] > [Define g(x)]
 12
12 
- (Screen immediately before you pressed )
5. Configure the number table range setting.
- – [Table Range]
 ((-))110
 5
5 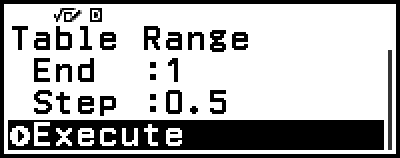
6. Press .
This displays the result in the number table screen.
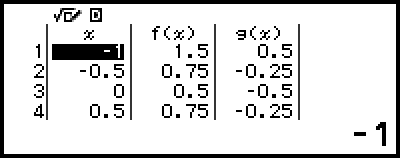
The number table generation operation causes the contents of variable x to be changed to the end value you input in step 5 above.
Note
On the number table screen, you can store the value in a cell to a variable. For example, performing the following operation while the screen in step 6 is displayed above will store -1 to variable A:  – [A=] > [Store]. For details about variables, see "Variables (A, B, C, D, E, F, x, y, z)".
Maximum Number of Rows in a Number Table According to Table Type
You can configure number table screen settings to show columns for both f(x) and g(x), or for either one of them. To set it, use the menu that appears when you press – [Table Type] while the number table screen is displayed.
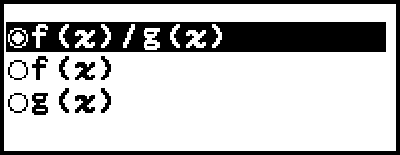
f(x)/g(x) ... Show both f(x)- and g(x)-columns (initial default setting)
f(x) ... Show only f(x)-column
g(x) ... Show only g(x)-column
The maximum number of rows in the generated number table depends on the Table Type setting. Up to 45 rows are supported for the "f(x)" or "g(x)" setting, while 30 rows are supported for the "f(x)/g(x)" setting.
Editing Number Table Screen Data
To delete a row
1. On the number table screen, move the cursor to the row you want to delete.
2. Press  .
.
To insert a row
1. On the number table screen, move the cursor to the row that will be under the row you will insert.
2. Perform the following operation: – [Edit] > [Insert Row].
To delete all number table screen contents
On the number table screen, perform the following operation: – [Edit] > [Delete All].
To change the value input in a cell in column x
You can change the value in the currently highlighted x cell. Changing the x value causes the f(x) and g(x) values in the same row to be updated accordingly.
To enter a value into the highlighted x-column cell using: {value of the cell above} +/− {step value}
If there is value in the x cell above the currently highlighted x cell, pressing or automatically inputs into the highlighted cell the value equal to the value of the cell above it plus the step value. So also, pressing automatically inputs the value equal to the value of the cell above less the step value. The f(x) and g(x) values in the same row are also updated accordingly.
f(x) and g(x) Update Timing
f(x) and g(x) values displayed on the number table screen are updated when any of the following occurs.
When is pressed while [Execute] is selected on the Table Range screen.
When the defining equations for f(x) and g(x) are updated.
When a number is input into column x (including pressing , , in column x).
When Verify is switched from enabled to disabled ( – [Verify OFF]).
Note, however, that values are not updated automatically after the following operations.
When the SETTINGS menu is used to change the Angle Unit setting.
When the variable of a defining equation is updated (new numeric value stored) when a defining equation that contains a variable (example: f(x) = 2x + A) is registered.
In these cases, execute – [Recalculate] while the number table screen is displayed to update values.
Using Verify with the Table App
If Verify is enabled in the Table app, every time you input an f(x) value (or a g(x) value) that corresponds to x on the number table screen, the calculator will determine if the value is true.
Note
Verify can be used with various calculator apps. Before performing the operations in this section, first read the information in "Verify Overview".
Verify Sample Operation
This sample operation begins with a number table that has been created according to the following settings.
Defining equation ...... f(x) = x2 + 12 g(x) = x2 − 12
Table Range ......... Start: -1, End: 1, Step: 0.5
Perform the procedure continuing from step 6 under "General Procedure for Creating a Number Table".
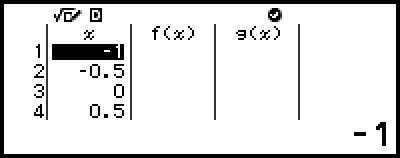
1. To enable Verify, press and then select [Verify ON].
An  indicator appears at the top of the screen to indicate that Verify is enabled.
This deletes all of the contents of the f(x)- and g(x)-columns of the number table screen.
2. Press  to move the cursor to the first row of column f(x).
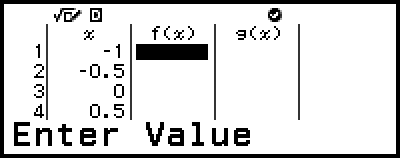
3. Input the f(x) value (1.5) that corresponds to x = 1.
- 15
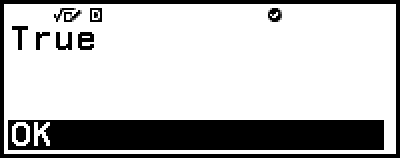
"True" is displayed if the input value is true.
"False" is displayed if the input value is false. Press  , , or to return to the number table screen and re-input the number.
4. If "True" is displayed, press , , or .
This returns to the number table screen and moves the cursor to the next row.
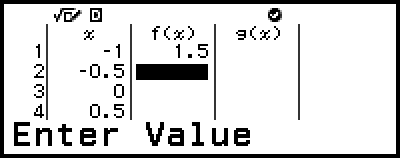
You can continue to input f(x) and g(x) values for x. Each time you input a value, the calculator determines whether it is true.
5. To disable Verify and end the Verify operation, press and then select [Verify OFF].
This causes the indicator to disappear from the screen.
For details about the operation to disable Verify, see "To disable Verify".
Any changes you made to or new values you input into the x-column values of the number table screen while Verify was enabled are retained. When you disable Verify, the f(x)- and g(x)-columns are recalculated in accordance with the values in the x-column.
Note
If the verification result is "True", the value input into the f(x)- or g(x)-column can be stored to a variable. For example, performing the following operation while the screen in step 4 is displayed above will store 1.5 to variable A:  – [A=] > [Store]. For details about variables, see "Variables (A, B, C, D, E, F, x, y, z)".
You can change the value in a cell by moving the cursor to the cell in column x and inputting a new value. Changing the value in an x cell causes the values in columns f(x) and g(x) to be deleted.
You can also input a value into an x-column cell that does not contain a value (if the maximum number of rows is not exceeded yet). For information about the maximum number of rows, see "Maximum Number of Rows in a Number Table According to Table Type".
Pressing  while Verify is enabled disables Verify and simultaneously deletes all data currently input in the number table.
To delete all the contents of the f(x)- and g(x)-columns
When Verify is enabled, the contents of the f(x)- and g(x)-columns can be batch deleted. On the number table screen, perform the following operation: – [Edit] > [Delete f/g Column].
Data Retention
Doing the following will discard some data and clear some settings of the Table app.
① Returning to the HOME screen and launching another calculator app.
② Pressing .
③ Changing the Input/Output setting with the SETTINGS menu.
④ Changing the Table Type setting with the TOOLS menu.
The table below shows which data is discarded and which data is retained.
Operation Data, Setting |
① | ② | ③ | ④ |
| Number table data (x-, f(x)-, g(x)-columns) |
Discarded | Discarded | Discarded | Discarded |
| Table Range settings | Discarded | Retained | Retained | Retained |
| Table Type settings | Retained | Retained | Retained | -- |
| f(x), g(x) defining equations | Discarded | Discarded | Discarded | Retained |