Equation Calculations
The Equation app includes the three functions described below. After starting up the app, you can use the Equation menu that appears to select the function you want.
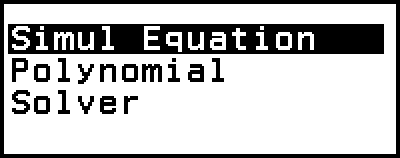
Simul Equation: Simultaneous linear equations with two to four unknowns
Polynomial: High-order equations from 2nd to 4th degree
Solver: Function to find the value of any variable contained in an input equation
Simultaneous Linear Equations
Here, we explain the general procedure for solving a simultaneous equation with an example that solves a simultaneous linear equation with three unknowns.
Example 1: 
1. Press  , select the Equation app icon, and then press
  .
.
This displays the Equation menu.

2. Select [Simul Equation], and then press .
This displays the number of unknowns menu.

3. Select [3 Unknowns], and then press .
This displays the Coefficient Editor.
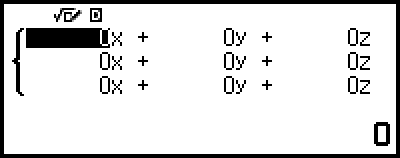
4. Use the Coefficient Editor to input coefficient values.
- 1


 ((-))112
11((-))10
((-))1114 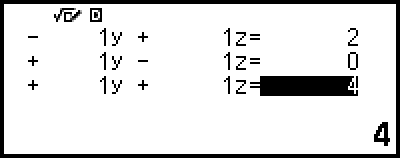
Pressing  while the Coefficient Editor is displayed will clear all of the coefficients to zero.
5. Press .
This will display a solution.
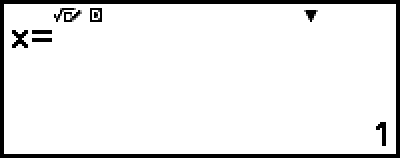
While the  indicator is displayed, each press of
  (or ) will display another solution.
- (or )
- (or )
Pressing  or
or  while the
  indicator is displayed causes the previously displayed solution to reappear.
Pressing while the final solution is displayed returns to the Coefficient Editor. To return to the Coefficient Editor while any solution is displayed, press .
Pressing while the Coefficient Editor is displayed returns to the number of unknowns menu.
Note
While the Coefficient Editor is displayed, you can store the currently highlighted value to a variable. Also, while the solution is being displayed, the currently displayed solution can be stored to a variable. For details about variables, see "Variables (A, B, C, D, E, F, x, y, z)".
High-order Equations from 2nd to 4th Degree
When you solve a high-order equation with the Equation app, the values below are displayed according to the degree of the equation.
Quadratic Equation
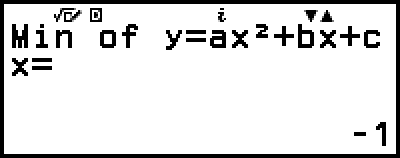
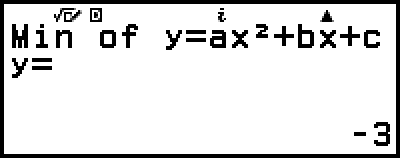
Following the display of the solution of ax2+bx+c=0, the minimum (or maximum) coordinates (x, y) for y=ax2+bx+c are displayed.
Cubic Equation
Following the display of the solution of ax3+bx2+cx+d=0, the coordinates (x, y) of the local minimum (or local maximum) of y=ax3+bx2+cx+d are displayed, only if a local minimum or local maximum exists. If a local minimum or local maximum does not exist, pressing while the last solution is displayed will cause the message "No Local Max/Min" to appear.
Quartic Equation
The solution of ax4+bx3+cx2+dx+e=0 is displayed.
Here we will show an example of a quadratic equation to explain the general procedure for solving a high-order equation.
Example 2: x2 + 2x − 2 = 0
(Input/Output: MathI/MathO)
1. Press , select the Equation app icon, and then press .
This displays the Equation menu.

2. Select [Polynomial], and then press .
This displays the number of degrees menu.
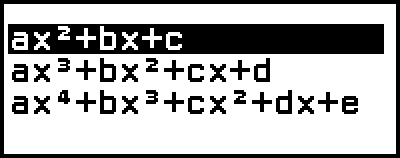
3. Select [ax2+bx+c=0], and then press .
This displays the Coefficient Editor.
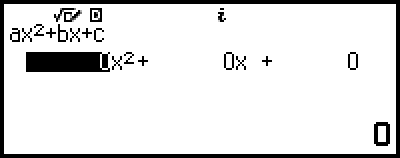
4. Use the Coefficient Editor to input coefficient values.
- 12((-))2
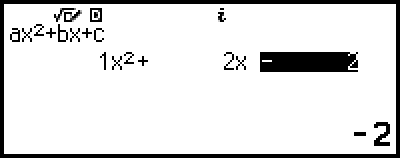
Pressing while the Coefficient Editor is displayed will clear all of the coefficients to zero.
5. Press .
This will display a solution.
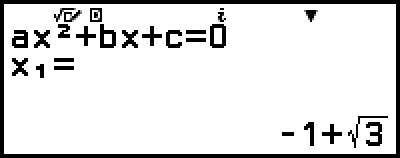
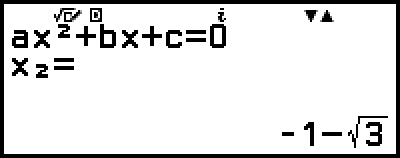
While the indicator is displayed, each press of (or ) will display another calculation result (solution or coordinate).
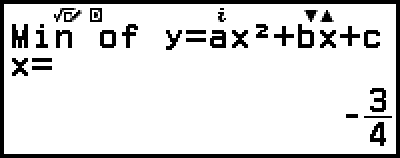
- (or )
(Displays x-coordinate of minimum of y = x2 + 2x − 2.)
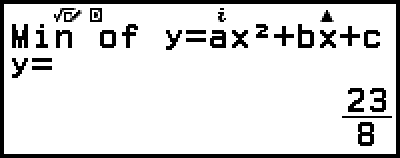
- (or )
(Displays y-coordinate of minimum of y = x2 + 2x − 2.)
- (or )
Pressing or while the indicator is displayed causes the previously displayed calculation result to appear again.
Pressing while the final calculation result is displayed returns to the Coefficient Editor. To return to the Coefficient Editor while any calculation result is displayed, press .
Pressing while the Coefficient Editor is displayed returns to the number of degrees menu.
Note
While the Coefficient Editor is displayed, you can store the currently highlighted value to a variable. Also, while a calculation result (solution or coordinate) is displayed, it can be stored to a variable. For details about variables, see "Variables (A, B, C, D, E, F, x, y, z)".
Complex Number Solution Display (Complex Roots)
High-order equations may have complex number solutions. When Polynomial is selected on the Equation menu, you can use the operations below to enable or disable complex number solution display.
 – [Complex Roots] > [On]
Enables complex number solution display (initial default setting).
– [Complex Roots] > [Off]
Disables complex number solution display. Inputting and executing an equation that has one or more complex number solutions only will cause the message "No Real Roots" to appear.
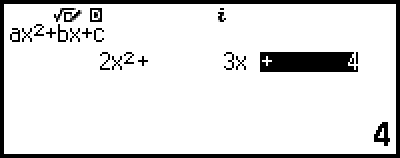
Example 3: 2x2 + 3x + 4 = 0
(Input/Output: MathI/MathO, Complex Result: a+bi, Complex Roots: On)
1. Press , select the Equation app icon, and then press .
This displays the Equation menu.

2. Select [Polynomial] > [ax2+bx+c=0].
This displays the Coefficient Editor.

3. Use the Coefficient Editor to input coefficient values.
- 234
4. Press .
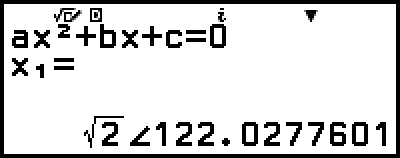
This will display a solution.
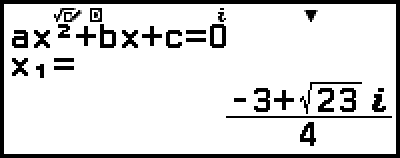
5. Display another solution and coordinate values.
- (or )
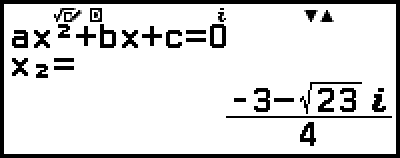
- (or )
- (or )
Pressing while the final calculation result is displayed returns to the Coefficient Editor. To return to the Coefficient Editor while any calculation result is displayed, press .
Converting a Complex Number Solution to Rectangular or Polar Coordinates
You can use the FORMAT menu that appears when you press  (
( ) to convert a complex number solution to rectangular coordinate or polar coordinate format.
Example 4: To convert the complex number solution displayed in Example 3 to polar coordinate format and then to rectangular coordinate format
1. Perform steps 1 to 4 of Example 3.

2. Press (), select [Polar Coord], and then press .
This converts the solution to polar coordinate format.
3. Press (), select [Rectangular Coord], and then press .
This converts the solution to rectangular coordinate format.

Using Solver
Solver uses Newton’s method to approximate the solution of equations. Solver supports input of equations of the following formats.
Examples: y = x + 5, x = sin(A), xy + C (Treated as xy + C = 0)
Example 5: To solve x2 − B2 = 0 for x when B = 4
(Input/Output: MathI/MathO)
Note
Before solving x2 − B2 = 0 for x, 4 needs to be stored to variable B. This is done in step 3 of the procedure below.
1. Press , select the Equation app icon, and then press .
This displays the Equation menu.
2. Select [Solver], and then press .
This displays the Solver equation input screen.
3. Here, store 4 to variable B.

 4
4
This operation can be executed at any point before step 7 of this procedure.
For details about variables, see "Variables (A, B, C, D, E, F, x, y, z)".
Press to return to the Solver equation input screen.
4. Input the equation.


 (B)
(B) 2
2
 (=)*0
(=)*0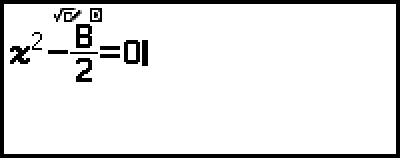
* You can also use the following operation to input = sign:  – [Equation] > [=].
5. Press to register the input equation.
6. On the Solve Target screen that appears, confirm that [x] is selected and then press .
This displays a screen with the initial value of x.
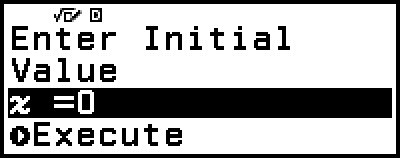
7. Input 1 as the initial value of x.
- 1
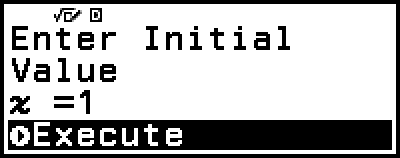
8. After making sure that [Execute] is selected, press to solve the equation.
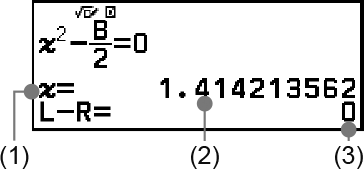
(1) Variable solved for
(2) Solution
(3) (Left Side) − (Right Side) result
Solutions are always displayed in decimal form.
The closer the (Left Side) − (Right Side) result is to zero, the higher the accuracy of the solution.
9. Next, press the key that performs the operation you want.
| To do this: | Press this key: |
|---|---|
| Return to the screen in step 6. | * |
| Store the input expression and return to the screen in step 4. | or |
* The initial value when you press this key becomes the initial value you last used for the calculation.
Important!
-
Solver performs convergence a preset number of times. If it cannot find a solution, it displays a confirmation screen like the one nearby, asking if you want to continue. Press
while [Continue] is selected to continue or select [Exit] and then to cancel the Solver operation. 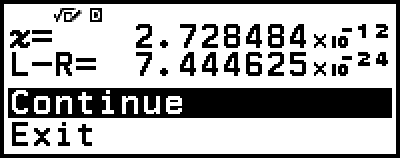
Depending on what you input for the initial value for the solution variable (x in the above example), Solver may not be able to obtain a solution. If this happens, try changing the initial value so it is closer to the solution.
Solver may not be able to determine the correct solution, even when one exists.
Solver uses Newton’s method, so even if there are multiple solutions, only one of them will be returned.
Due to limitations in Newton’s method, solutions tend to be difficult to obtain for equations like the following: y=sinx, y=ex, y=√x.
Using Verify with the Equation App
The Equation app lets you use Verify for simultaneous or high-order equations. Enabling Verify with the Equation app causes an answer menu like the one shown below to appear in place of the solution.

After you use this menu to enter a response (by selecting [Enter Solution] and then inputting a solution, or selecting [No Solution] or [Infinite Solution]), the calculator will determine if your response is true.
Note
The above menu appears in the case of Simul Equation. A different menu will appear in the case of Polynomial.
Verify can be used with various calculator apps. Before performing the operations in this section, first read the information in "Verify Overview".
Verify cannot be used with the Equation app functions below.
- [Simul Equation] > [3 Unknowns] or [4 Unknowns]
- [Polynomial] > [ax3+bx2+cx+d=0] or [ax4+bx3+cx2⋯+e=0]
- [Solver]
Selecting any one of the above menu items on the Equation menu while Verify is enabled causes the message "Not Compatible with Verify" to appear on the display.
Example Verify Operation
Example 6: Input the two solutions (x1 = -1 + √3, x2 = -1 − √3) of the equation x2 + 2x − 2 = 0 solved in Example 2, and determine if they are true. Also, select whether this equation has a minimum value or a maximum value, input coordinate values (x, y), and determine if the values are true.
1. Perform steps 1 to 4 of Example 2.

2. To enable Verify, press and then select [Verify ON].
An  indicator appears at the top of the screen to indicate that Verify has been enabled.
3. Press .
This displays the quadratic equation answer menu.

4. Confirm that [Solution] is selected, and then press .
This displays the number of solutions menu.
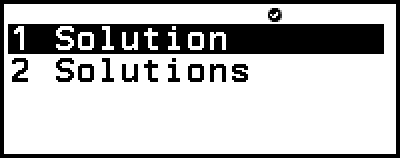
5. Here, select [2 Solutions] and then press .
6. On the solution input screen that appears, input x1 and x2.
- ((-))1

 3
3
((-))13 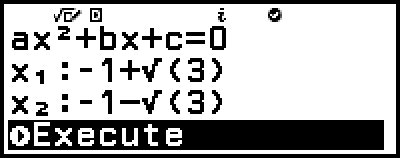
7. Confirm that [Execute] is selected, and then press .

"True" appears on the display if the number of solutions and all the input solutions are correct.
"False" appears if the number of solutions or the input solution is wrong. Press or to return to the solution input screen and input the value again. To change the number of solutions selection, press on the solution input screen and start over from step 4.
8. Confirm that [Back to Equation] is selected, and then press .
This returns to the Coefficient Editor in step 1 of this procedure.
9. Press to display the answer menu and then select [Max] or [Min].
The equation x2 + 2x − 2 = 0 has a minimum value, so we will select [Min] and then press .
10. On the coordinate value input screen that appears, input x and y.
- ((-))1
((-))3 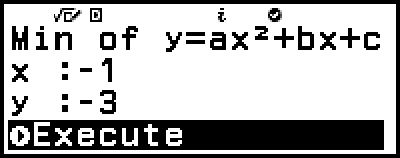
11. Confirm that [Execute] is selected, and then press .

"True" appears on the display when the maximum or minimum value selection and all the input coordinate values are correct.
"False" appears when the maximum or minimum value selection or an input coordinate value is wrong. If this happens, press or to return to the coordinate value input screen and input values again. If you want to change maximum/minimum value selection, press on the coordinate value input screen and start over from step 9.
12. Confirm that [Back to Equation] is selected, and then press .
This returns to the Coefficient Editor in step 1 of this procedure.
13. To disable Verify and exit the Verify operation, press and then select [Verify OFF].
This causes the indicator to disappear from the screen.
For information about how to disable Verify, see "To disable Verify".
Note
You can view the solution and the minimum value by selecting [Confirm Solution] in step 8 or step 12 of this procedure, and then pressing . The screen that appears and the operations that can be performed are the same as those in step 5 of Example 2.