Displaying the Map View
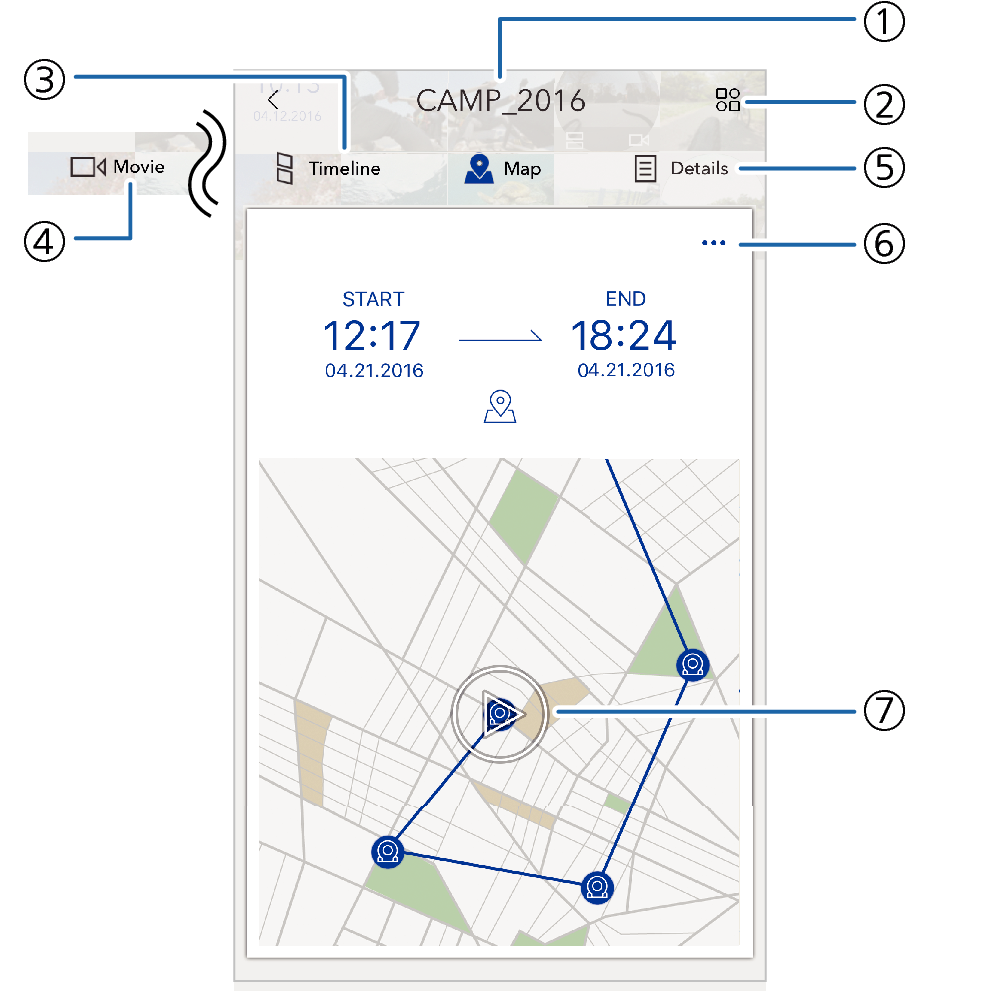
Map View displays Album photos and movies on a map.
To display the Map View from the Timeline View, tap “Map”.
Map View Operations

- ①
-
Album title
- ②
-

You can change the highlighted images of the Map View, if you want.
- Swiping the screen from top to bottom will also display a screen for changing highlighted images.
- ③
-
Timeline icon
Changes to the Timeline View.
- Swiping the screen from left to right also shifts the timeline.
- ④
-
Movie icon
Changes to the Movie View.
- ⑤
-
Details icon
Changes to the Detailed View.
- Swiping the screen from right to left also changes to the Detailed View.
- ⑥
-

Opens a menu.
- ⑦
-

Displays a full-screen view of the map and automatically plays back the tracks of the selected images.
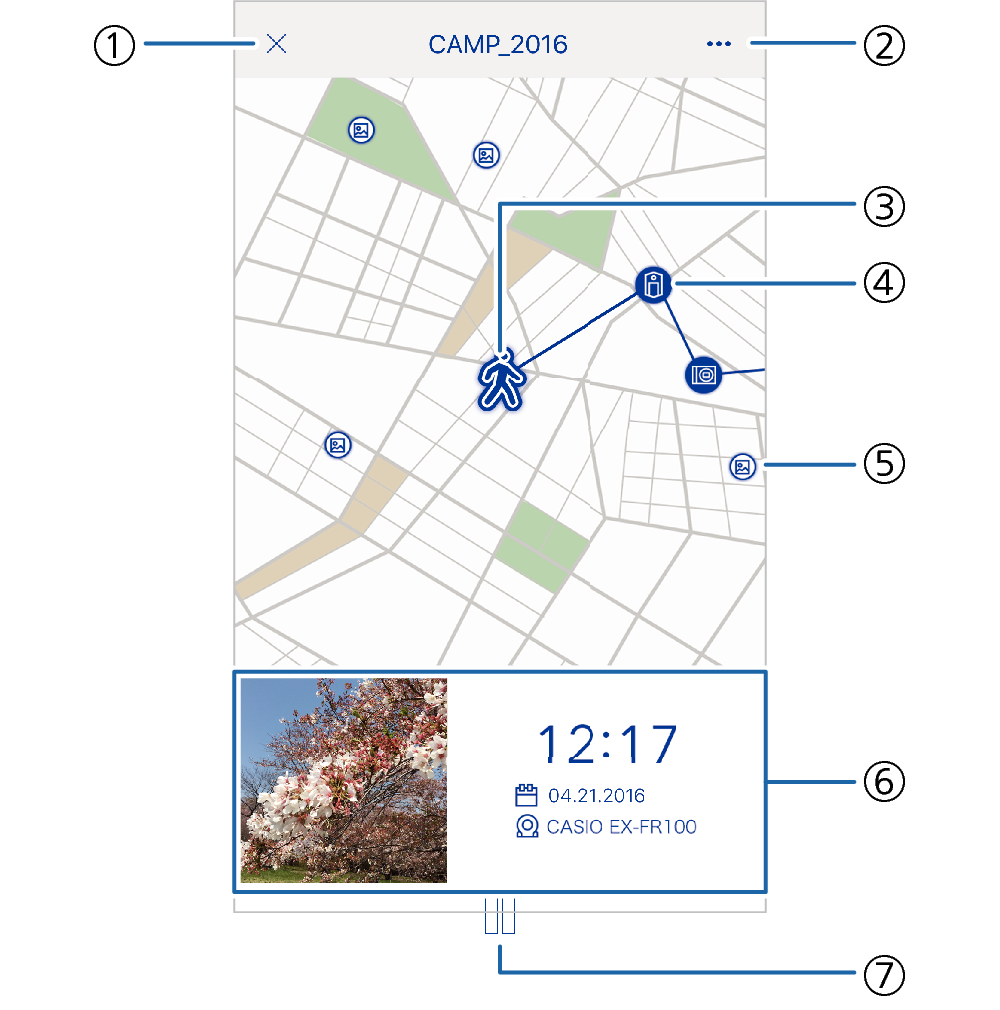
Map View Full-screen Operations

- ①
-

Closes the full-screen view and returns to the normal Timeline View.
- ②
-

Opens a menu.
- ③
-
Movement icon
Shows movement in the center of the display. This icon is displayed in the center of the screen during Auto Play.
- ④
-
Highlight pin
Shows the location where an album’s highlighted image was shot.
Auto playback of tracks moves from highlight pin to highlight pin in sequence. When the movement icon moves to a highlight pin, the pin changes to a thumbnail of the applicable image.
- Tapping a highlight pin displays a thumbnail of its image and pauses auto playback.
- ⑤
-
Normal pin
Shows the location of where an album’s unhighlighted image was shot.
- Tapping a normal pin displays a thumbnail of its image and pauses auto track playback.
- ⑥
-
Image area
Shows a thumbnail of and information about an image.
- Tapping the image area displays a full-screen view of the image.
- While auto track playback is paused, you can scroll between images by flicking the image area left or right.
- ⑦
-

Pauses auto track playback.
- To resume playback, tap
 .
.
- To resume playback, tap

 Top of page