Displaying a Highlight Timeline
Use the procedure below to select a day’s highlighted snapshots and movies highlights in an album, and display a Highlight Timeline that arranges them in chronological order.
-
1.Use the “RECENTLY” screen or “ALL ALBUMS” screen to look for the album you want to view.
-
- The first time you open an automatically created album, a theme selection screen will appear. Specifying an album theme will cause the album design to change accordingly.
-
2.Tap the desired album.
-
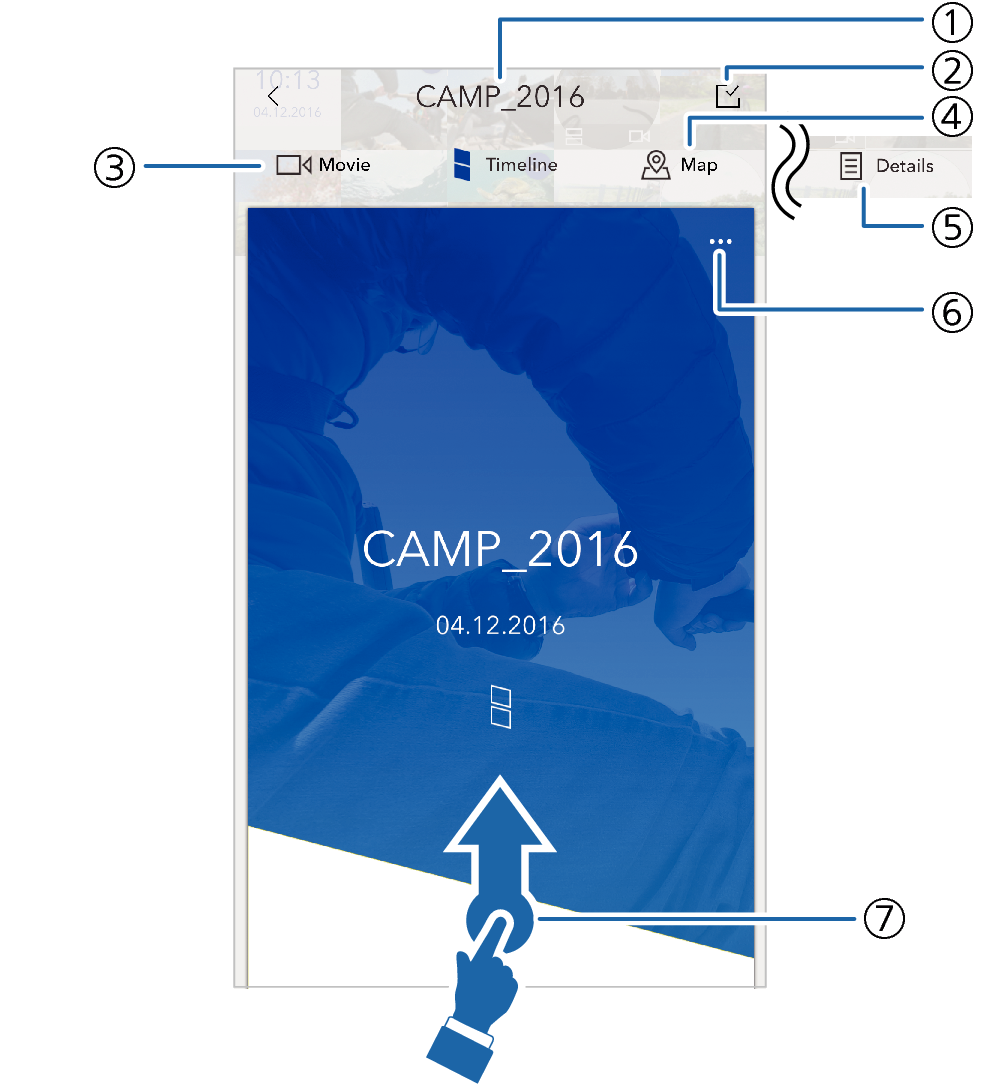
This displays the Timeline View.
Timeline View Operations

- ①
-
Album title
- ②
-

You can change the images used in the Highlight Timeline, if you want.
- Swiping the screen from top to bottom will also display a screen for changing the images that are used.
- ③
-
Movie icon
Changes to the Movie View.
- Swiping the screen from left to right also changes to the Movie View.
- ④
-
Map icon
Changes to the Map View.
- Swiping the screen from right to left also changes to the Map View.
- ⑤
-
Details icon
Changes to the Detailed View.
- ⑥
-

Opens a menu.
- ⑦
-
Swiping the screen from bottom to top displays a full-screen view of the Highlight Timeline.
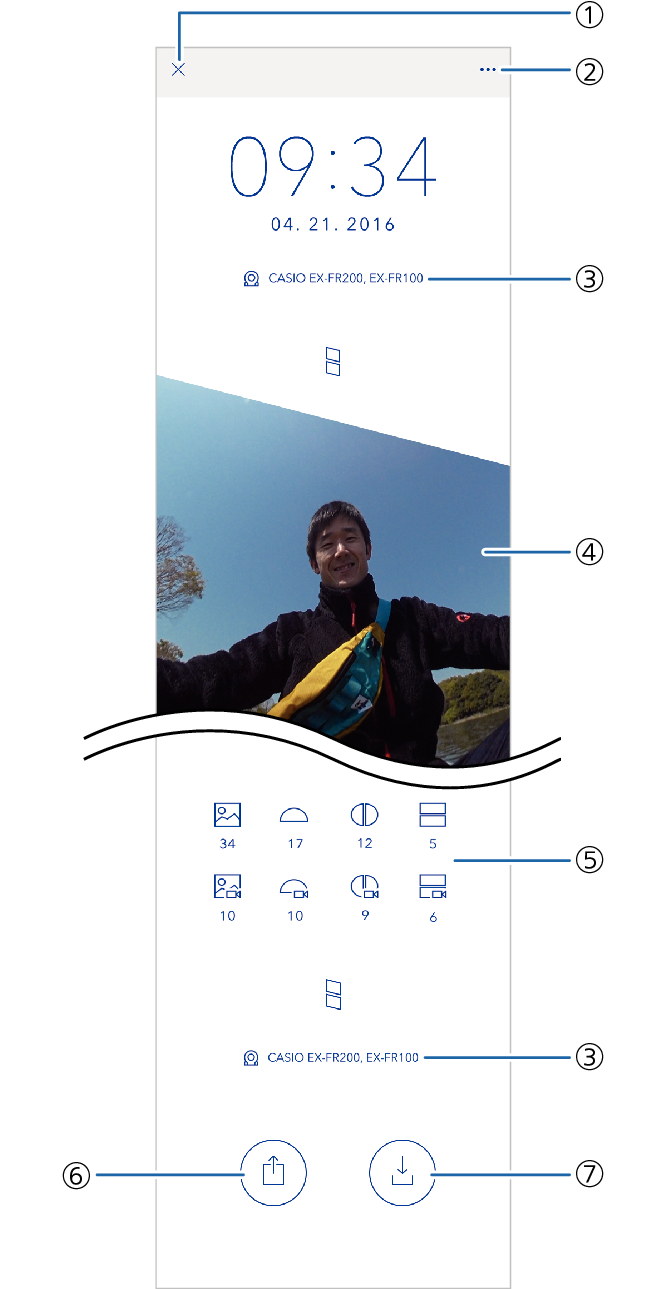
Timeline View (Full Screen) Operations

- ①
-

Closes the full-screen view and returns to the normal Timeline View.
- ②
-

Opens a menu.
- ③
-
Camera and/or smartphone name used to shoot the images
- ④
-
Images used in the Highlight Timeline
- Tapping an image displays it.
- Tap and hold an image to enable relocation.
- ⑤
-
Image types and counts
Shows the types of images and the number of each type of image.
- ⑥
-

Some Terminals Only: You can export a Highlight Timeline as a movie and share it with another app.
- ⑦
-

Some Terminals Only: You can export a Highlight Timeline as a movie and save it.

 Top of page