Using the Gʼz EYE App to Shoot Images
You can use the Gʼz EYE app to configure shooting settings and to shoot images. Note that camera button operations or an optional controller cannot be used to shoot images while you are shooting images with the Gʼz EYE app.
-
1.Start up the “Gʼz EYE” app and establish a wireless LAN connection between the camera and smartphone.
-
2.On the top screen, tap “Shooting with the App”.
-
This displays the Remote Capture screen.
Remote Capture Screen
You can scroll between recording modes by swiping this screen left or right.
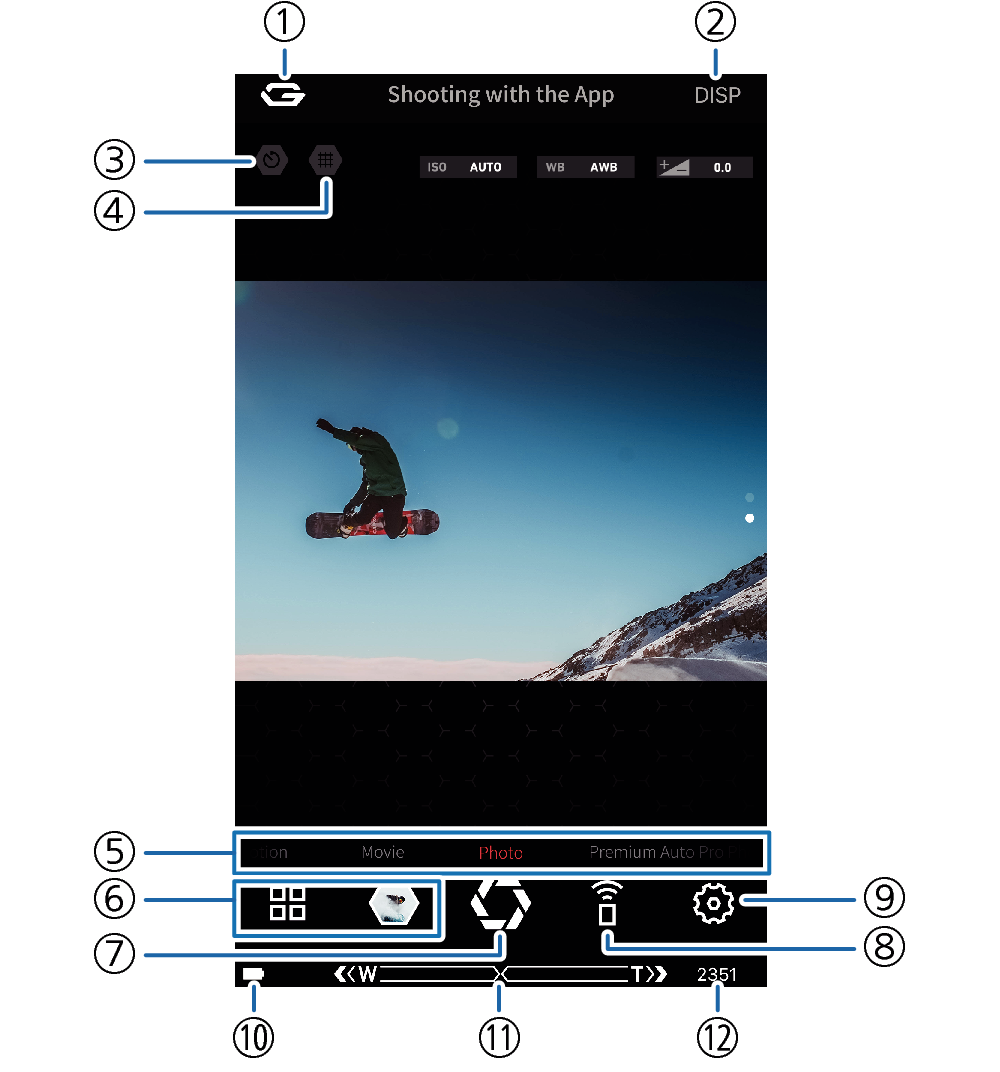
- ①
-
 button
Returns to the top screen.
- ②
-
DISP button
Tap to toggle shooting conditions and other display information between show and hide.
- ③
-
Self-timer button
Tap to toggle the self-timer between on and off.
- ④
-
Grid button
Toggles the grid between show and hide.
- ⑤
-
REC Mode
Shows the current recording mode.
- ⑥
-
Play Screen selection buttons
Tap these buttons to display the Play Screen or the images stored in camera memory.
- ⑦
-
Shutter button
Records the image.
- ⑧
-
No Look Mode button
Enters the Remote Capture screen No Look Mode.
- Swiping the screen from top to bottom will also enter the No Look Mode.
- ⑨
-
Recording settings button
Use the REC menu to configure shooting conditions.
- ⑩
-
Battery status
Shows the camera’s battery status. If
 is displayed, charge the battery as soon as possible.
- ⑪
-
Zoom button
Digital zoom can zoom an image up to 4X.
- ⑫
-
Remaining memory
Shows how much memory capacity remains for storage of images shot with the camera.
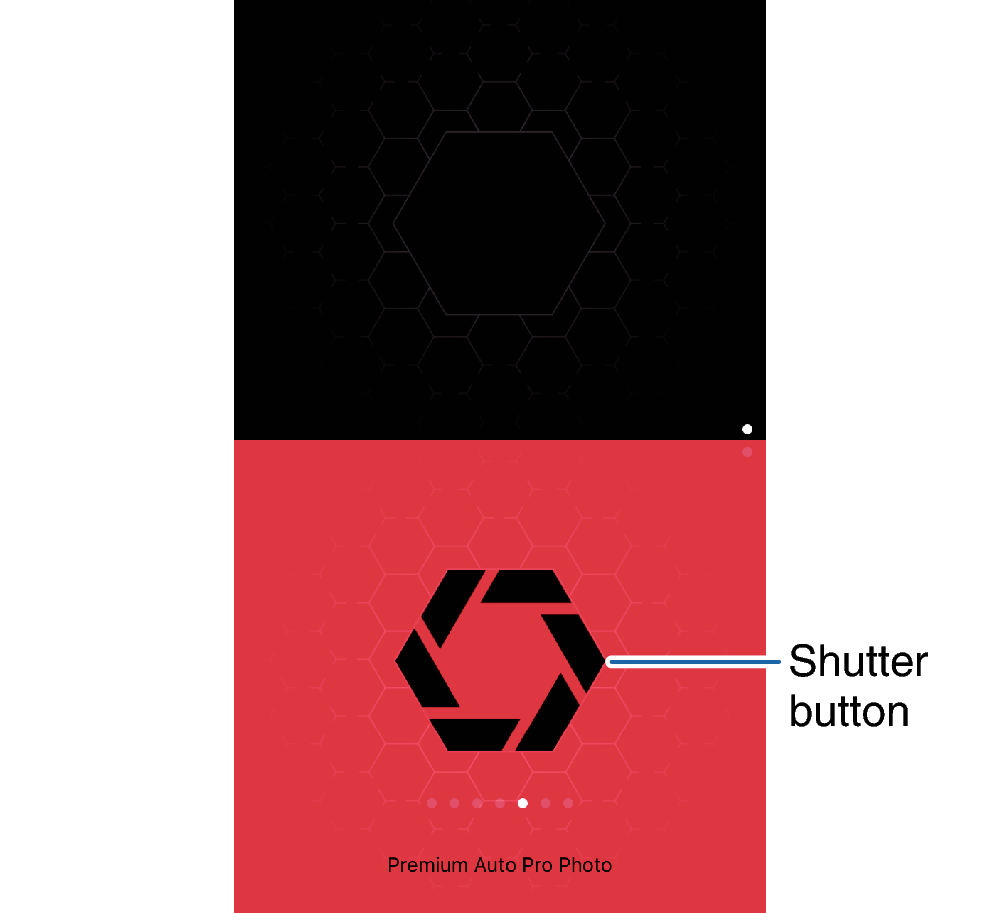
No Look Mode
If you want to keep your eye on the movement of the subject without looking at the smartphone screen, tap ![]() on the Remote Capture screen, or swipe the screen from top to bottom. This will display only the shutter button, making it easier to tap when shooting. To return to the previous screen, swipe the screen from bottom to top.
on the Remote Capture screen, or swipe the screen from top to bottom. This will display only the shutter button, making it easier to tap when shooting. To return to the previous screen, swipe the screen from bottom to top.
 Top of page