Using a Different Watch Face
In addition to the watch’s initial default “DIGITAL” watch face, the Wear OS by Google function can be used to select any one of a number of other different watch faces. You can add CASIO, Google, and third-party watch faces.
Important!
If you are using a non-CASIO watch face, you cannot return to it following an activity measurement operation. If you want to return to a non-CASIO watch face, long-press the screen and then re-select the watch face .
Even if you change to another watch face, the watch face automatically switches to “DIGITAL” during activity measurement operations.
Changing to Another Watch Face
-
While a watch face is displayed, hold your finger down in the center of the screen for about two seconds.
-
Swipe the touch screen left or right to scroll though the available watch faces. When the one you want is displayed tap it.
This displays the watch face list.
For example, tap the “2 Layers” CASIO watch face. For details about “2 Layers”, see Using the “2 Layers” CASIO Watch Face.
Note
You can tap “See more watch faces” on the watch face list that appears in step 1 above and install other watch faces.
Using the “ANALOG” CASIO Watch Face
The CASIO ANALOG watch face is an analog face that prioritizes readability.
The information displayed by this watch face changes automatically according to your current location and activity.
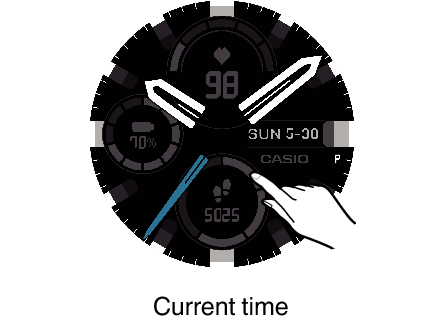
ANALOG Screen Items
This screen enhances viewing of the current time, with the automatically changing information in the background.
Tapping the display causes the background to become easy to view for about 5 seconds.
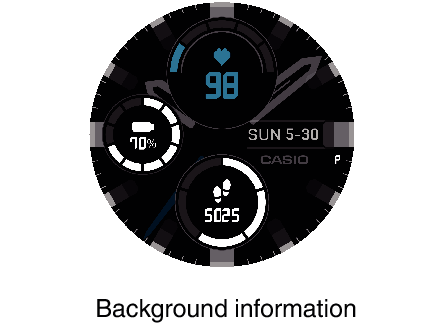
Background Information
After you specify your Home Time Zone and “Daily Activity Range*”, the screen's background information automatically switches in accordance with your current location and activity.
The “Daily Activity Range” is the area where you conduct your daily life. You specify a range by setting a center point, like your home, and the radius of a circle on a map displayed by the watch.
Background Information Details
This section explains the background information that changes automatically.
The example screens shown in this section are those that appear when you tap the display to make the background information easy to view.
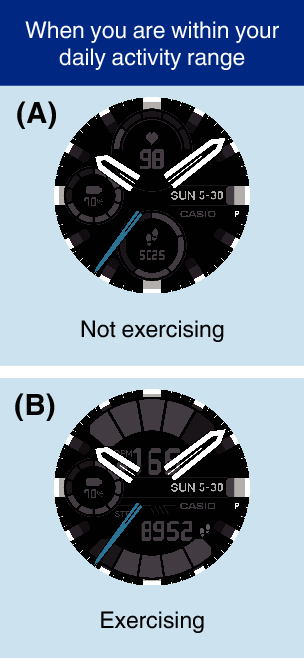
Screen (A)
This screen appears when you are not exercising and you are within your Daily Activity Range. You can use it to check your heart rate, your daily step count, etc.
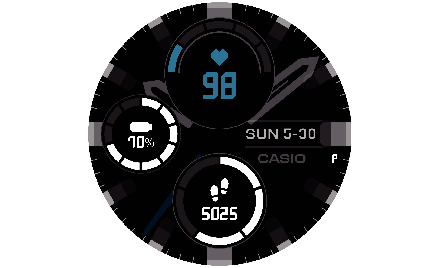
Background Information Example
Screen (B)
While Screen (A) is displayed, continuing to walk, run, ride a bicycle, or perform some other activity for some preset time causes this screen to appear. With this screen, heart rate zones and your step count are enlarged, making them easier to view.
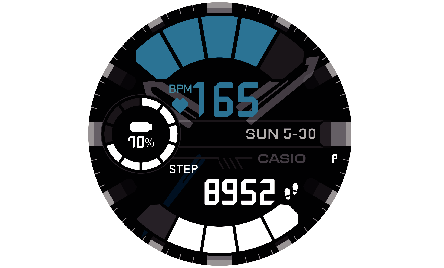
Background Information Example
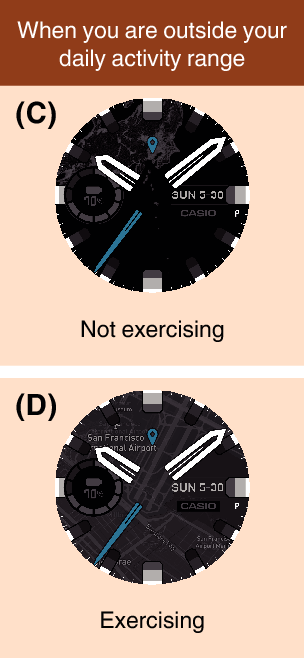
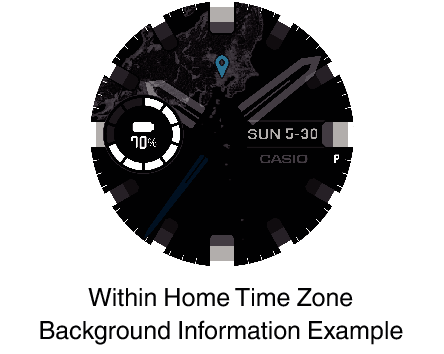
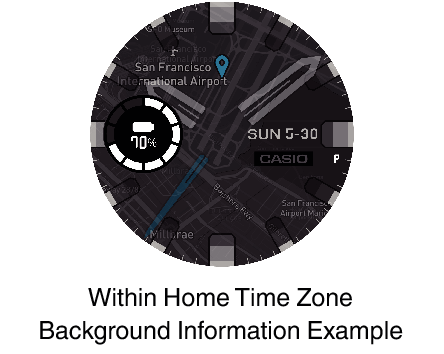
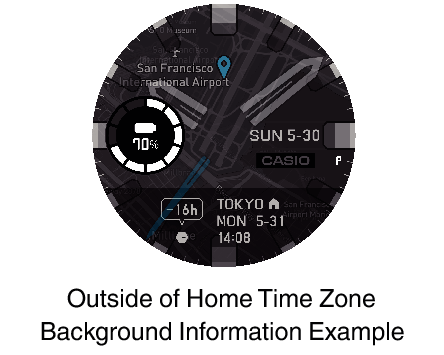
Screen (C)
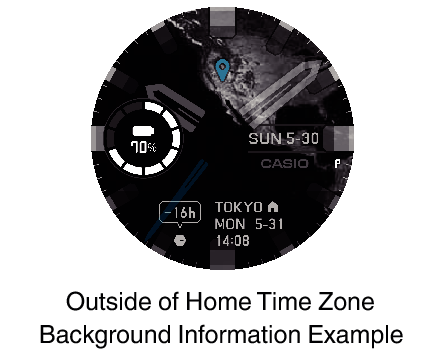
This screen appears when you are not exercising and you are outside of the Daily Activity Range. The background of the watch face changes to a map.
If you move outside of your Home Time Zone, the watch display switches to the current time in your current location, and the current time in your Home Time Zone is shown in the lower display area.
If the time does not switch to the time at your current location, swipe the watch face downwards. On the setting screen that appears, perform the following steps: ![]() > “System” > “Date & time”. Next, makes sure that “ON” is selected for the “Automatic time zone” setting.
> “System” > “Date & time”. Next, makes sure that “ON” is selected for the “Automatic time zone” setting.
Screen (D)
While Screen (C) is displayed, continuing to walk, run, ride a bicycle, or perform some other activity for some preset time causes this screen to appear. The background of the watch face change to a map that shows more details of your current location.
Using the “2 Layers” CASIO Watch Face
Digital watch face that combines easy-to-read monochrome LCD and a color LCD. You can customize the information that appears in the upper and lower display areas of the display. While this watch face is displayed, tapping the screen will start a manual heart rate measurement operation.
2 Layers Screen Items
With the 2 Layers watch face, you can combine the display information below as required.
Upper display area: Date, barometric pressure, heart rate
Lower display area: Step count, battery level, altitude, Calories Burned
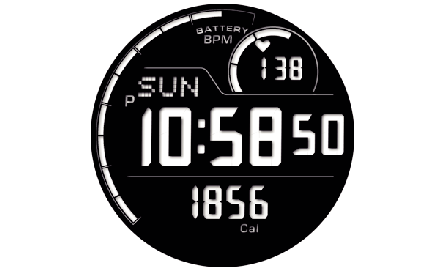
Display example (Upper display area: heart rate, Lower display area: Calories Burned)
The middle display area normally shows the day of the week and current time, while the outer ring shows the remaining battery charge. For information about the display during heart rate measurement, see To measure your heart rate manually.
To change the 2 Layers watch face display items
-
While the “2 Layers” watch face is displayed, hold your finger down in the center of the touch screen for about two seconds.
-
Tap in the following in sequence:
 > “Display”.
 -
Tap “Upper”. On the menu that appears, tap the item (Date, Barometer, or Heart Rate) that you want to display in the Upper display area.
-
Tap “Lower”. On the menu that appears, tap the item (Steps, Battery Level, Altimeter, or Calories Burned) that you want to display in the Lower display area.
-
To quit the setting procedure and return to the watch face display, press the power button.
This shrinks the watch face and displays ![]() below it.
below it.
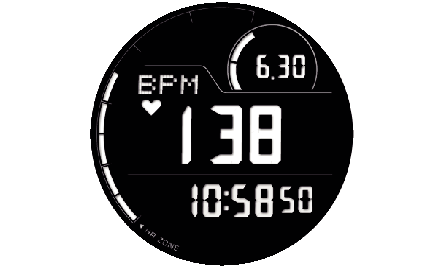
To measure your heart rate manually
-
While the “2 Layers” watch face is displayed, tap the screen.
-
This displays the message “Start heart rate measurement.”. Tap
 .
.
This starts a heart rate measurement operation. This returns to the watch face display, with your heart rate shown in the middle display area. The outer ring of the display shows your heart rate zone.*1
Manual heart rate measurement stops automatically after the time you set for “Manually Measured Heart Rate Time*2” (1 to 3 minutes). To manually stop heart rate measurement part way through, tap the screen again. If the message “End heart rate measurement.” appears, tap ![]() .
.
For this measurement, you need to use the procedure under Configuring Initial Default Settings for Heart Rate Measurement to enter your birthday, gender, and other profile information.
You can change this setting by tapping the following operation in step 2 of the procedure under To change the 2 Layers watch face display items: ![]() > “Manually Measured Heart Rate Time”.
> “Manually Measured Heart Rate Time”.