Adjusting Hand and Day Indicator Alignment
-
1.Loosen the crown and then pull it out to the second click.
-
2.Hold down (B) for at least five seconds until the second hand points to 12 o’clock . Release the button when the second hand reaches 12 o’clock.
-
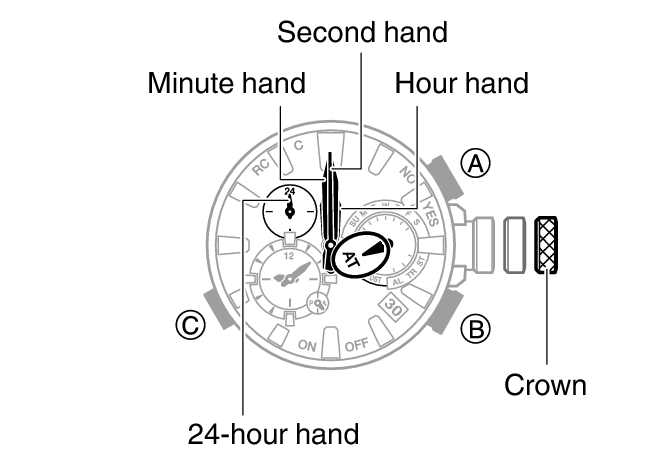
This will start auto alignment of the hour hand, minute hand, second hand, and 24-hour hand.
- After auto alignment is complete, the hands should be in the positions shown below.
-
3.Press (C).
-
Confirm that the small hour and minute hands, and the small 24-hour hand are all stopped at 12 o’clock.

-
4.If the small hour and minute hands, and the small 24-hour hand are not at 12 o’clock, rotate the crown to align them with 12 o’clock.
-
5.Press (C).
-
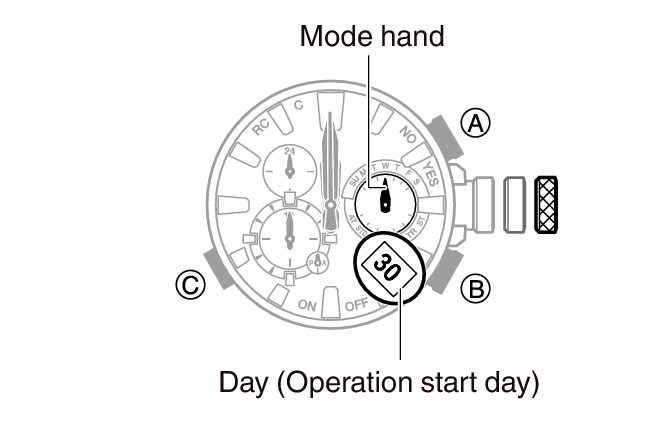
Confirm that the mode hand is stopped at 12 o’clock, and check if the day is indicated properly.
-
6.If the mode hand and/or the day indicator is out of alignment, rotate the crown to move the mode hand to 12 o’clock and the day to the center of the indicator window.
-
- The movement range of the mode hand and day indicator is limited when you rotate the crown. The maximum left-right movement of the mode hand is 180 degrees in either direction. The day indicator moves only slightly.
- After the mode hand and day indicator are in the positions you want, advance to step 9 of this procedure. If you are unable to make the adjustments you want, go to step 7.
-
7.Press (C).
-
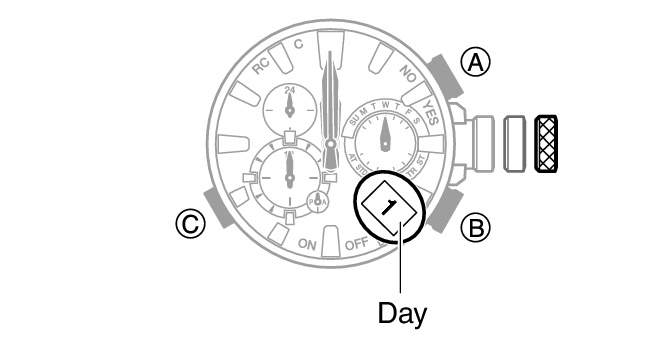
Confirm that the day indicator shows “1”.
- Changing the date setting will cause the mode hand to rotate repeatedly. In some cases, the mode hand may continue to rotate for about 5 minutes.
-
8.If “1” is not shown for the day, rotate the crown until “1” is shown for the day.
-
- The mode hand moves in conjunction with crown rotation. Move the mode hand to 12 o’clock.
-
9.Push the crown back in and then lock it.
 Top of page