Installing Tape Cartridges
-
Press
 until the LED indicator turns off indicating that the power is off.
 -
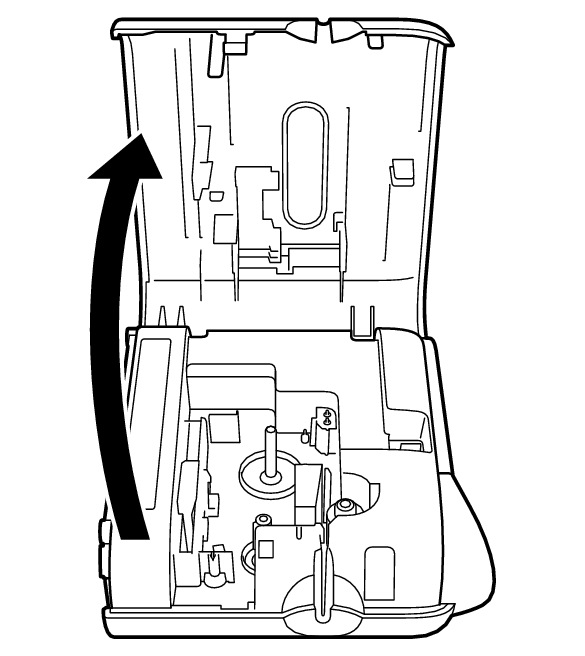
Set the printer down on its side, press on the area on the side marked “PUSH” and raise the cover.
-
Remove the cover.
-
Remove the stopper attached to the tape cartridge.
-
Check the condition of the tape and the ink ribbon.
-
Set the tape cartridge in place.
-
Re-attach the cover.

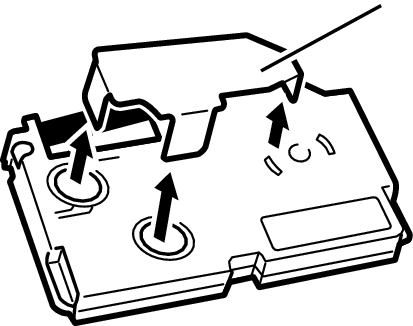
Stopper
Important!
When removing the stopper, carefully and slowly raise it straight upwards. Pulling on the stopper with strong force can cause the stopper to break and leave part of it inside one of the tape wheels, which can cause tape rotation problems and faulty printing.
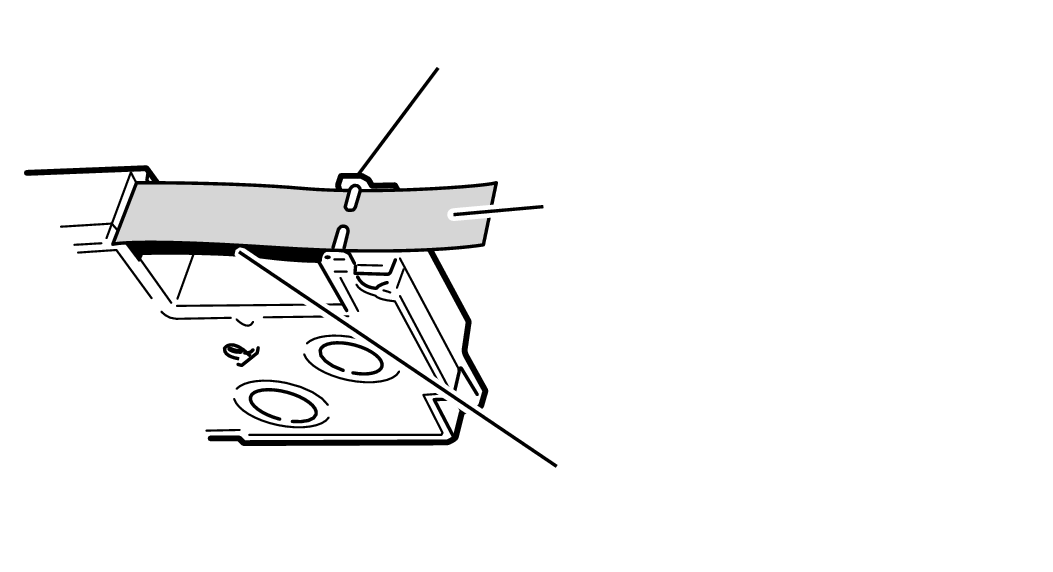
Tape guide
Tape
(Pull out about 3 cm)
Ink ribbon
(under the tape)
Make sure the leading end of the tape is not bent. If it is, use scissors to trim off the bent part.
Make sure the leading end of the tape is passing through the tape guide.
Make sure there is no slack in the ink ribbon.
Important!
Tape once pulled out of the cartridge cannot be pushed back in.
Do not apply excessive force when pulling on the tape. Doing so can break or otherwise damage the ink ribbon.
Loading a tape cartridge whose ink ribbon is slack can cause cutting of the ink ribbon and other malfunctions.
Take up any slack in the ink ribbon.
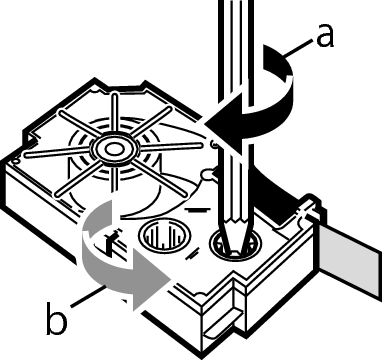
If there is slack in the ink ribbon, insert a pencil or similar object into the upper right wheel (“a” in the nearby illustration) and rotate in the direction indicated by the arrow. Rotate until the lower left wheel (“b” in the illustration) starts to rotate. Note that the tape does not move along with the ink ribbon at this time.
Taking care not to pull on the ink ribbon, pass the tape and ink ribbon between the print head and the rubber roller (illustration below). Press down on the tape cartridge until it clicks securely into place.
If the tape is not loaded correctly, a tape-related error message will appear and you may not be able to print. If this occurs, load the tape again.
Important!
An improperly loaded tape cartridge can cause the ribbon to break.
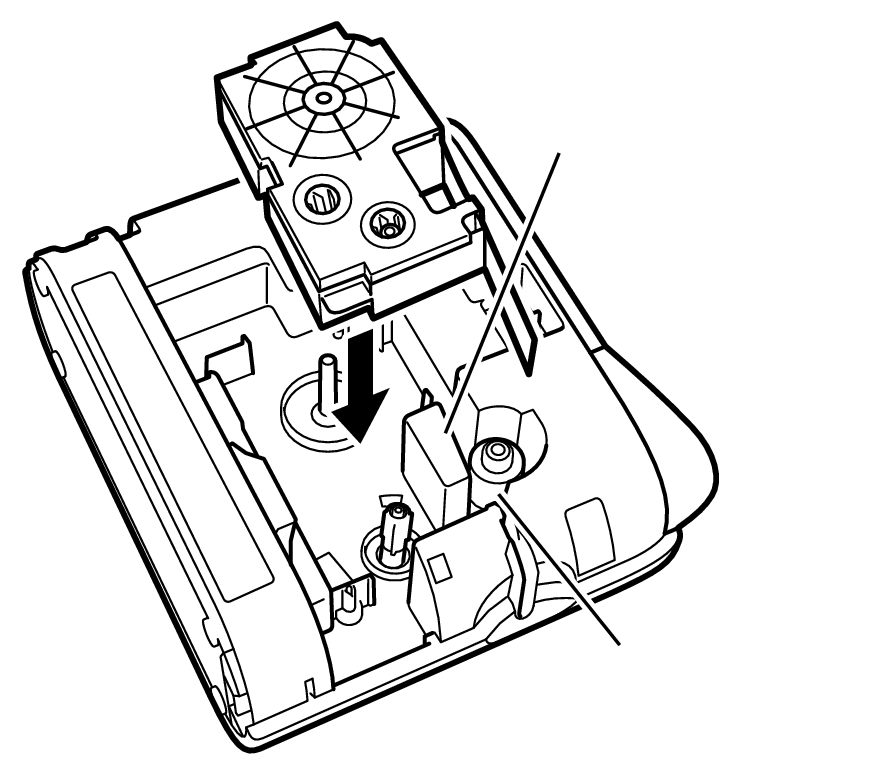
Printer head
Rubber roller

Engage the cover hooks with the printer locations marked “a” and close the cover. Close the cover until it clicks into place.
Once you have loaded the tape cartridge, do not pull the tape out or try to push it back in.