About This Watch
This section provides an overview of the watch and introduces convenient ways it can be used.
Watch Features
The watch supports connection and communication with a Bluetooth capable phone.
Sunlight and artificial light generate electricity for watch operation as it charges.
The watch receives a radio signal containing time information and uses it to keep its time setting accurate.
Displays the current time in any one of 26 cities (38 time zones) around the globe and UTC.
You can use the stopwatch to measure up to 24 hours of elapsed time in 1-second units.
Note
The illustrations included in this operation guide have been created to facilitate explanation. An illustration may differ somewhat from the item it represents.
General Guide
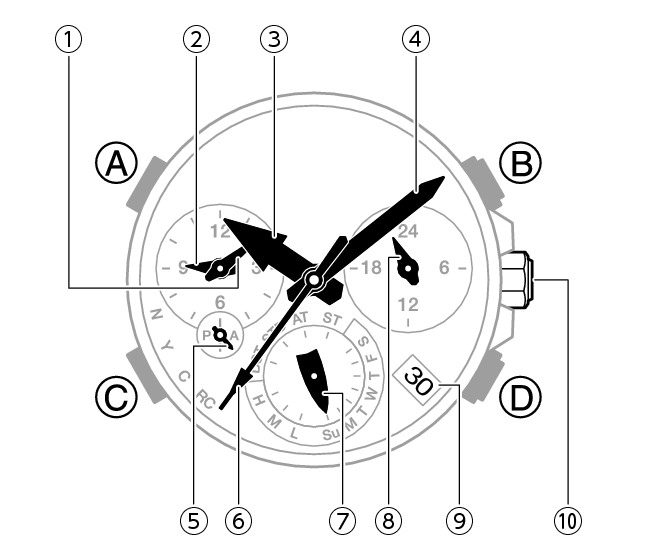
-
Small minute hand
-
Small hour hand
-
Hour hand
-
Minute hand
-
Small 24-hour hand
-
Second hand
-
Mode hand
-
24-hour hand
-
Day indicator
-
Crown
A button
Holding down this button for at least one second in the Timekeeping Mode causes the second hand to point to a city whose current time is in the 0:00 hour.
B button
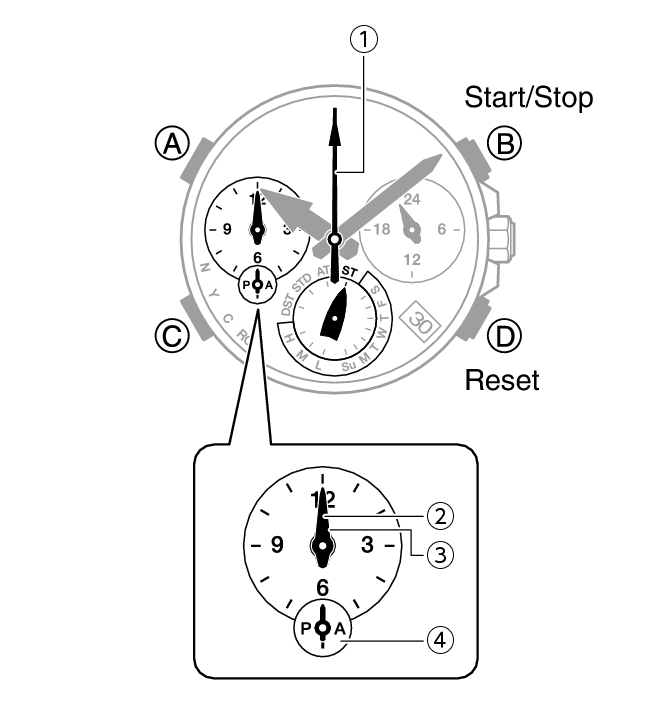
Pressing this button in the Stopwatch Mode starts or stops elapsed time measurement.
C button
Each press cycles between watch modes.
In any mode, hold down this button for at least one second to return to the Timekeeping Mode.
D button
In the Timekeeping Mode, pressing this button causes the second hand to indicate the result of the last performed receive operation.
Watch Face Items
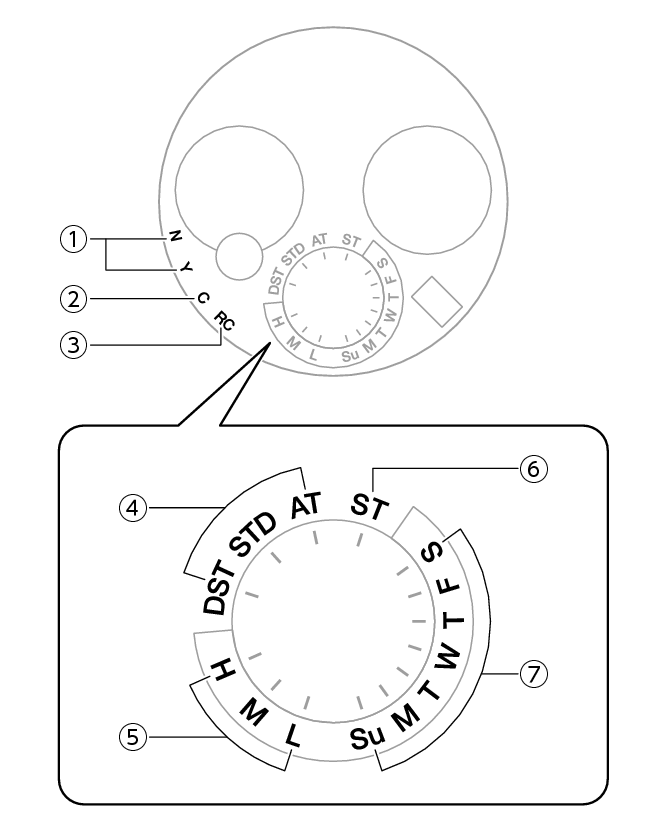
-
Last receive result/Auto time correction setting
-
[C]
-
[RC]
-
Summer time setting
-
Battery level
-
[ST]
-
Day of week
The second hand points to [Y(YES)] or [N(NO)] to indicate the result of the last auto time correction operation based on time signal reception or connection with a phone.
[Y(YES)]: Auto time correction successful
[N(NO)]: Auto time correction failed
The second hand indicates whether auto time correction is enabled or disabled.
[Y(YES)]: Auto time correction enabled
[N(NO)]: Auto time correction disabled
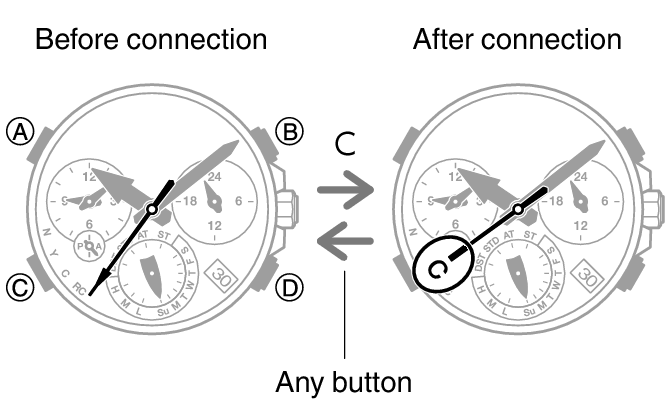
The second hand will point to [C] if the watch is connected with a phone.
The second hand points to this mark while calibration signal reception is in progress.
The mode hand points to the current summer time setting.
The current charge level is indicated by the mode hand after you enter the Timekeeping Mode.
In the Stopwatch Mode, the mode hand points to [ST].
In the Timekeeping Mode, the mode hand points to the day of the week in the Home City.
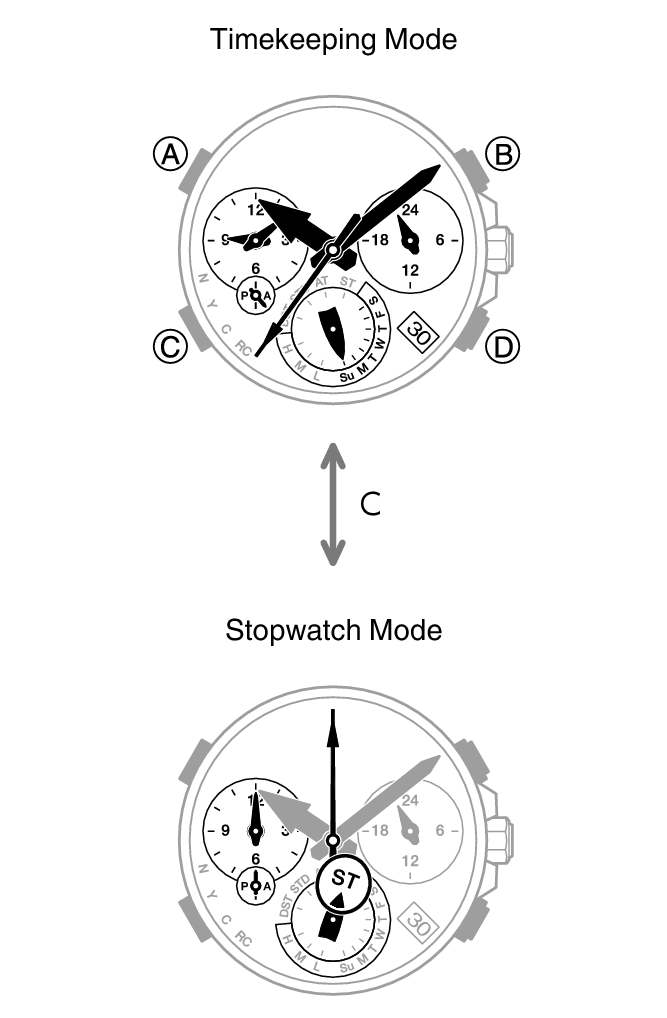
Navigating Between Modes
Each press of (C) cycles between watch modes.
Hold down (C) for at least one second to enter the Timekeeping Mode.
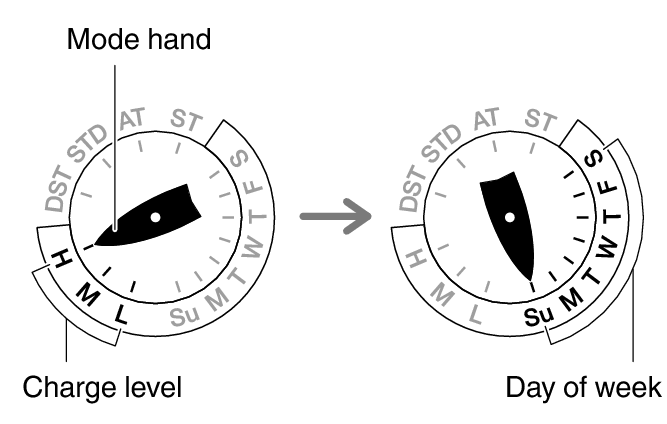
After you enter the Timekeeping Mode, the mode hand first indicates the battery charge level and then the current day of the week.
Connecting with a Paired Phone
Hold down (C) for at least 2.5 seconds to connect with a phone.
To disconnect, press any button.
Mode Overview
Timekeeping Mode
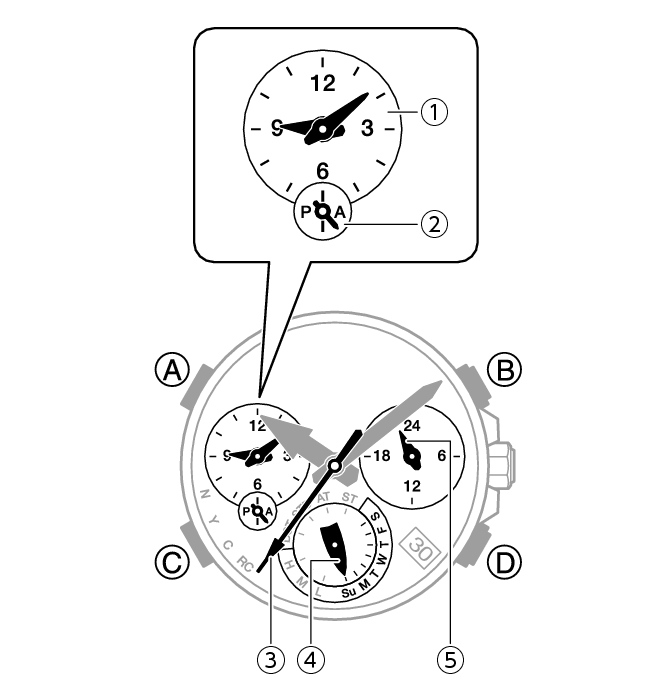
The main hour, minute, and second hands indicate the current time.
The small hour and minute hands indicate the current World Time.
-
World Time
-
World Time 24-hour time
-
Current location seconds
-
Day of the week at current location
-
Current location 24-hour time
The hand points to the A-side for a.m. times, and to the P-side for p.m. times.
One revolution every 24 hours.
Swapping the Current Location Time and World Time
Hold down (B) for at least three seconds.
Time Adjustment Using a Time Calibration Signal
Hold down (D) for at least 0.5 seconds until the second hand points to [RC].
A manual time calibration signal receive operation cannot be performed while the watch is paired with a phone.
Connecting with a Paired Phone to Correct the Watch’s Time
Hold down (D) for at least 0.5 seconds until the second hand points to [C].
Searching for a Paired Phone
Hold down (D) for at least 3.5 seconds until the second hand points to [C].
Stopwatch Mode
The main hour and minute hands indicate the current time.
The second hand, and the small hour and minute hands indicate the elapsed stopwatch time.
-
Stopwatch seconds
-
Stopwatch minutes
-
Stopwatch hours
-
Stopwatch 24-hour hand
The hand points to the A-side for hours 0 through 11, and to the P-side for hours 12 through 23.
Using the Crown
Fast Forward/Fast Reverse
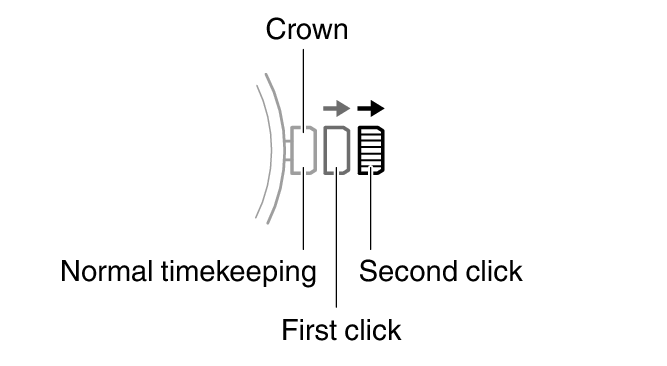
After pulling out the crown to the first or second click, rotating it quickly in succession in either direction will start a fast forward or fast reverse operation. While a fast forward operation is in progress, quickly rotating the crown in succession again will increase the speed even further.
Stopping Fast Forward/Fast Reverse
Rotate the crown in the direction opposite that of the ongoing operation or press any button.
Note
If you do not perform any operation for about two minutes after pulling out the crown, crown operations will automatically become disabled. If that happens, push the crown back in and then pull it out again.
Hand and Day Indicator Movement
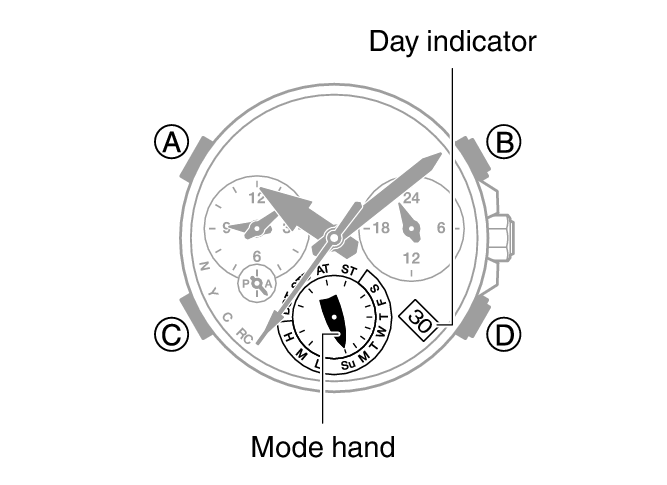
Mode Hand and Day Indicator Movement
Changing the day setting of the watch will also cause the mode hand to move.
Day
It can take anywhere from about 10 to 40 seconds for the day indicator to change after timekeeping reaches midnight. The mode hand moves as the day indicator changes.
The day may not be indicated correctly while the watch’s crown is pulled out.
Charging
This watch runs on power supplied from a rechargeable (secondary) battery that is charged by a solar panel. The solar panel is integrated into the face of the watch, and power is generated whenever the face is exposed to light.
Charging the Watch
When you are not wearing the watch, put it in a location where it is exposed to bright light.
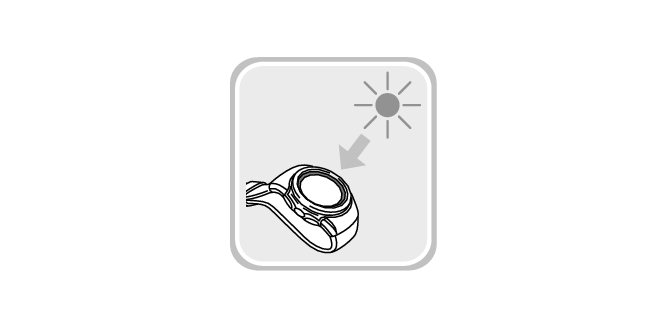
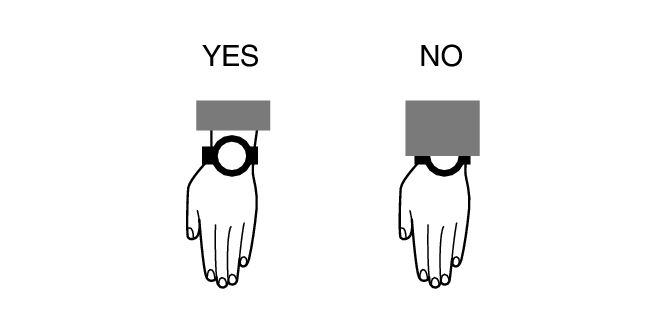
While you are wearing the watch, make sure that its face (solar panel) is not blocked from light by the sleeve of your clothing. Power generation efficiency is reduced even when the face of the watch is blocked only partially.
Important!
Some light sources and environments can cause the watch to become extremely hot during charging, which creates the risk of burn injury and damage to internal watch components.
Avoid charging the watch under conditions like the ones described below, where the temperatures may exceed 60 °C (140 °F).
On the dashboard of a vehicle parked in the sun
Near incandescent lamps, camera lights, halogen lamps, or other sources of heat
In locations exposed to direct sunlight for long periods and other hot locations
Checking the Charge Level
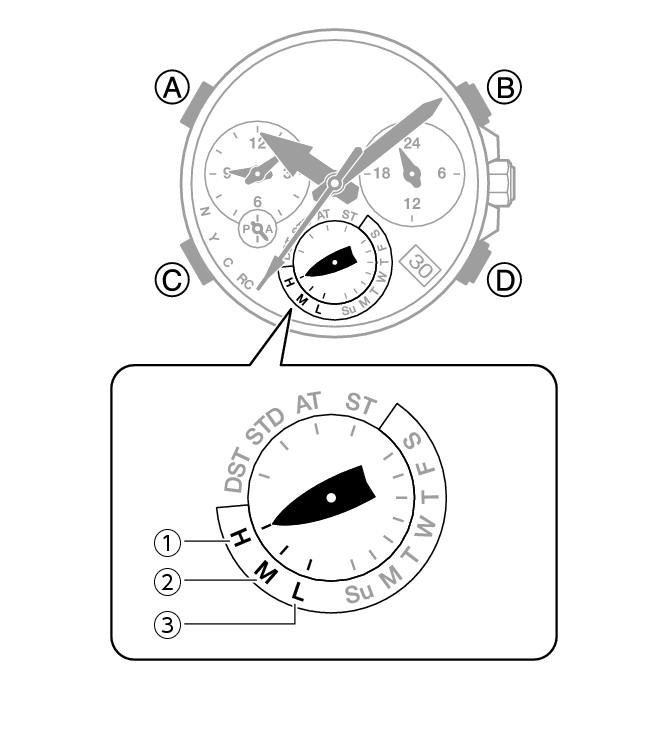
Immediately after you press (C) to return to the Timekeeping Mode, the mode hand will indicate the battery charge level. After a short while, the mode hand will indicate the current day of the week.
-
Good (high charge)
-
Good (medium charge)
-
Low Battery
Remaining Charge and Dead Battery
You can determine if the charge level is low by checking the hand movement. Functions become disabled as battery power goes low.
Important!
Should the battery go low or go dead, expose the face (solar panel) to light as soon as possible.
Note
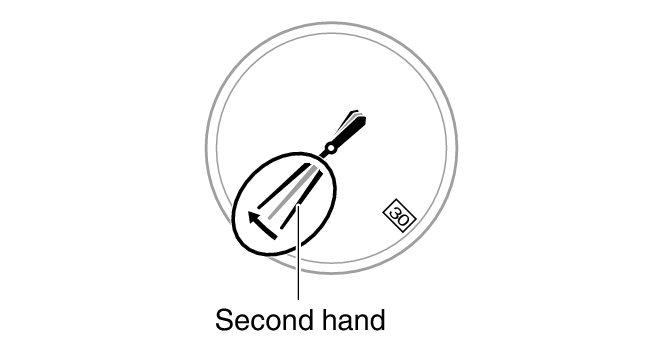
Exposing the watch face to light after the battery goes dead will cause the second hand to revolve counterclockwise until it stops at second 57. This indicates charging has started.
Low Battery Power
The second hand jumps at two-second intervals.
Dead Battery
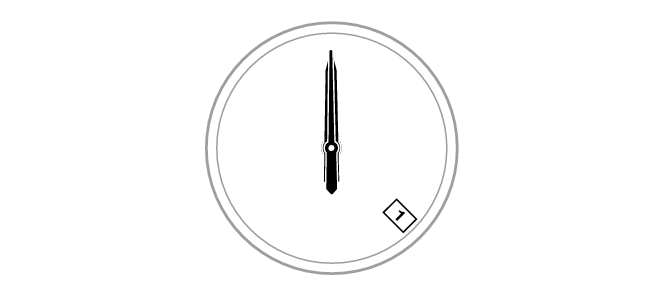
All hands (except for the mode hand) stop at the 12 o’clock position, and the date stops.
Charging Time Guidelines
The table below shows guidelines for approximate charging times.
Charging Times Required for 1 Day of Operation
|
Light Level (Lux) |
Approximate Charging Time |
|---|---|
|
50,000 |
8 minutes |
|
10,000 |
30 minutes |
|
5,000 |
48 minutes |
|
500 |
8 hours |
Charge Recovery Times
Sunny day, outdoors (50,000 lux)
|
Dead battery |
2 hours |
|
Medium charge |
17 hours |
|
High charge |
5 hours |
 Medium charge
Sunny day, near a window (10,000 lux)
|
Dead battery |
5 hours |
|
Medium charge |
64 hours |
|
High charge |
17 hours |
Overcast day, near a window (5,000 lux)
|
Dead battery |
8 hours |
|
Medium charge |
103 hours |
|
High charge |
28 hours |
Indoor fluorescent lighting (500 lux)
|
Dead battery |
89 hours |
|
Medium charge |
- |
|
High charge |
- |
Note
Actual charging time depends on the charging environment, watch settings, and other factors.
Power Saving
Leaving the watch in a dark location for about one hour between the hours of 10 p.m. and 5:50 a.m. will cause the second hand to stop, and the watch to enter Level 1 power saving. If the watch is left in this condition for six or seven days, all hands (except for the mode hand) will stop at the 0 position and the watch will enter Level 2 power saving.
Level 1:
Second hand stops to save power.
Level 2:
All hand movement is stopped and Bluetooth is disconnected to save power (day indicator continues operating).
Note
Note that the watch also may enter the power saving state if its face is blocked from light by your sleeve while you are wearing it.
Recovering from Power Saving Operation
Use one of the operations below to exit power saving.
Press any button.
Pull out the crown.
Move the watch to a bright location.
Useful Features
Pairing the watch with your phone makes a number of the watch’s features easier to use.
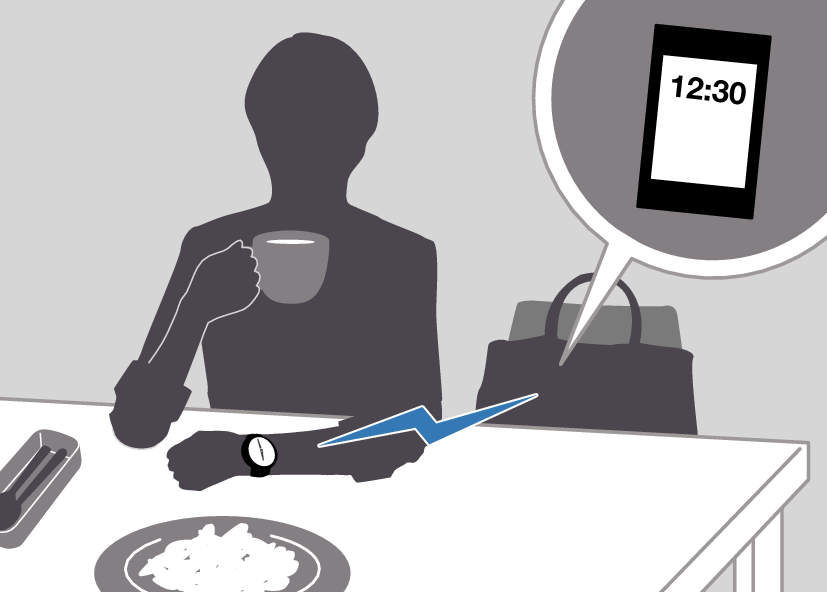
Auto time correction
Selection of More Than 300 World Time cities
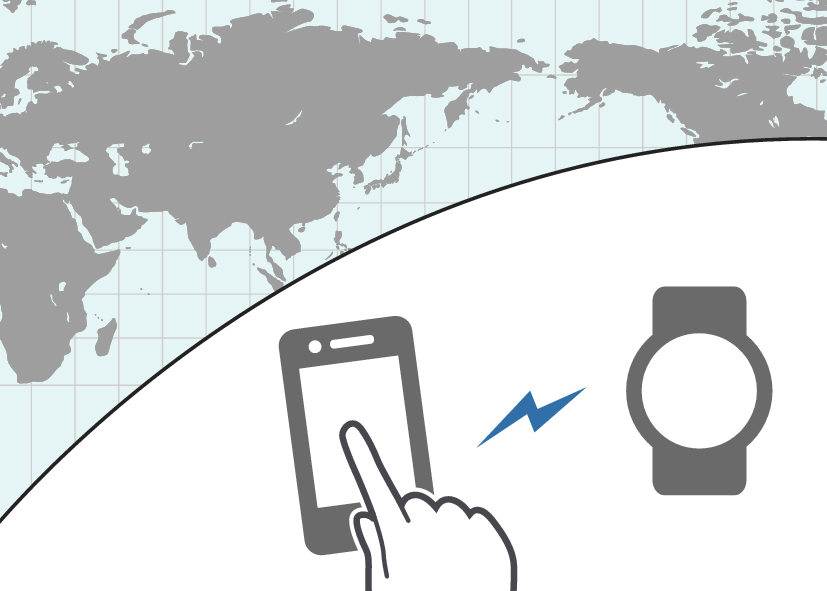
In addition, a number of other watch settings can be configured using your phone.
To transfer data to a watch and to configure settings, you first need to pair the watch with your phone.
Your phone needs to have the “CASIO WATCHES” phone app installed to pair with the watch.