Hand and Day Indicator Alignment
Strong magnetism or impact can cause the hands and/or the day indicator to go out of alignment. If this happens, correct hand and day indicator alignment.
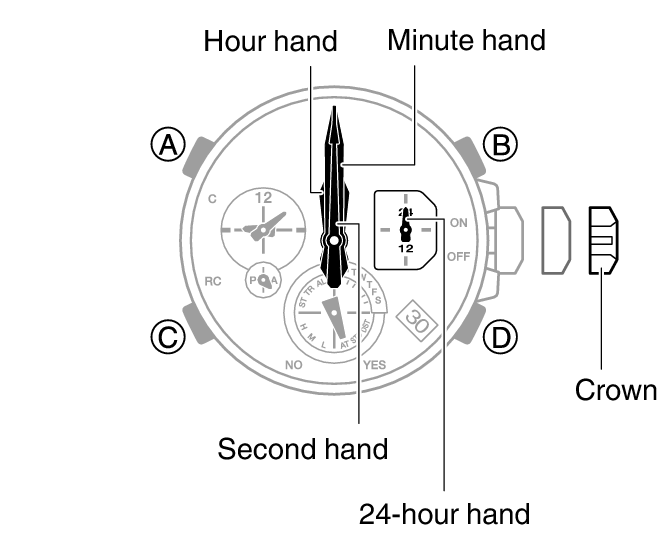
The hour hand, minute hand, second hand, and 24-hour hand are automatically corrected at a fixed time each day while the watch is in the Timekeeping Mode, and also after the watch is subjected to strong impact.
When the watch detects strong magnetism in the Timekeeping Mode, hand movement stops to prevent the hands from going out of alignment.
Using the CASIO WATCHES Phone App to Adjust Hand and Day Indicator Alignment
If the watch is paired with a phone, you can also use the CASIO WATCHES phone app to correct hand and day indicator positions.
Turning Magnetic Field Detection On or Off
-
Pull out the crown to the second click.
-
Hold down (D) for at least five seconds until the second hand points to 12 o’clock . Release the button when the second hand reaches 12 o’clock.
-
Hold down (D) for at least one second.
-
Hold down (D) for at least one second.
-
Push the crown back in.
This will start auto alignment of the hour hand, minute hand, second hand, and 24-hour hand.
After auto alignment is complete, the hands should be in the positions shown below.
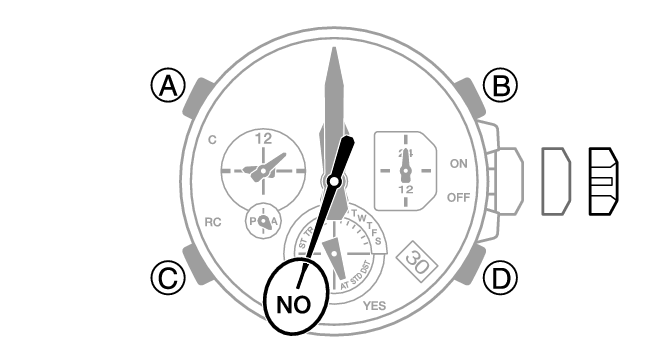
This causes the second hand to move to the current magnetic field detection setting.

Holding down (D) for at least one second toggles magnetic field detection on or off.
[Y(YES)]: Magnetic field detection on
[N(NO)]: Magnetic field detection off
Note
Leaving the crown pulled out for more than approximately 30 minutes without performing any operation will automatically cause the adjustment operation to become disabled. If this happens, push the crown back in to its normal position and then pull it out again to restart the procedure from the beginning.
Adjusting Hand and Day Indicator Alignment
-
Pull out the crown to the second click.
-
Hold down (D) for at least five seconds until the second hand points to 12 o’clock . Release the button when the second hand reaches 12 o’clock.
-
Press (C).
-
If the 24-hour hand is at the 12 position (straight downwards), hold down (B) for at least two seconds to move it to the 24 position (straight upwards).
-
Press (C).
-
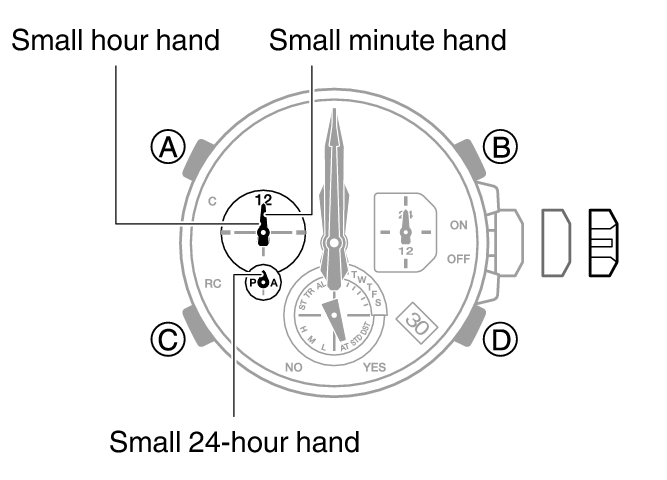
If the small hour and minute hands, and the small 24-hour hand are not at 12 o’clock, rotate the crown to align them with 12 o’clock.
-
Press (C).
-
If the mode hand and/or the day indicator is out of alignment, rotate the crown to move the mode hand to 12 o’clock and the day to the center of the indicator window.
-
Press (C).
-
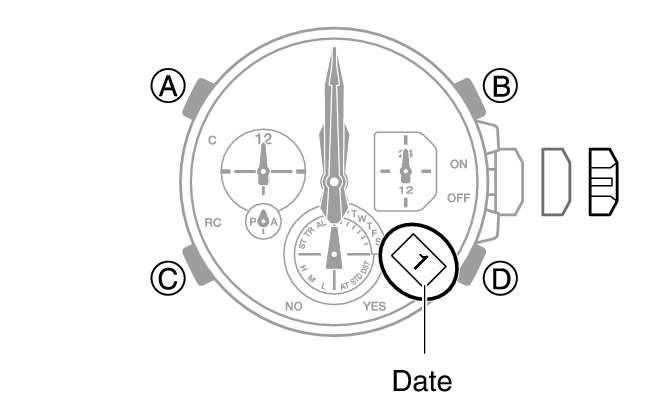
If “1” is not shown for the day, rotate the crown until “1” is shown for the day.
-
Push the crown back in.
This will start auto alignment of the hour hand, minute hand, second hand, and 24-hour hand.
After auto alignment is complete, the hands should be in the positions shown below.
Confirm that the 24-hour hand is at the 24 position (straight upwards).
Confirm that the small hour and minute hands, and the small 24-hour hand are all stopped at 12 o’clock.
Confirm that the mode hand is stopped at 12 o’clock, and check if the day is indicated properly.
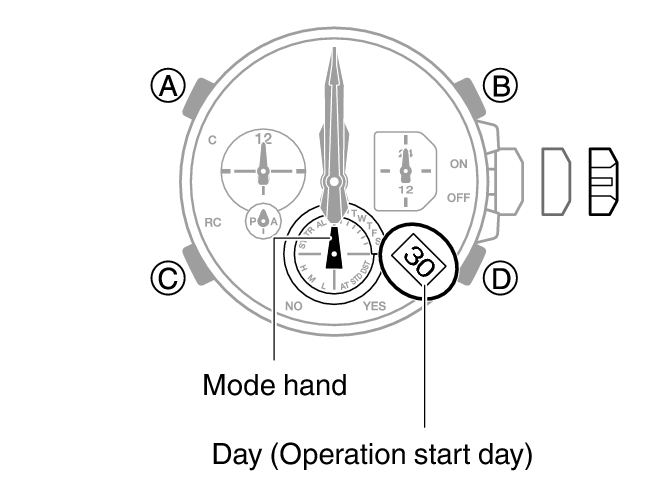
The movement range of the mode hand and day indicator is limited when you rotate the crown. The maximum left-right movement of the mode hand is 180 degrees in either direction. The day indicator moves only slightly.
After the mode hand and day indicator are in the positions you want, advance to step 11 of this procedure. If you are unable to make the adjustments you want, go to step 9.
Confirm that the day indicator shows “1”.
Changing the date setting will cause the mode hand to rotate repeatedly. In some cases, the mode hand may continue to rotate for about 5 minutes.
The mode hand moves in conjunction with crown rotation. Move the mode hand to 12 o’clock.
Note
Leaving the crown pulled out for more than approximately 30 minutes without performing any operation will automatically cause the adjustment operation to become disabled. If this happens, push the crown back in to its normal position and then pull it out again to restart the procedure from the beginning. Pushing the crown in to its normal position part way through the alignment procedure will cause the hands to return to their normal position. Any alignment you performed up to that point will be applied.