Module No. 5719
Correcting Hand and Day Indicator Alignment
-
Pull out the crown to the first click.
-
Hold down (D) for at least five seconds.
-
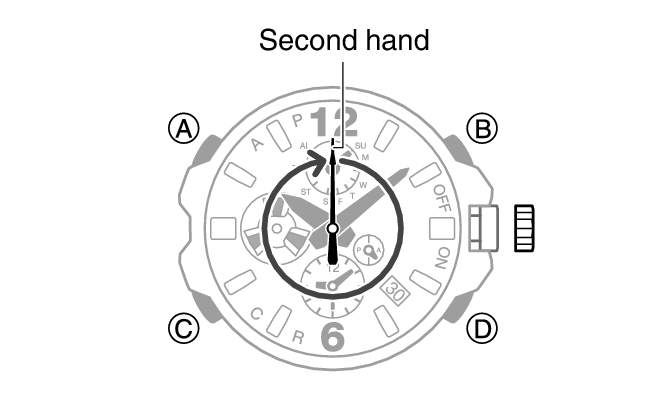
Rotate the crown to align the second hand with 12 o’clock.
-
Press (A).
-
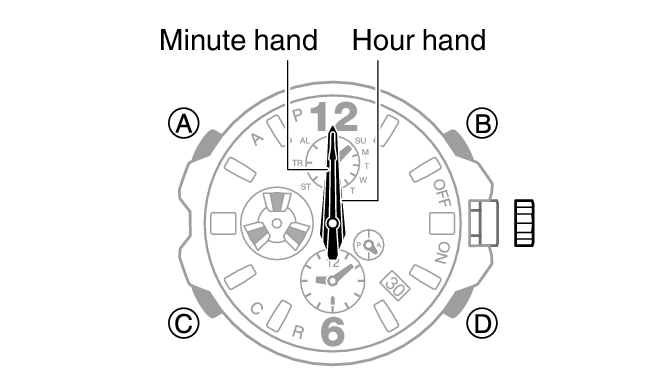
Rotate the crown to align the hour and minute hands with 12 o’clock.
-
Press (A).
-
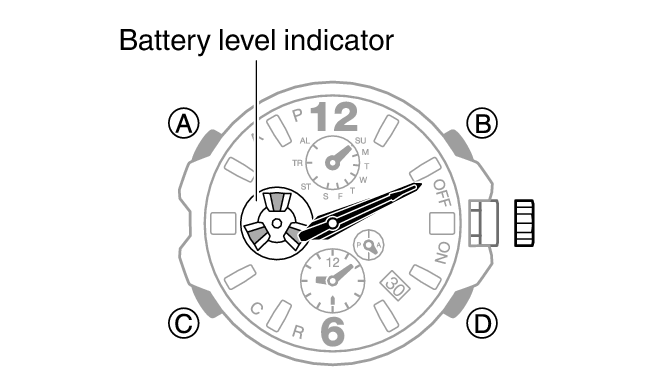
Rotate the crown until the Battery level indicator appears as shown in the nearby illustration.
-
Press (A).
-
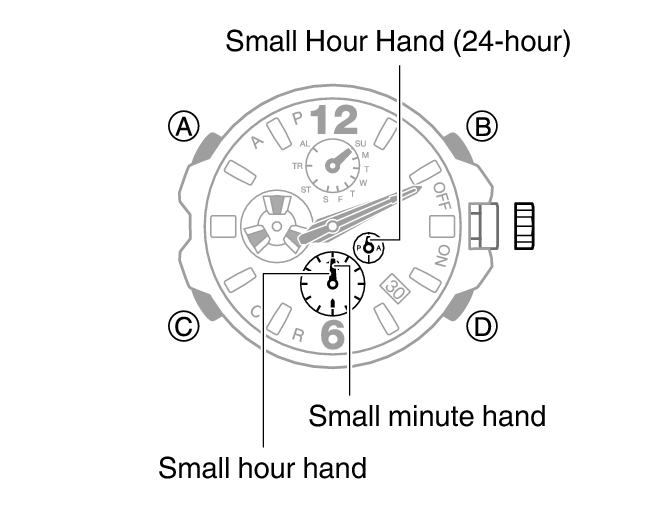
Rotate the crown to align the small hour and minute hands with 12 o’clock, and the small 24-hour hand with 24.
-
Press (A).
-
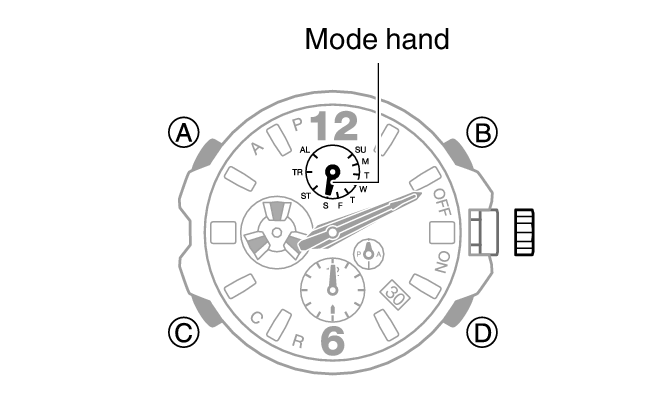
Rotate the crown to align the mode hand with “S”.
-
Press (A).
-
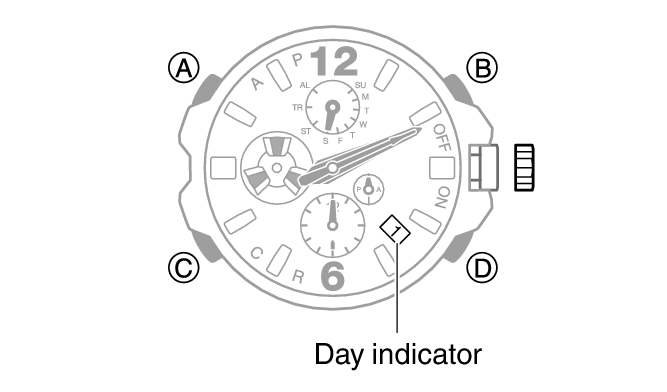
Rotate the crown to align “1” in the center of the day indicator.
-
Push the crown back in.
This causes the second hand to perform one full revolution and enables adjustment of second hand alignment.
This enables adjustment of hour and minute hand alignment.
This enables adjustment of Battery level indicator alignment.

This enables adjustment of small hour hand, small minute hand, and small 24-hour hand alignment.
This enables adjustment of mode hand alignment.
This enables adjustment of day indicator alignment.
The mode hand moves in conjunction with crown rotation. Align the mode hand with “S”.
Note
Leaving the crown pulled out for more than approximately 30 minutes without performing any operation will automatically cause the adjustment operation to become disabled. If this happens, push the crown back in to its normal position and then pull it out again to restart the procedure from the beginning. Pushing the crown in to its normal position part way through the alignment procedure will cause the hands to return to their normal position. Any alignment you performed up to that point will be applied.