Module No. 3573
Adjusting the Current Time Setting
Use the procedure below to change the time and date settings.
To set the time
-
Enter the Timekeeping Mode.
-
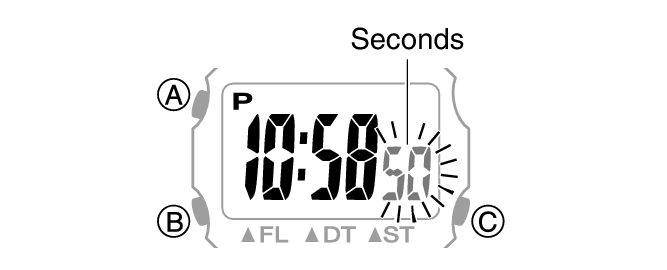
Hold down (A) for at least two seconds.
-
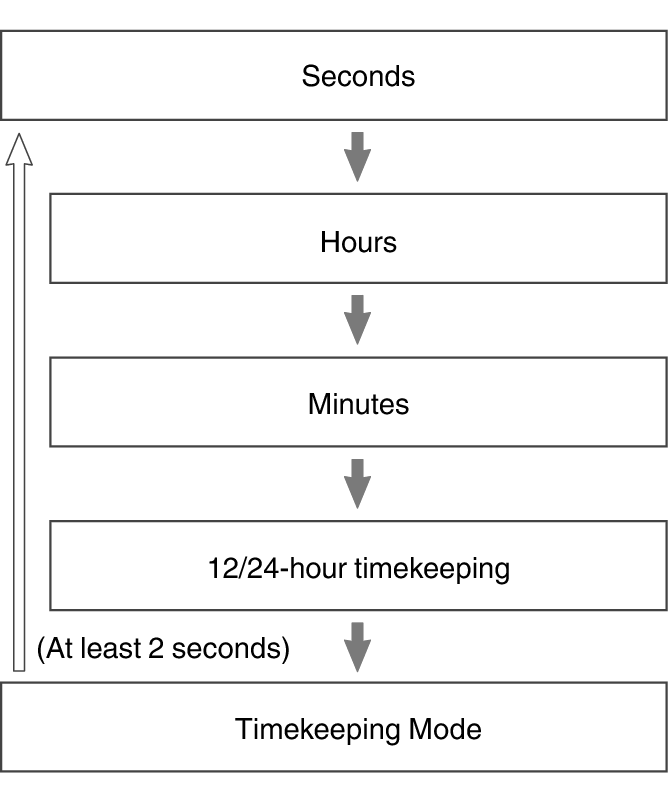
Use (A) to display the setting you want to change.
-
Configure the current time setting.
-
Repeat steps 3 and 4 to set the time.
-
Press (A) to return to the Timekeeping Mode.
This causes the light to turn on momentarily and the seconds to flash.
The light may not be visible when ambient lighting is bright.
Each press of (A) cycles through settings in the sequence shown below.
While the seconds are flashing, pressing (B) resets them to 00. 1 is added to the minutes when the current count is between 30 and 59 seconds.
For all the other values, use (B) to change the flashing setting.
Holding down (B) scrolls through settings at high speed.
Note
While a setting is being configured, the setting operation will be exited automatically after about one or two minutes of non-operation.
Switching between 12-hour and 24-hour Timekeeping
You can specify either 12-hour format or 24-hour format for the time display.
-
Enter the Timekeeping Mode.
-
Hold down (A) for at least two seconds.
-
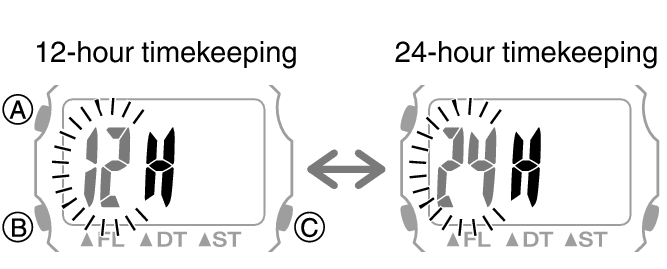
Press (A) three times.
-
Press (B) to select 12-hour or 24-hour timekeeping.
-
Press (A) to return to the Timekeeping Mode.
This causes the light to turn on momentarily and the seconds to flash.
The light may not be visible when ambient lighting is bright.
Either [12H] or [24H] will flash on the display.
Each press of (B) toggles between 12-hour and 24-hour timekeeping.
[P] is displayed during p.m. times while 12-hour timekeeping is being used.
Note
While a setting is being configured, the setting operation will be exited automatically after about one or two minutes of non-operation.
To set the day
-
Enter the Calendar Mode.
-
Hold down (A) for at least two seconds.
-
Use (A) to display the setting you want to change.
-
Configure the day setting.
-
Press (A) to return to the Calendar Mode.
This causes the light to turn on momentarily and the month to flash.
The light may not be visible when ambient lighting is bright.
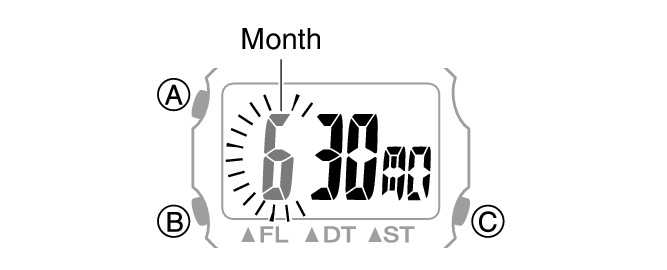
Each press of (A) cycles through settings in the sequence shown below.

Use (B) to change the value.
Holding down (B) scrolls through settings at high speed.
Note
The Auto Calendar automatically distinguishes between months of different lengths. You do not need to change the current time setting except for leap years or after replacing the battery.