Installation Precautions and Procedure
|
 |
The following explains installation by installing the 32-bit version on the EX-Z1000 camera.
Important!
| • |
Never try to install this software on any computer that is not running the Windows Vista operating system. |
|
|
| 1. |
On the camera, select "Set Up", "USB", and then "PTP (PictBridge). |
|
|
| 2. |
Use the USB cable to connect the camera to your computer, and then press the cradle's USB button (or the camera's power button, depending on your camera model) to turn on the camera. |
|
|
| 3. |
Double-click the compressed file that you downloaded (32_wpdmtphw.exe), which will extract it.
On the dialog box that appears, specify the folder to which you want to extract the files, and then click [OK].
Extracting the file will first create a folder named 32_wpdtphw inside the folder you specified (Figure 1) and then will create a file named wpdmtphw.inf (Figure 2) inside it. |
|
|
 (Figure 1)
 |
 (Figure 2)
 |
|
|
|
| 4. |
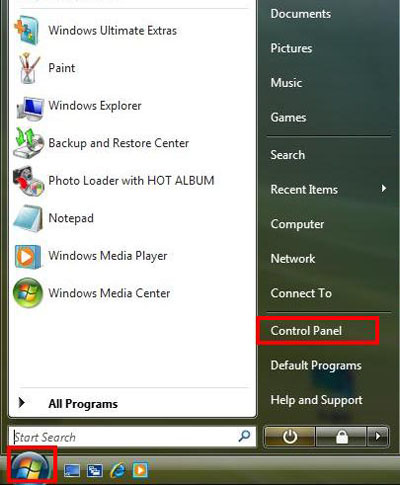
On the "Start" menu, select"Control Panel" (Figure 3). |
|
|
|
|
|
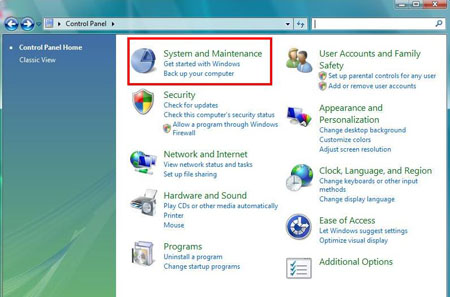
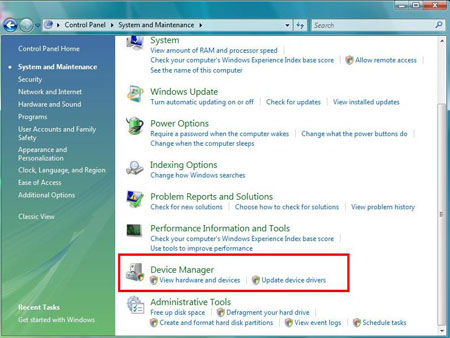
| 5. |
Select "System and Maintenance" (Figure 4) and then "Device Manager" (Figure 5). |
|
|
|
|
| (Figure 4) |
|
|
|
| (Figure 5) |
|
|
|
| 6. |
On the "User Account Control" dialog box that appears, select "Continue". |
|
|
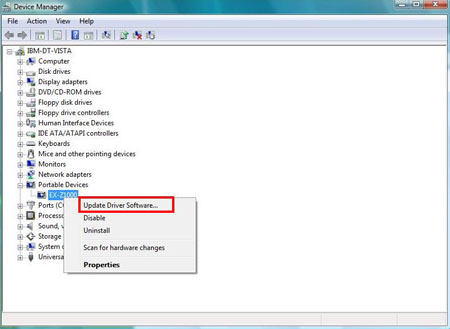
| 7. |
Click "Portable Device" (Figure 6), select the camera connected via the USB cable (EX-Z1000), and then right-click with your mouse to display the shortcut menu. |
|
|
|
|
|
| 8. |
Select "Update Driver Software..." (Figure 7). |
|
|
|
|
|
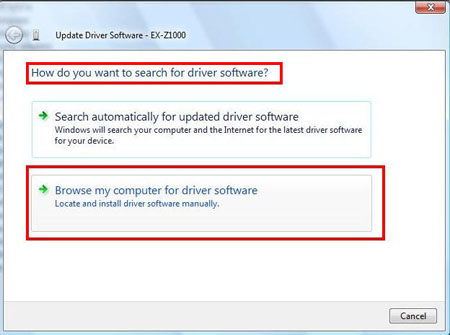
| 9. |
On the "How do you want to search for driver software?" dialog box that appears, select "Browse my computer for driver software" (Figure 8). |
|
|
|
|
|
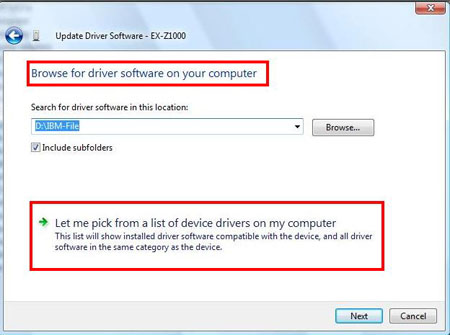
| 10. |
On the "Browse for driver software on your computer" dialog box that appears, select "Let me pick from a list of device drivers on my computer" (Figure 9). |
|
|
|
|
|
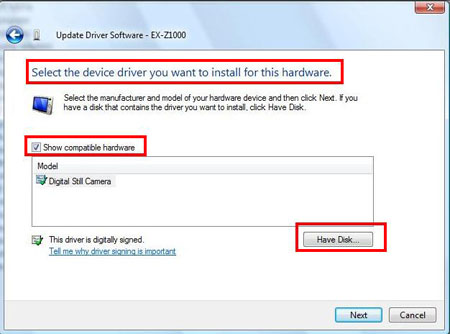
| 11. |
On the "Select the device driver you want to install for this hardware." dialog box that appears, select the "Show compatible hardware" check box and then select "Have Disk..." (Figure 10). |
|
|
|
|
|
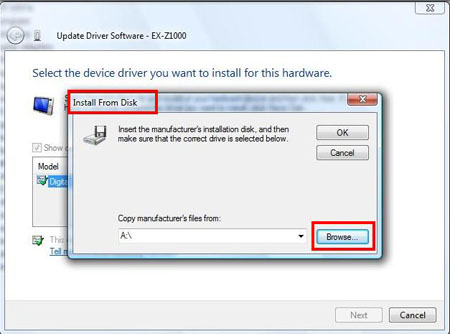
| 12. |
On the "Install From Disk" dialog box that appears (Figure 11), click [Browse...]. |
|
|
|
|
|
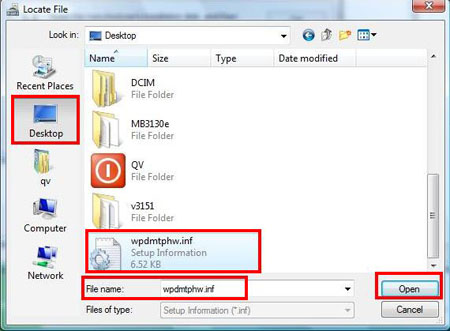
| 13. |
Select "wpdmtphw.inf" (Figure 12). After making sure that the correct name is displayed in "File name", click "Open". |
|
|
|
|
|
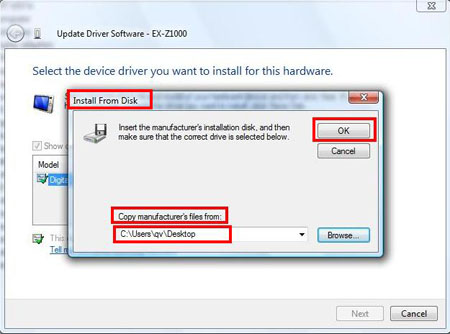
| 14. |
After confirming that the correct path to the wpdmtphw.inf file is shown in the "Copy manufacturer's files from:" box of the "Install From Disk" dialog box (Figure 13), click "OK". |
|
|
|
|
|
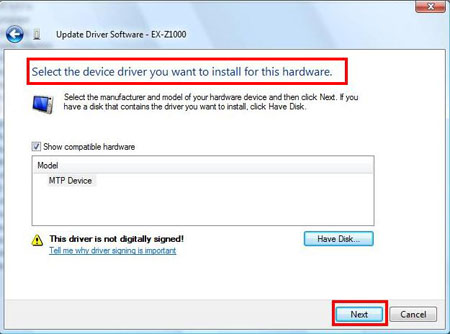
| 15. |
On the "Select the device driver you want to install for this hardware." dialog box (Figure 14) that appears, click "Next". |
|
|
|
|
|
| 16. |
If the "Windows Security" dialog box appears during the installation, select "Install this driver software anyway" (Figure 15). |
|
|
|
|
|
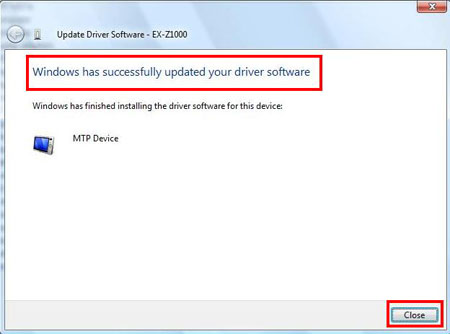
| 17. |
The message "Windows has successfully updated your driver software" (Figure 16) indicates that installation is complete. Click "Close". |
|
|
|
|
|
| 18. |
On the camera, select PTP (PictBridge) for the USB mode, and try to transfer image data from your computer to the camera to see if it works properly. |
|