| Apr.2005 |
Download File
|
 |
When the file save dialog box appears, specify the folder on your computer where you want to save the downloaded file, and then click the [Save] button. |
|
|
|
Downloading the File
|
|
Click the download file name "USB_C_E.exe" to download it to your computer. |
|
Installation Precautions and Procedures
|
|
|
|
|
|
Installation notes |
|
Be sure not to connect your digital camera to your computer before you install the downloaded USB driver. If the digital camera is connected to a computer before installing the driver, the Plug & Play function may register it as an unidentified device. |
|
|
|
|
1. |
Double-click the compressed USB driver file (USB_C_E.exe) that you downloaded. This will automatically extract it. |
|
|
|
2. |
On the dialog box that appears, specify the location where you want to extract the files, and then click "OK". |
|
• |
This will create a folder named "USB_C_E" at the location you specified. The folder will contain the files listed below. |
|
|
|
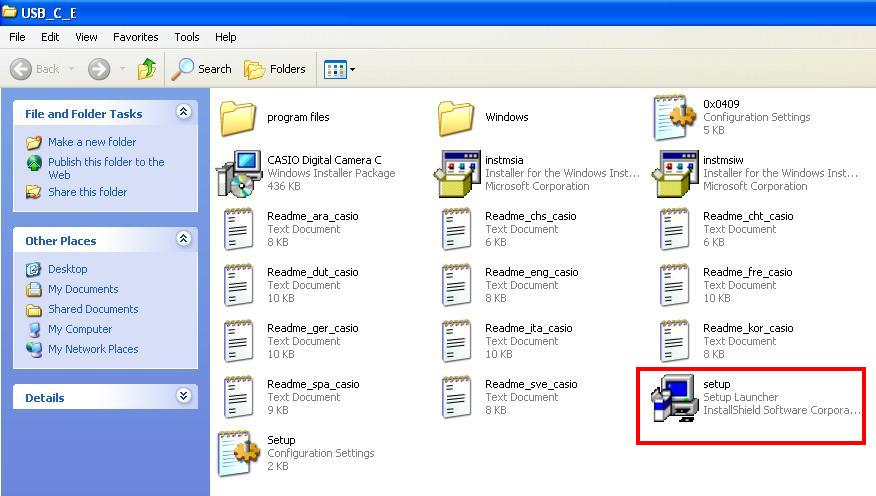
3. |
Open the extracted "USB_C_E" folder, and then double click "Setup.exe" (Figure 1) to start the installer. |
|
|
|
|
|
|
|
|
|
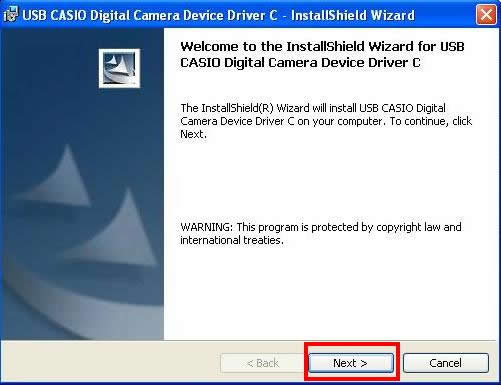
4. |
On the welcome dialog box that appears (Figure 2), click [Next].This starts installation. |
|
|
|
|
|
|
|
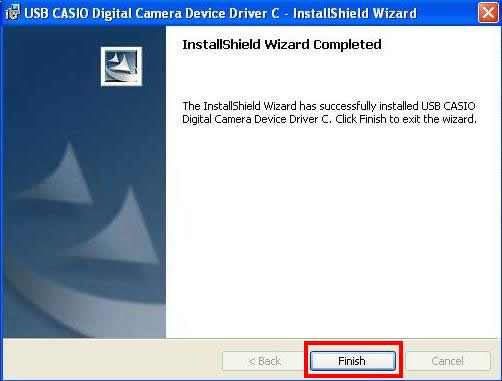
5. |
When the "InstallShield Wizard Complete" dialog box appears, click [Finish] (Figure 3). |
|
|
|
|
|
|
|
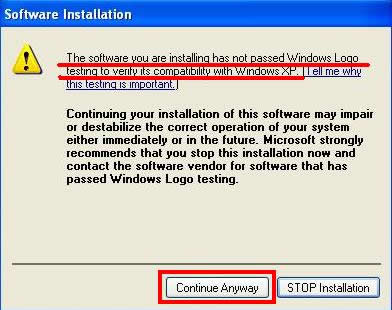
6. |
Though the "The software you are installing..." dialog box will appear, click "Continue Anyway" (Figure 4).
Compatibility has been confirmed by CASIO. |
|
|
|
|
|
|
|
7. |
Check to make sure that the USB setting of the camera is "MassStorage. Next, connect the camera to your computer with the USB cable and turn on the camera. |
|
|
|
|
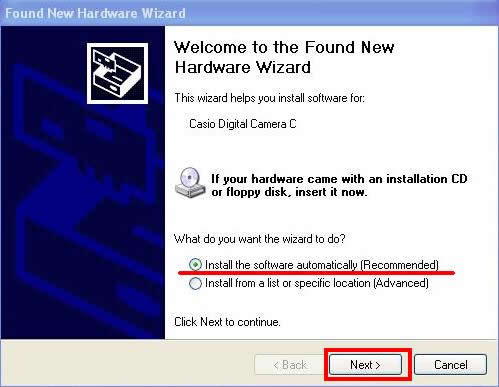
8. |
On the "Welcome to the Found New Hardware Wizard" that appears, select the "Install the software automatically ?Recommended?" button, and then click "Next" (Figure 5). |
|
|
|
|
|
|
|
9. |
Though the "has not passed Windows Logo testing to verify its compatibility..." dialog box will appear, click "Continue Anyway" (Figure 6). Compatibility has been confirmed by CASIO. |
|
|
|
|
|
|
|
10. |
On the "Completing the Found New Hardware Wizard" dialog box that appears, click "Finish" (Figure 7). |
|
|
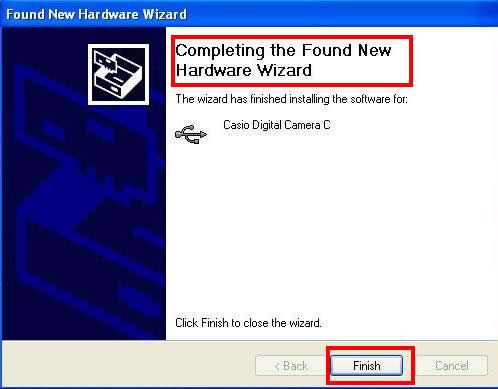 |
| Figure 7 |
|
|
|
|
|
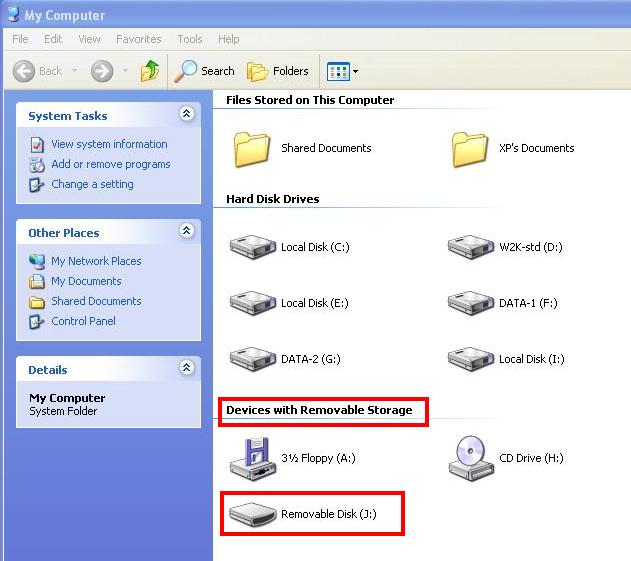
11. |
This completes installation of Casio Digital Camera C. On the Windows "Start" menu, open "My Computer".
Check to make sure that a new "Removable Disk" has been created in "Devices with Removable Storage" (Figure 8). |
|
|
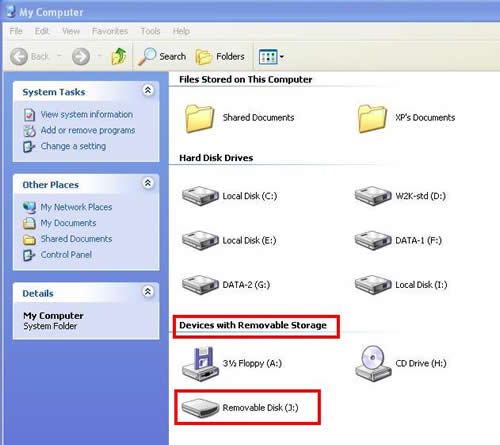 |
| Figure 8 |
|
|
|
|
|
From now on, you will be able to connect the camera to your computer and view the contents of the camera's memory card as if it were a removable disk drive. |
|
|
Important! |
|
|
* |
Never disconnect the USB cable while data communication is in progress. Doing so can cause data to become corrupted. |
|
|
* |
The specifications and performance of the USB driver are subject to change without notice. |
|
|
* |
This upgrade offer may be terminated without notice. |
|
|
Note |
|
|
Uninstalling the USB Driver |
|
|
|
|
| 1. |
Click your computer!s [Start] button. |
| 2. |
Click "Control Panel", and then"Add or Remove Programs". |
| 3. |
On the list of Currntiy installed programs on the dialog box that appears, select "USB CASIO Digital Camera Device Driver C", and then click "Remove". |
| 4. |
In response to the "Are you sure you want to remove USB CASIO Digital Camera Device Driver C" message that appears, select "Yes" to perform the uninstall operation. |
| 5. |
After completing the uninstall procedure, restart your computer. |
|
|
|
|
File List
|
|
Extracting the downloaded file creates the files listed below. |
|
|
USB_C_E [Folder] |
|
|
 |
 program files program files |
| Windows |
| 0x0411.ini |
| CASIO Digital Camera B.msi |
| instmsia.exe |
| instmsiw.exe |
| Readme_ara_CASIO.txt |
| Readme_chs_CASIO.txt |
| Readme_cht_CASIO.txt |
| Readme_dut_CASIO.txt |
| Readme_eng_CASIO.txt |
| Readme_fra_CASIO.txt |
| Readme_ger_CASIO.txt |
| Readme_ita_CASIO.txt |
| Readme_kor_CASIO.txt |
| Readme_apa_CASIO.txt |
| Readme_sve_CASIO.txt |
| setup.exe |
 Setup.ini Setup.ini |
|