|
|
|
|
Uninstalling and Installing Photohands 1.0.3
|
|
|
IMPORTANT! |
|
• |
Never install Photohands 1.0.3 on a computer that currently has a Photohands version from 1.0 to 1.0.2. Always uninstall the current version of Photohands first and then install Photohands 1.0.3E. |
|
| 1. |
Perform the following steps to uninstall your existing Photohands version. |
|
|
• |
If this is the first install of Photohands on your computer, skip step 1 and go directly to step 2. |
|
|
1-1) |
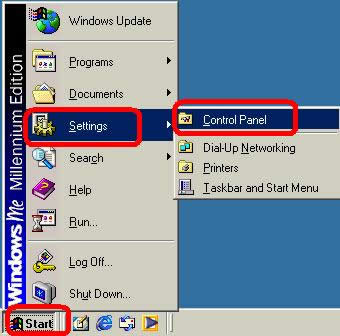
On the "Start" menu, select "Settings" and then "Control Panel" (Figure 1). |
|
|
|
|
|
1-2) |
Select "Add/Remove Program" (Figure 2). |
|
|
|
|
|
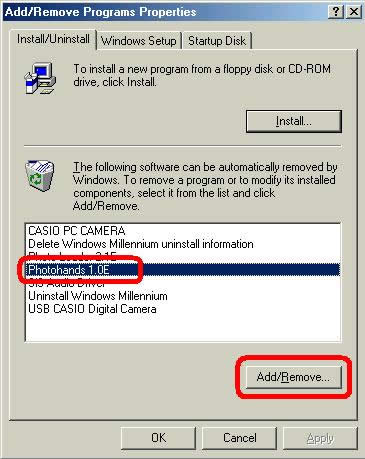
1-3) |
Select the "Install/Uninstall" tab. In the list of applications, select "Photohands 1.0E" (Figure 3). |
|
|
|
|
|
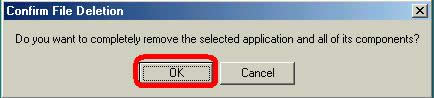
1-4) |
In response to the "Confirm File Deletion" dialog box that appears (Figure 4), select "OK". This will start the uninstall operation. |
|
|
|
|
|
1-5) |
In response to the "Maintenance Complete" dialog box that appears (Figure 5), select "Finish". |
|
|
|
|
| 2. |
Perform the following steps to install Photohands 1.0.3E, which you downloaded from the CASIO Website. |
|
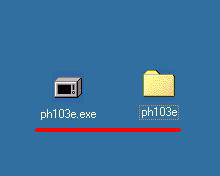
2-1) |
Double-click the compressed file that you downloaded (ph103e.exe), which will extract it. On the dialog box that appears, specify the folder to which you want to extract the files, and then click "OK". Extraction will create a folder named "ph103e" at the location you specify(Figure 6), and then will extract the files included under "File List" into the folder. |
|
|
|
|
|
2-2) |
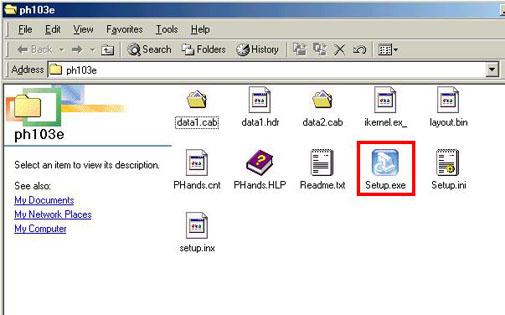
Open the extracted "ph103e" folder and then double click "Setup.exe" (Figure 7) to start the installer. |
|
|
|
|
|
2-3) |
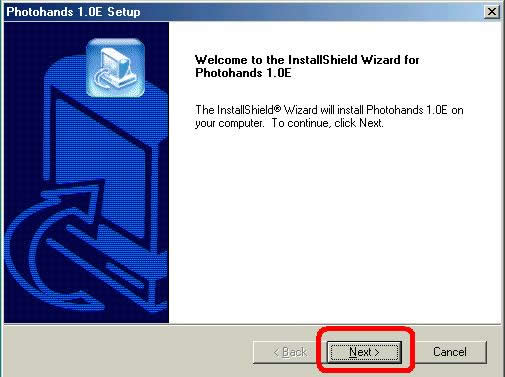
On the "Photohands 1.0E Setup Wizard" dialog box that appears (Figure 8), select "Next". |
|
|
|
|
|
2-4) |
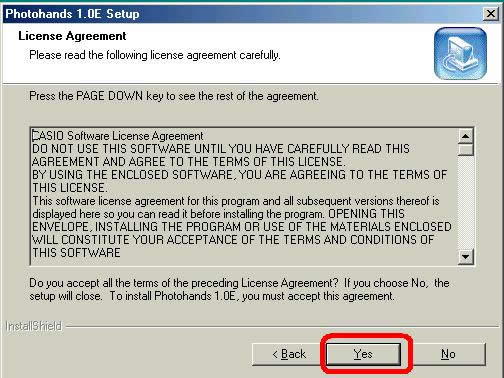
Carefully read the contents of the "License Agreement" dialog box that appears (Figure 9), and then select "Yes". |
|
|
|
|
|
2-5) |
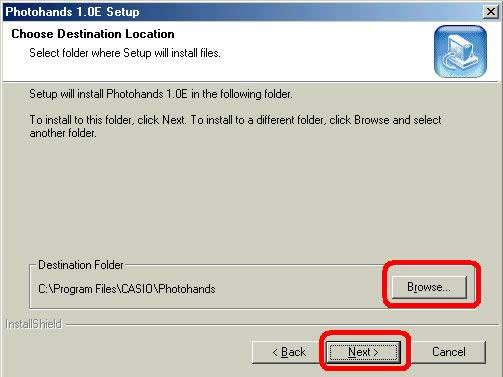
Check the "Destination Folder" item of the "Choose Destination Location" dialog box that appears (Figure 10), and then select "Next". If you want to change the destination folder, select "Browse" and to display the "Choose Folder" dialog box. Clicking "Next" in the previous step starts Photohands installation. |
|
|
|
|
|
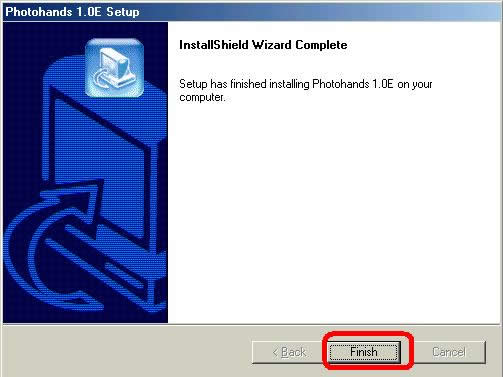
2-6) |
On the "InstallShield Wizard Complete" dialog box that appears after installation is complete (Figure 11), select "Finish". |
|
|
|
|
|
2-7) |
Restart your computer to complete installation. |
|
|
IMPORTANT! |
|
* |
The specifications and performance of Photohands are subject to change without notice. |
|
* |
This upgrade offer may be terminated without notice. |
|
|