Basic functions
- Q1
- Unable to connect to Dermatology camera wirelessly
- A1
-
Changing the Wi-Fi settings
There are two methods for wireless connection to the camera (DZ-D100): AP mode and STATION mode.
* Specifying the settings shown below does not affect the connection between the PC and DZ-D100. However, if data communication fails, check whether any restrictions apply to the wireless LAN or router connections on the PC.
Connecting in AP Mode
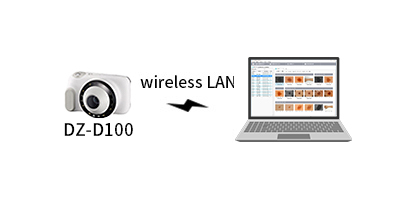
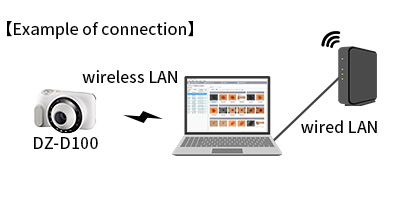
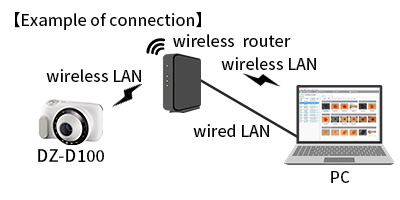
Example of connection Connecting in STATION Mode
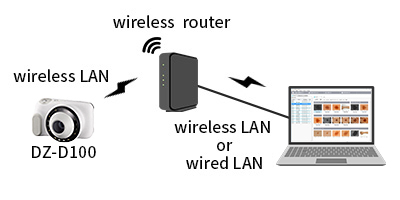
Example of connection
1. DZ-D100 Settings
Turn DZ-D100 on, go into Settings and select:
Wi-Fi: ON
Wi-Fi Mode: AP
in the Wi-Fi settings.
The default SSID and password settings are shown below, but these can be changed.
SSID: DZ-D100
Password: 00000000
* Refer to DZ-D100 User's Guide for details.
* In AP mode, you cannot connect multiple cameras at the same time.
2. Connecting the PC and DZ-D100 via Wi-Fi
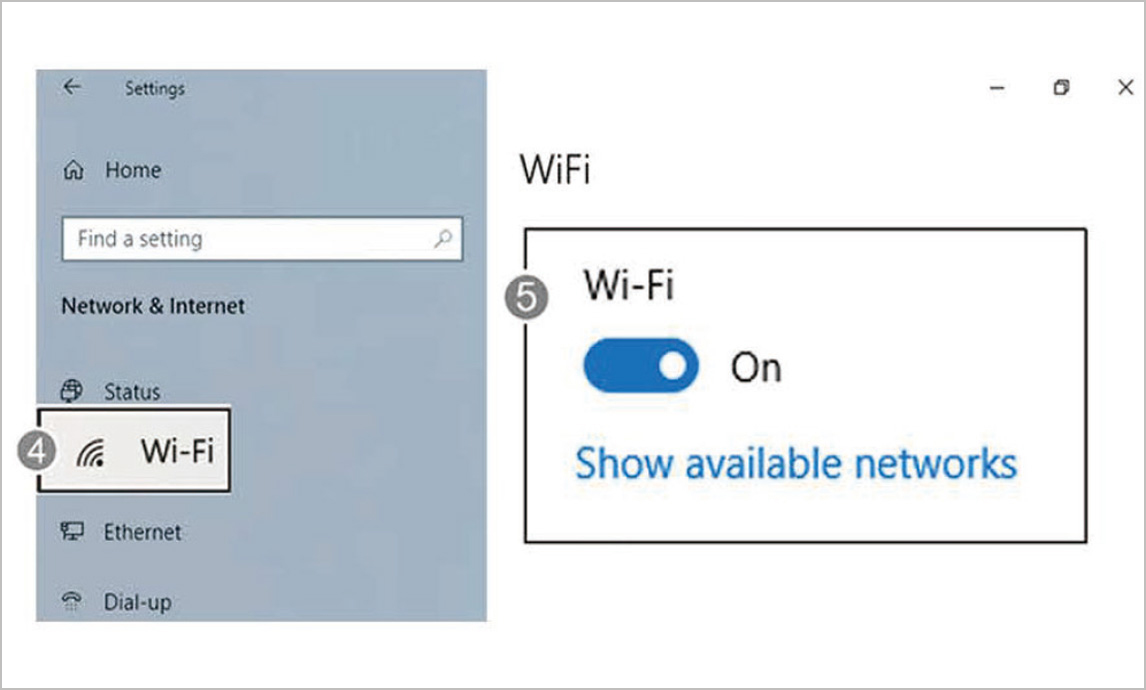
- From “Start (1)” on the Windows desktop screen, click “Settings (2)”.
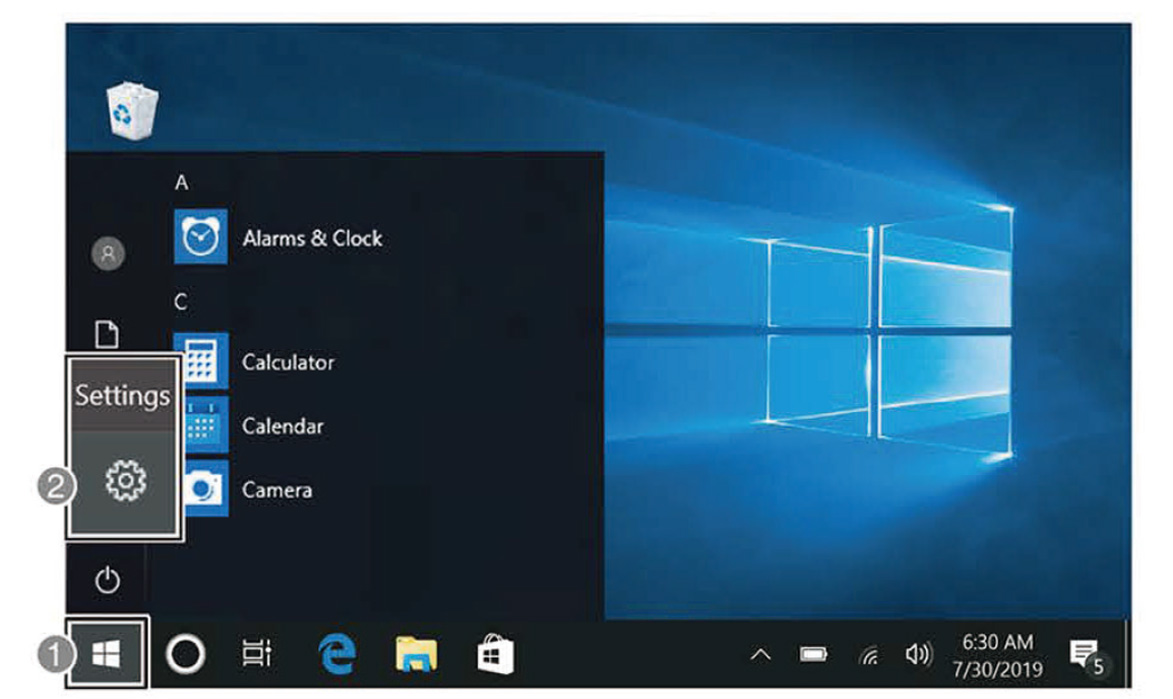
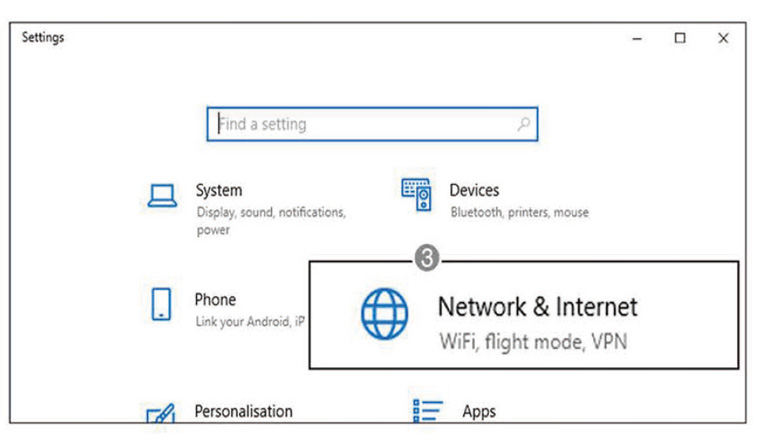
- Click “Network & Internet (3)”.
- Click “Wi-Fi (4)” and check that the Wi-Fi setting is enabled.
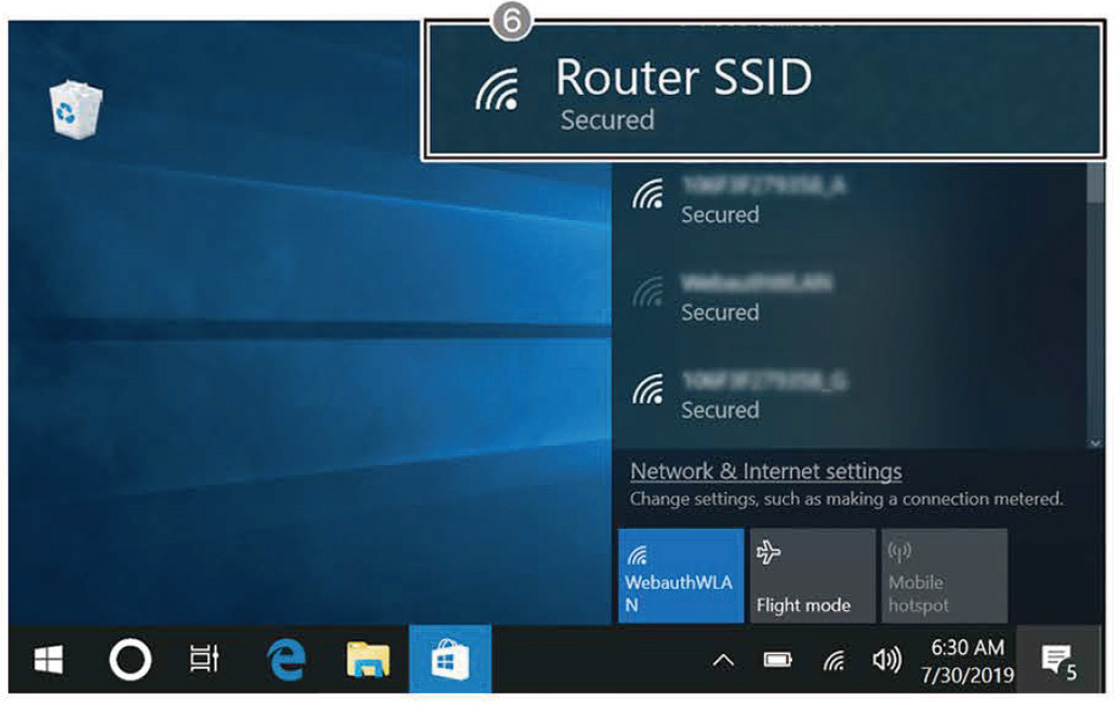
- Click “Show available networks (5)”.
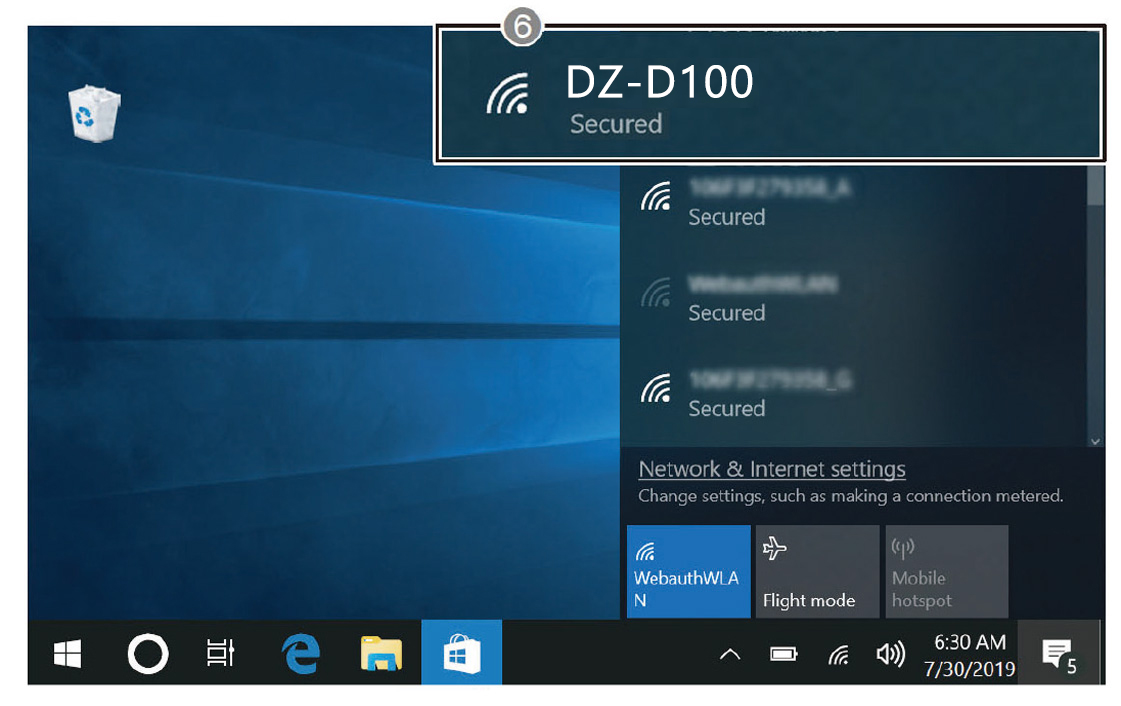
- Select DZ-D100's SSID (“SSID (6)”).
* Check that DZ-D100 is turned on.
3. D'z IMAGE Viewer D Settings
- Launch D'z IMAGE Viewer D and open
[Tools] > [Settings] > [Wi-Fi]
in the menu bar.
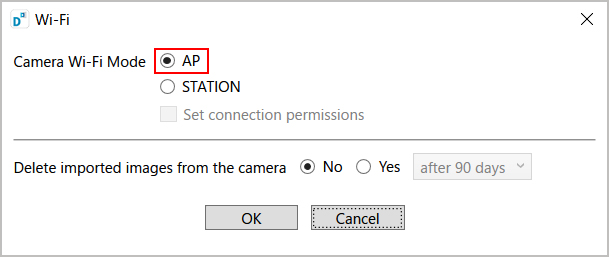
- Select “AP” as the camera's Wi-Fi mode and click “OK” to close the window.
To automatically delete images on the camera that have been imported into the Viewer, select the “Yes” option and then select the period after which images will be deleted in the pull-down list.
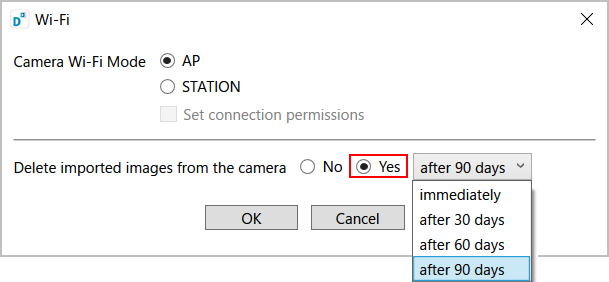
* Because leaving large numbers of photos on the camera may slow down image importing into the viewer, it is recommended that this function be used to automatically delete imported images that no longer need to be retained on the camera.
If you select “immediately”, files on the camera will be deleted as soon as they have been imported.
If you select “after 30 days”, “after 60 days”, or “after 90 days”, the data will be deleted from the camera when the camera and Viewer are connected after the specified number of days has elapsed since the data was imported.
If the “Trash” function is enabled in the camera settings, the files are moved to the Trash on the camera.
To connect DZ-D100 to a wireless LAN while connected to the Internet via a wired LAN, the following settings are required.
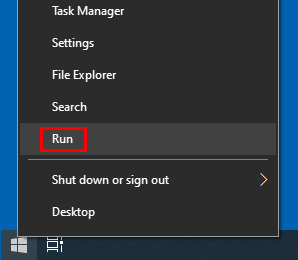
- Right-click on the Windows icon in the taskbar and select “Run”.
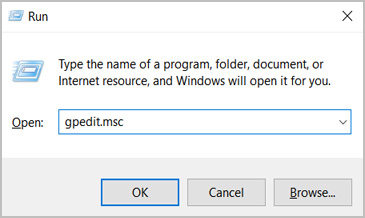
- Enter “gpedit.msc” and click [OK] to open the Local Group Policy Editor screen.
- In the left-hand pane of this screen, open
[Computer Configuration] > [Administrative Templates] > [Network] > [Windows Connection Manager].
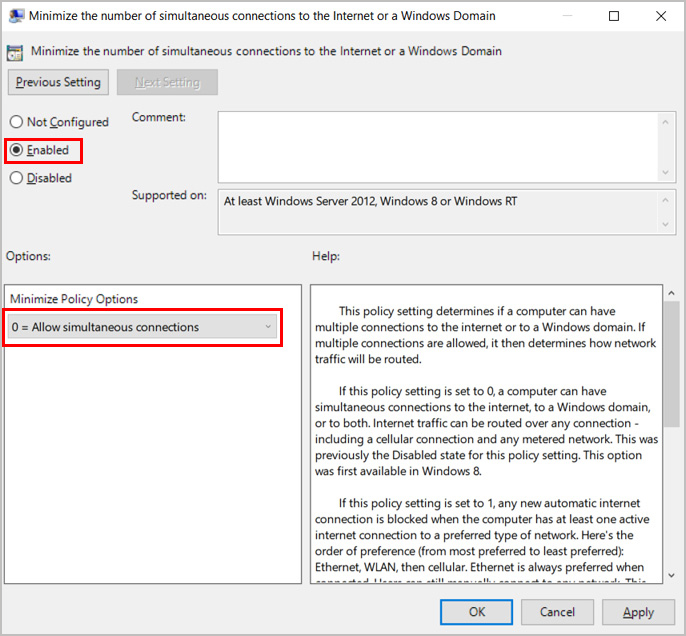
- In the right-hand pane, double-click [Minimize the number of simultaneous connections to the Internet or a Windows Domain].

- Click “Enabled” in the upper left of the window.
- In the options at lower left, select “0 = Allow simultaneous connections”.
- Click “OK” to finish.
This completes the AP mode settings.
1. DZ-D100 Settings
Turn DZ-D100 on, go into Settings and select:
Wi-Fi: ON
Wi-Fi Mode: STATION
in the Wi-Fi settings.
Touch SSID and select the SSID for the wireless router to be connected and then connect DZ-D100 to the wireless router.
Where a password has been set for the wireless router, you will need to enter the password.
* Refer to DZ-D100 User's Guide for details.
* If multiple DZ-D100 are connected at the same time, as shown in the illustration below, specify the same settings for the other DZ-D100 also.

2. Connecting the PC and DZ-D100 via Wi-Fi
- From “Start (1)” on the Windows desktop screen, click “Settings (2)”.
- Click “Network & Internet (3)”.
- Click “Wi-Fi (4)” and check that the Wi-Fi setting is enabled.
- Click “Show available networks (5)”.
- Select the SSID for the router to which DZ-D100 (SSID (6)) is connected.
* Check that DZ-D100 is turned on.
3. D'z IMAGE Viewer D Settings
- Launch D'z IMAGE Viewer D and open
[Tools] > [Settings] > [Wi-Fi]
in the menu bar.
- Select (click) “STATION” as the camera's Wi-Fi mode.
- If multiple cameras are connected in STATION mode, select the checkbox to the left of “Set connection permissions”.
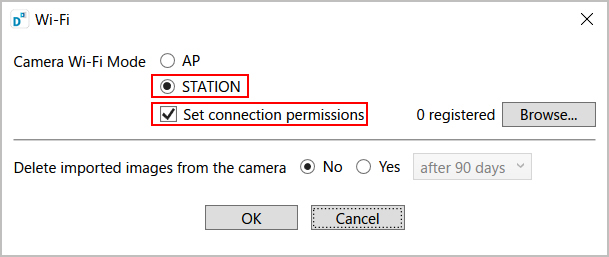
- Clicking “Browse...” opens the camera selection screen and enables you to select multiple cameras to be connected for automatic transfer.
* Check that all the cameras are turned on and connected to the wireless router.
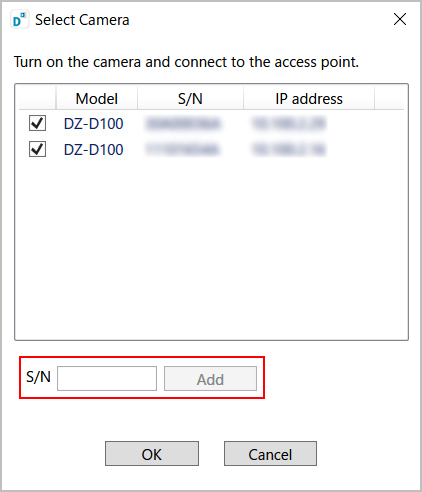
If a camera is not shown in the list, directly enter the camera's serial number in the “S/N” field to add it to the list.
*You can find the camera's serial number on the label stuck to the bottom of the camera.
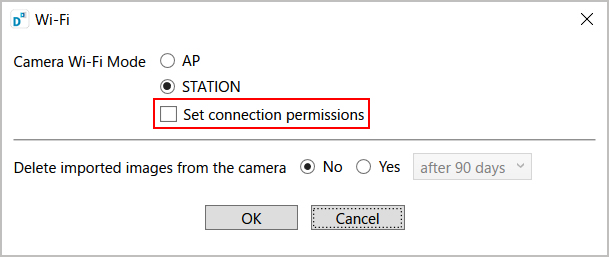
- To use automatic transfer with all the cameras connected in STATION mode, deselect the checkbox to the left of “Set connection permissions”.
To automatically delete images on the camera that have been imported into the Viewer, select the “Yes” option and then select the period after which images will be deleted in the pull-down list.
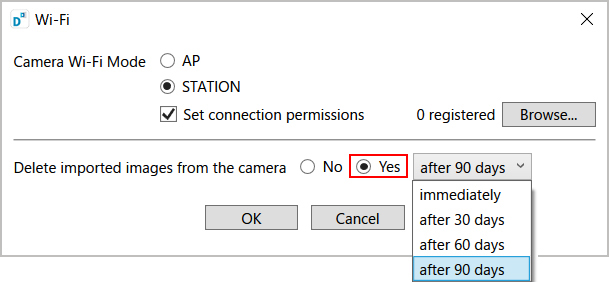
* Because leaving large numbers of photos on the camera may slow down image importing into the viewer, it is recommended that this function be used to automatically delete imported images that no longer need to be retained on the camera.
If you select “immediately”, files on the camera will be deleted as soon as they have been imported.
If you select “after 30 days”, “after 60 days”, or “after 90 days”, the data will be deleted from the camera when the camera and Viewer are connected after the specified number of days has elapsed since the data was imported.
If the “Trash” function is enabled in the camera settings, the files are moved to the Trash on the camera.
To use a wired LAN and wireless LAN at the same time, the following settings are required.
- Right-click on the Windows icon in the taskbar and select “Run”.
- Enter “gpedit.msc” and click [OK] to open the Local Group Policy Editor screen.
- In the left-hand pane of this screen, open
[Computer Configuration] > [Administrative Templates] > [Network] > [Windows Connection Manager].
- In the right-hand pane, double-click [Minimize the number of simultaneous connections to the Internet or a Windows Domain].
- Click “Enabled” in the upper left of the window.
- In the options at lower left, select “0 = Allow simultaneous connections”.
- Click “OK” to finish.
This completes the STATION mode settings.