 |
Installing Updated Controller Loader Firmware
|
| This installation is required when updating a controller from version 1.10 or lower. |
| Installation is not necessary when the controller firmware version is V2.00 or higher. In such a case, advance to step 11 of this procedure. |
| • |
Installation of this software requires a USB cable to connect the camera controller to a computer. |
|
| 1. |
Extract the file you downloaded. |
|
• Double-click the file you downloaded (EX-FR100_CTR_LOADER_199.zip) to unzip it. This will create a file named FR100CT.BIN.
|
|
| 2. |
Use the micro USB cable provided with the camera to establish a USB connection between the camera controller and your computer. (Figure 1) |
|
|
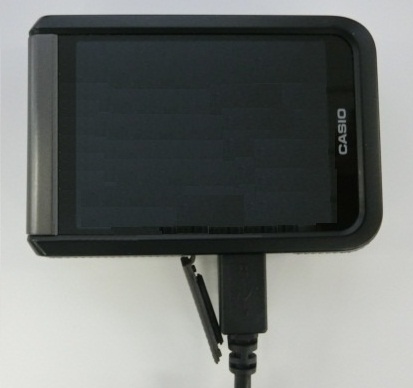 (Figure 1)
 |
|
| 3. |
While holding down the controller's movie button (I), press its power button (II) and wait for a moment. (Figure 2)
The controller's operation lamp (III) will flash, indicating that the controller is being recognized as a removable disk. |
|
|
 (Figure 2)
 |
|
| 4. |
Copy the extracted file (FR100CT.BIN) to the root directory (not in a folder) on the controller/removable disk. |
|
|
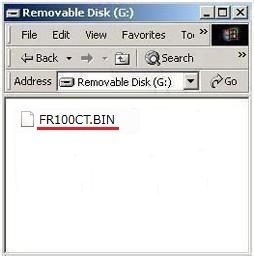
Windows *
|
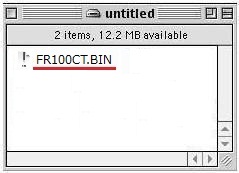 Macintosh *
|
|
|
* Depending on its operating system and setup, the appearance of the display may be different on your computer. |
|
* If a file already exists in the root directory of your controller, delete it before copying FR100CT.BIN to it. |
|
| 5. |
After you finish copying the files, disconnect the USB cable from the controller.
This causes controller power to turn off automatically. |
|
| 6. |
Use the micro USB cable provided with the camera to establish a USB connection between the camera controller and your computer. (Figure 3) |
|
|
 (Figure 3)
 |
|
| 7. |
While holding down the controller's movie button (I) and shutter button (II), press its power button (III) and wait for a moment. (Figure 4)
|
| This will display a program update selection screen (Figure 5) on the controller's monitor screen. |
|
|
|

(Figure 4) |
 (Figure 5)
 |
|
| 8. |
| On the controller, press the shutter button to start program updating. |
| • |
Program updating takes about two minutes to complete.
|
| • |
The controller LED will alternately flash red and orange while program updating is in progress. (Figure 6)
|
| • |
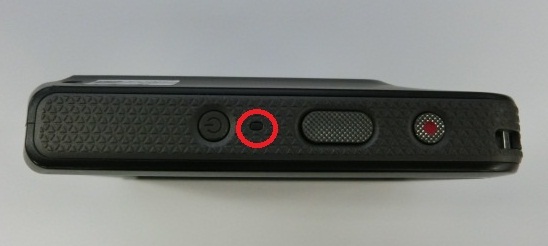
Disconnection of the micro USB cable while program updating is in progress will stop program updating.
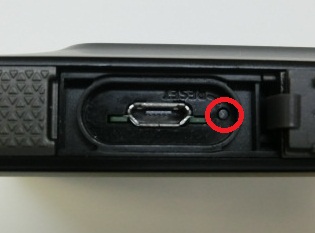
If this happens, open the controller's USB cover, press the reset button (Figure 7), and then start again from step 6 of this procedure.
|
|
|
|
(Figure 6) |
 (Figure 7)
 |
|
| 9. |
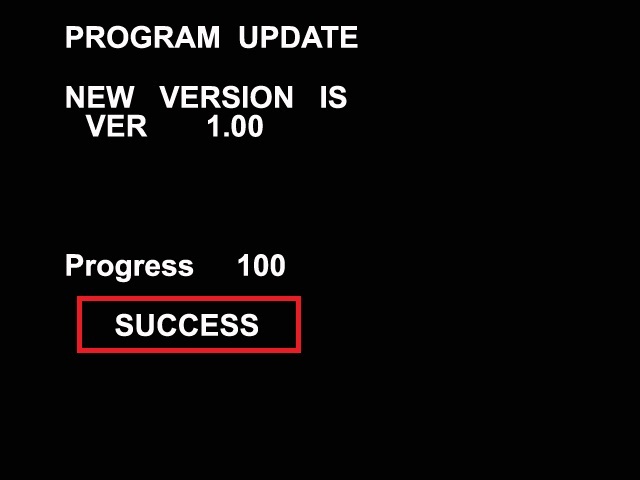
Updating is complete when "SUCCESS" appears on the controller's monitor screen (Figure 8). |
|
After a few seconds, the monitor screen will go blank and controller power will turn off. |
|
|
 (Figure 8)
 |
|
| 10. |
After the controller turns off, disconnect it from the computer. |
|
|
|
| To install the update software on your controller |
| This installation must be performed in the case of all EX-FR series controller firmware versions. |
| • |
Installation of this software requires a USB cable to connect the camera controller to a computer. |
|
| 11. |
Extract the file you downloaded. |
|
• Double-click the file you downloaded (GZE-1_CTR_G100.zip) to unzip it. This will create a file named FR-CTA.BIN.
|
|
| 12. |
Use the micro USB cable provided with the camera to establish a USB connection between the camera controller and your computer. (Figure 9) |
|
|
(Figure 9) |
|
| 13. |
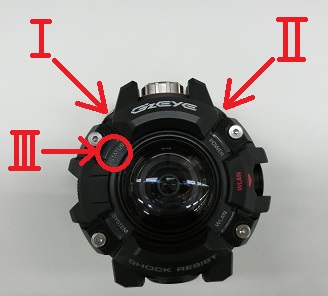
While holding down the controller's movie button (I), press its power button (II) and wait for a moment. (Figure 10)
The controller's operation lamp (III) will flash, indicating that the controller is being recognized as a removable disk. |
|
|
(Figure 10) |
|
| 14. |
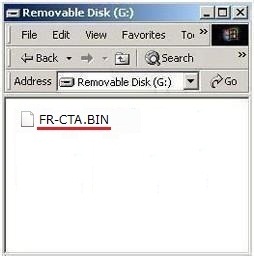
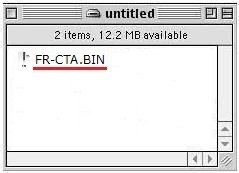
Copy the extracted file (FR-CTA.BIN) to the root directory (not in a folder) on the controller/removable disk. |
|
|
Windows *
|
 Macintosh *
|
|
|
* Depending on its operating system and setup, the appearance of the display may be different on your computer. |
|
* If a file already exists in the root directory of your controller, delete it before copying FR-CTA.BIN to it. |
|
| 15. |
After you finish copying the files, disconnect the USB cable from the controller.
This causes controller power to turn off automatically. |
|
| 16. |
Use the micro USB cable provided with the camera to establish a USB connection between the camera controller and your computer. (Figure 11) |
|
|
(Figure 11) |
|
| 17. |
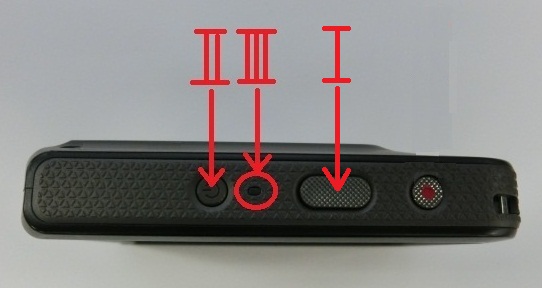
While holding down the controller's movie button (I) and shutter button (II), press its power button (III) and wait for a moment. (Figure 12)
|
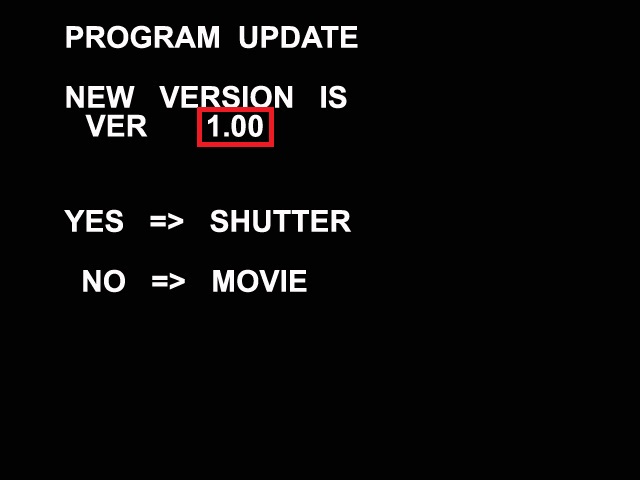
| This will display a program update selection screen (Figure 13) on the controller's monitor screen. |
|
|
|
(Figure 12) |
 (Figure 13)
 |
|
| 18. |
| On the controller, press the shutter button to start program updating. |
| • |
Program updating takes about two minutes to complete.
|
| • |
The controller LED will alternately flash red and orange while program updating is in progress. (Figure 14)
|
| • |
Disconnection of the micro USB cable while program updating is in progress will stop program updating.
If this happens, open the controller's USB cover, press the reset button (Figure 15), and then start again from step 16 of this procedure.
|
|
|
|
(Figure 14) |
(Figure 15) |
|
| 19. |
Updating is complete when "SUCCESS" appears on the controller's monitor screen (Figure 16). |
|
After a few seconds, the monitor screen will go blank and controller power will turn off. |
|
|
 (Figure 16)
 |
|
| 20. |
After the controller turns off, disconnect it from the computer. |
|
|
|
| 21. |
Check if the firmware version has been updated. |
| |
1) |
Remove the memory card from the camera. |
| |
2) |
On the camera, hold down shutter button (I) as you press itspower button (II) for at least six seconds. (Figure 17)
This will cause the [STATUS] lamp (III) to flash amber. |
|
 (Figure 17)
 |
|
3) |
On the controller, hold down shutter button (I) as you press its power button (II) for at least six seconds. (Figure 18)
This will cause the operation lamp (III) to flash amber to indicate that camera registration has started.
|
|
 (Figure 18)
 |
|
4) |
The language setting screen appears after the camera is registered on the controller. (Figure 19)
Flick the controller screen upwards and downwards or touch the up and down arrow icon, until you find the language you want, and then touch to select it.
|
|
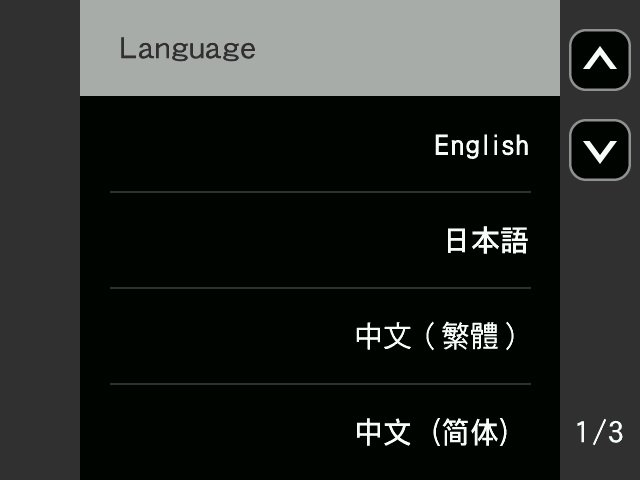 (Figure 19)
 |
|
5) |
Touch the date display format you want. (Figure 20)
|
|
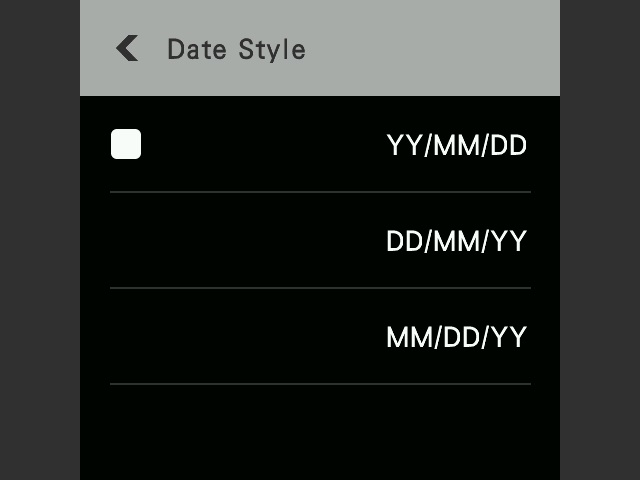 (Figure 20)
 |
|
6) |
Set the date and the time. (Figure 21)
Touch the value you want to change (year, month, day, hour, minute) and then touch the up and down arrow icon, to change it.
|
|
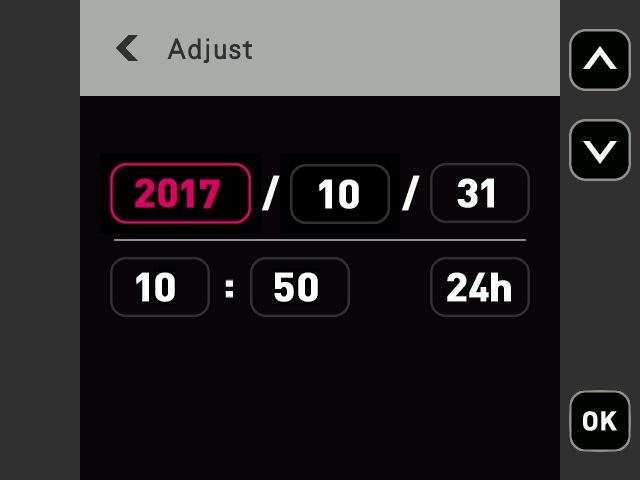 (Figure 21)
 |
|
|
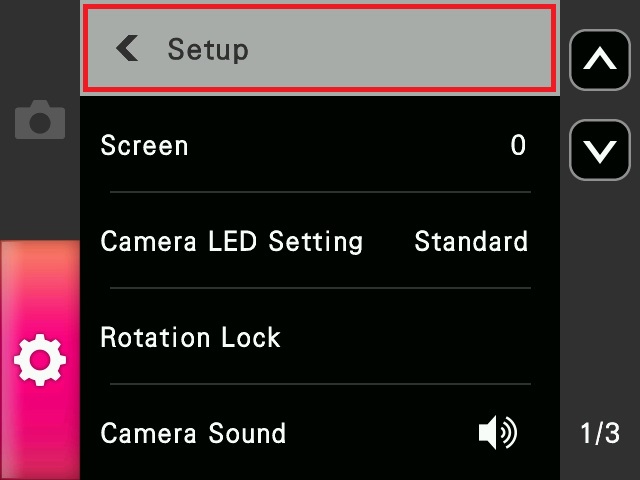
On the controller's monitor screen (Figure 22), touch Show Icons. (Figure 23) |
|
|
Next, touch "MENU". (Figure 23) |
|
|
 (Figure 22)
 |
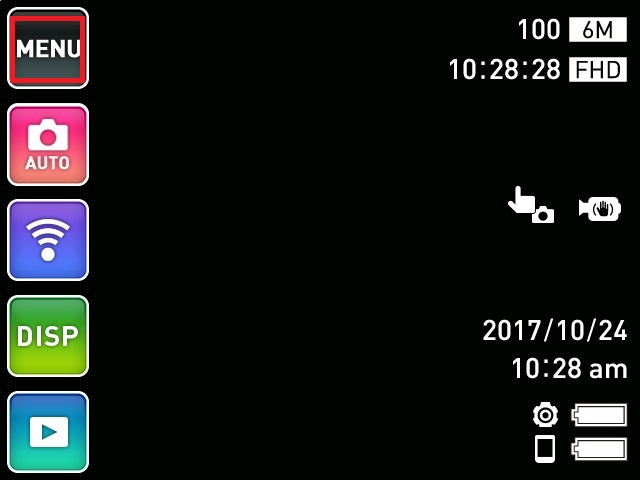 (Figure 23)
 |
|
|
|
| |
8) |
Touch the set up icon in the lower left corner (Figure 24) to display "SetUp". (Figure 25) |
|
|
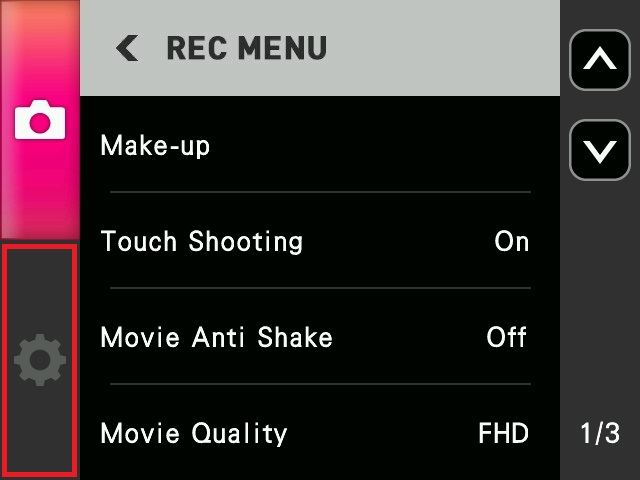 (Figure 24)
 |
 (Figure 25)
 |
|
|
|
| |
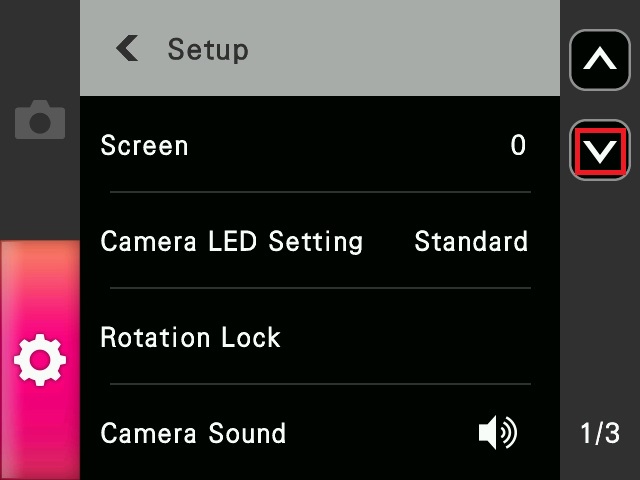
9) |
Touch the down arrow icon (Figure 26) to display "Reset". (Figure 27) |
|
|
Next, touch "Reset". (Figure 27) |
|
|
 (Figure 26)
 |
 (Figure 27)
 |
|
|
|
| |
10) |
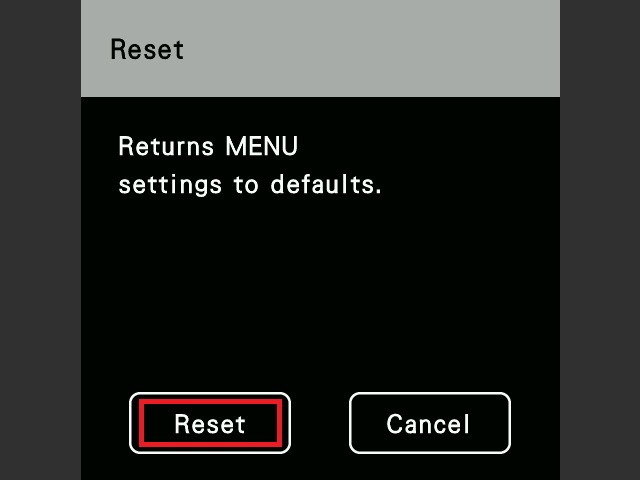
Touch "Reset". (Figure 28) |
|
|
 (Figure 28)
 |
|
|
|
|
11) |
Turn off the camera and controller. |
|
12) |
Turn on the camera and controller. |
| |
13) |
Perform steps 7) through 9) of the above procedure to display "Version". (Figure 29)
|
|
|
Next, touch "Version". (Figure 29) |
|
|
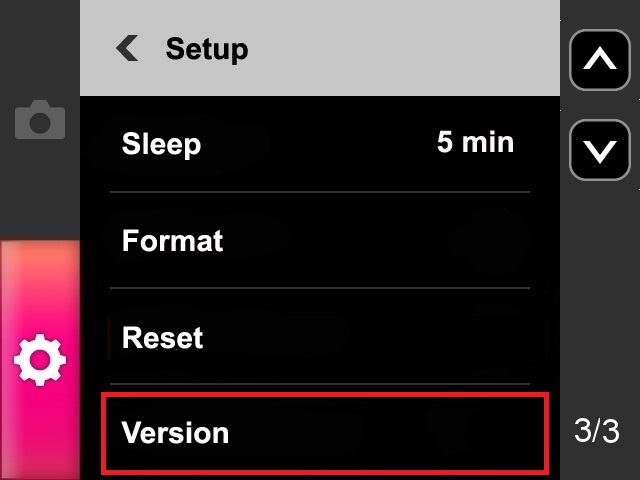 (Figure 29)
 |
|
|
|
| |
14) |
If " Ver G controller 1.00" is displayed for the controller firmware version, it means that firmware update installation was successful. (Figure 30) |
|
|
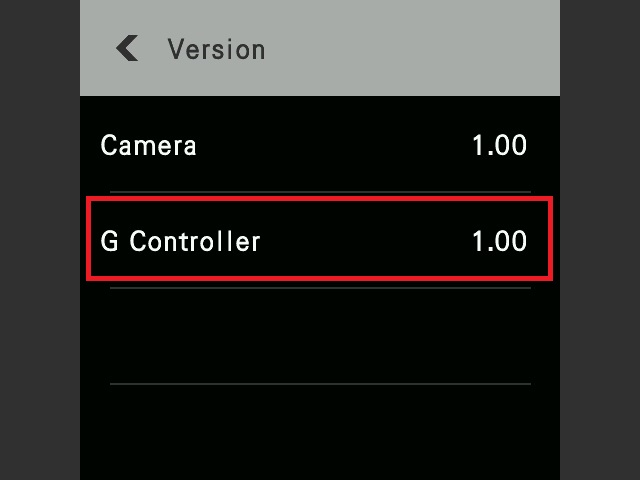 (Figure 30)
 |
|
|
|
|
|
Important! |
|
|
| * |
Before installing the firmware update, be sure you back up the data in camera memory to a memory card or your computer's hard disk. |
| * |
Installing the update software can cause changes in the camera's image memory size, camera startup time, recording time, recording interval, user settings, etc. |
| * |
If firmware update installation is interrupted due to low battery power, your camera will no longer be able to operate. Be sure to fully charge the camera's battery before starting the firmware update installation procedure. |
| * |
If you are unable to restart your controller after installing the update software, contact your local Authorized CASIO Service. Tell them you need assistance because your controller will not restart after installing EX-FR series controller firmware. |
|
|